

Learn how to set up custom attributes to store customer information not covered by existing fields in contact details.
Custom Attributes
What are they?
There are a number of standard attributes which exist for contacts. These include data like the contact’s email, phone, address details, CRM ID, favorite agent, and more. However, we know that not all contact data will fit into one of these categories. Contacts being imported from an integration, for example, may have additional attribute types that differ from the ones offered. That’s why CloudTalk lets you add your own custom fields, known as custom attributes.Create Custom Attributes
- From the dashboard, navigate to Settings > Preferences and scroll down to the Contacts section.
-
Select
+ Add Custom Attribute. You can make as many custom attributes as you want, or remove existing ones. Attributes are listed in the order you create them and can’t be reordered. Adding an attribute doesn’t fill in a value for existing contacts.To fill an attribute from a contact import, name it exactly like the column in your CSV file, with the same spelling and case. See How to Import Contacts to CloudTalk from a File. Custom attributes are listed in the order you create them, so add them in the order you want them to appear. You can’t reorder them later.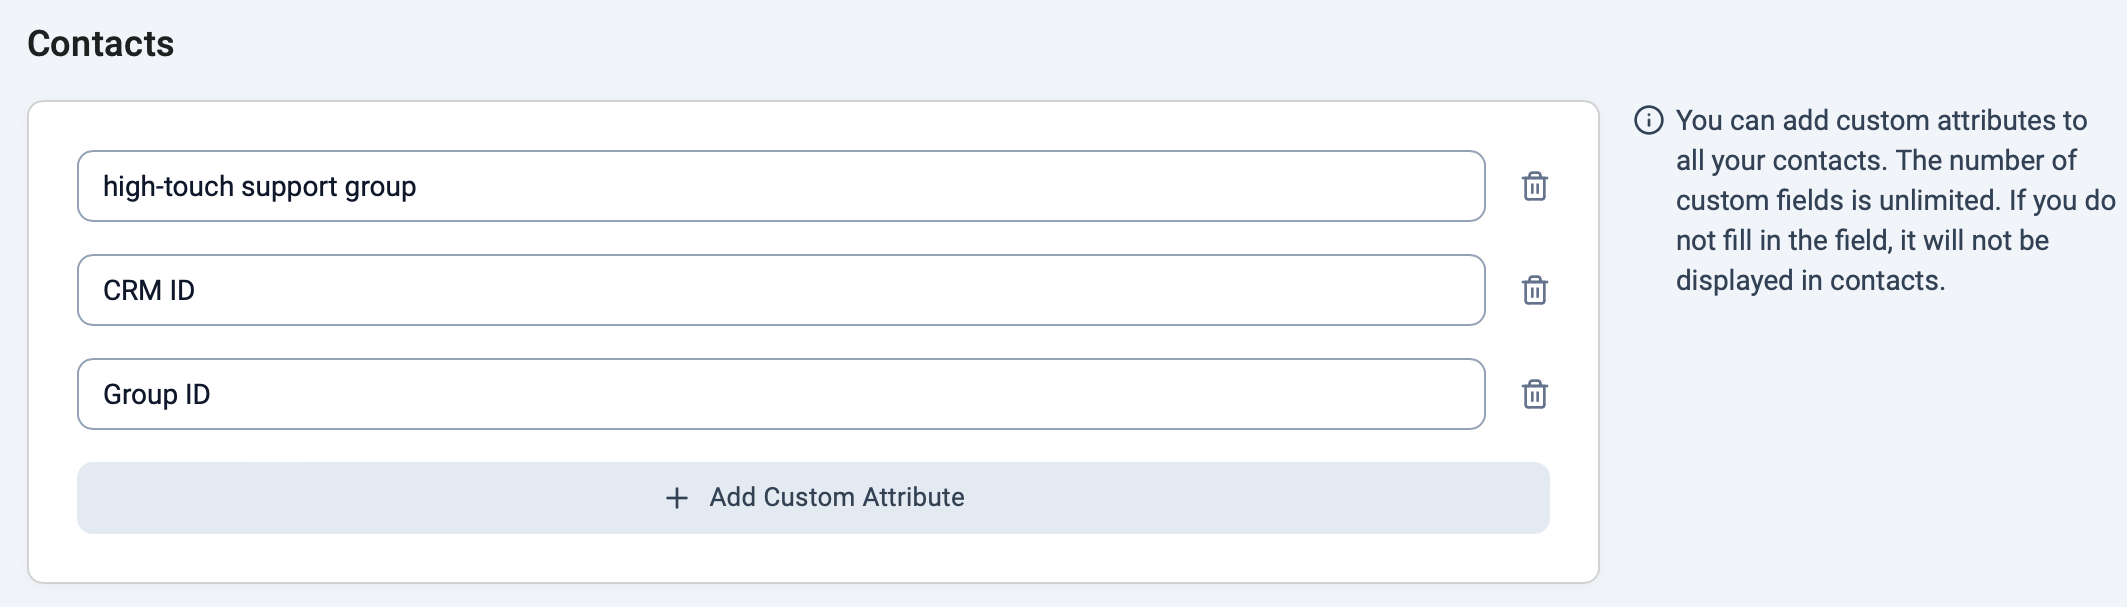
- Select Save Changes at the bottom of the page to finalize changes.
- To delete custom attributes, click the bin icon next to the field, confirm by selecting Delete, and the attribute will be removed.
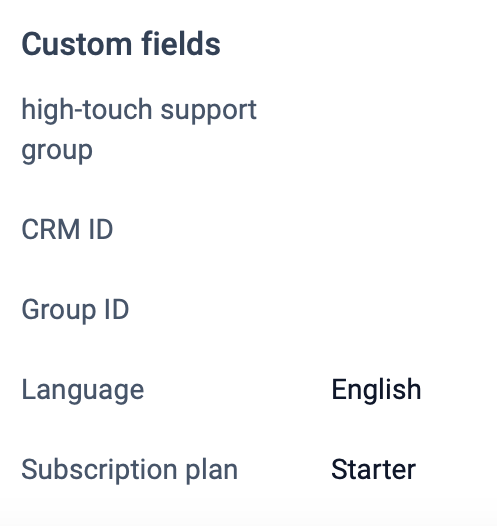
- New attribute fields are shown on the contact’s profile and in the Custom fields section of the screens for adding or editing contacts. During a call, click the caller’s name to open their profile and see their custom attributes.
Need help or have a question? Just reach out through our Support portal — we’re here for you.