

You can start a CloudTalk VoiceAgent call straight from an Attio workflow, so a VoiceAgent calls a person the moment something changes in your CRM. If the CloudTalk integration for Attio is connected, the call and its outcome are logged on the same person in Attio.
Before you start
You will need:- VoiceAgents enabled on your CloudTalk account, and an outbound VoiceAgent (note its VoiceAgent ID). See VoiceAgents for Outbound Calls.
- CloudTalk API credentials (API Key ID and API Secret)
- An Attio workspace where you can create workflows
- People in Attio with a phone number in international format, for example
+14155550123
Create the Authorization header
The CloudTalk API uses Basic authentication. Attio sends your credentials in anAuthorization header, with a value in this format:
-
Join your API Key ID and API Secret with a colon:
API_KEY_ID:API_SECRET. -
Encode that text in Base64. For example, on a Mac or Linux computer, run this in the Terminal:
-
Put
Basic(with a space) in front of the result, for exampleBasic QVBJX0tFWV9JRDpBUElfU0VDUkVU.
What you can trigger on
Any Attio workflow trigger works. These suit a VoiceAgent well:
The steps below use Record added to list. You can swap the trigger in Step 1 for any of the others, and the rest of the steps stay the same.
Option A: Build the workflow manually
Step 1: Create the workflow and choose a trigger
- In Attio, go to Workflows > New workflow.
- Choose the People object and give the workflow a name.
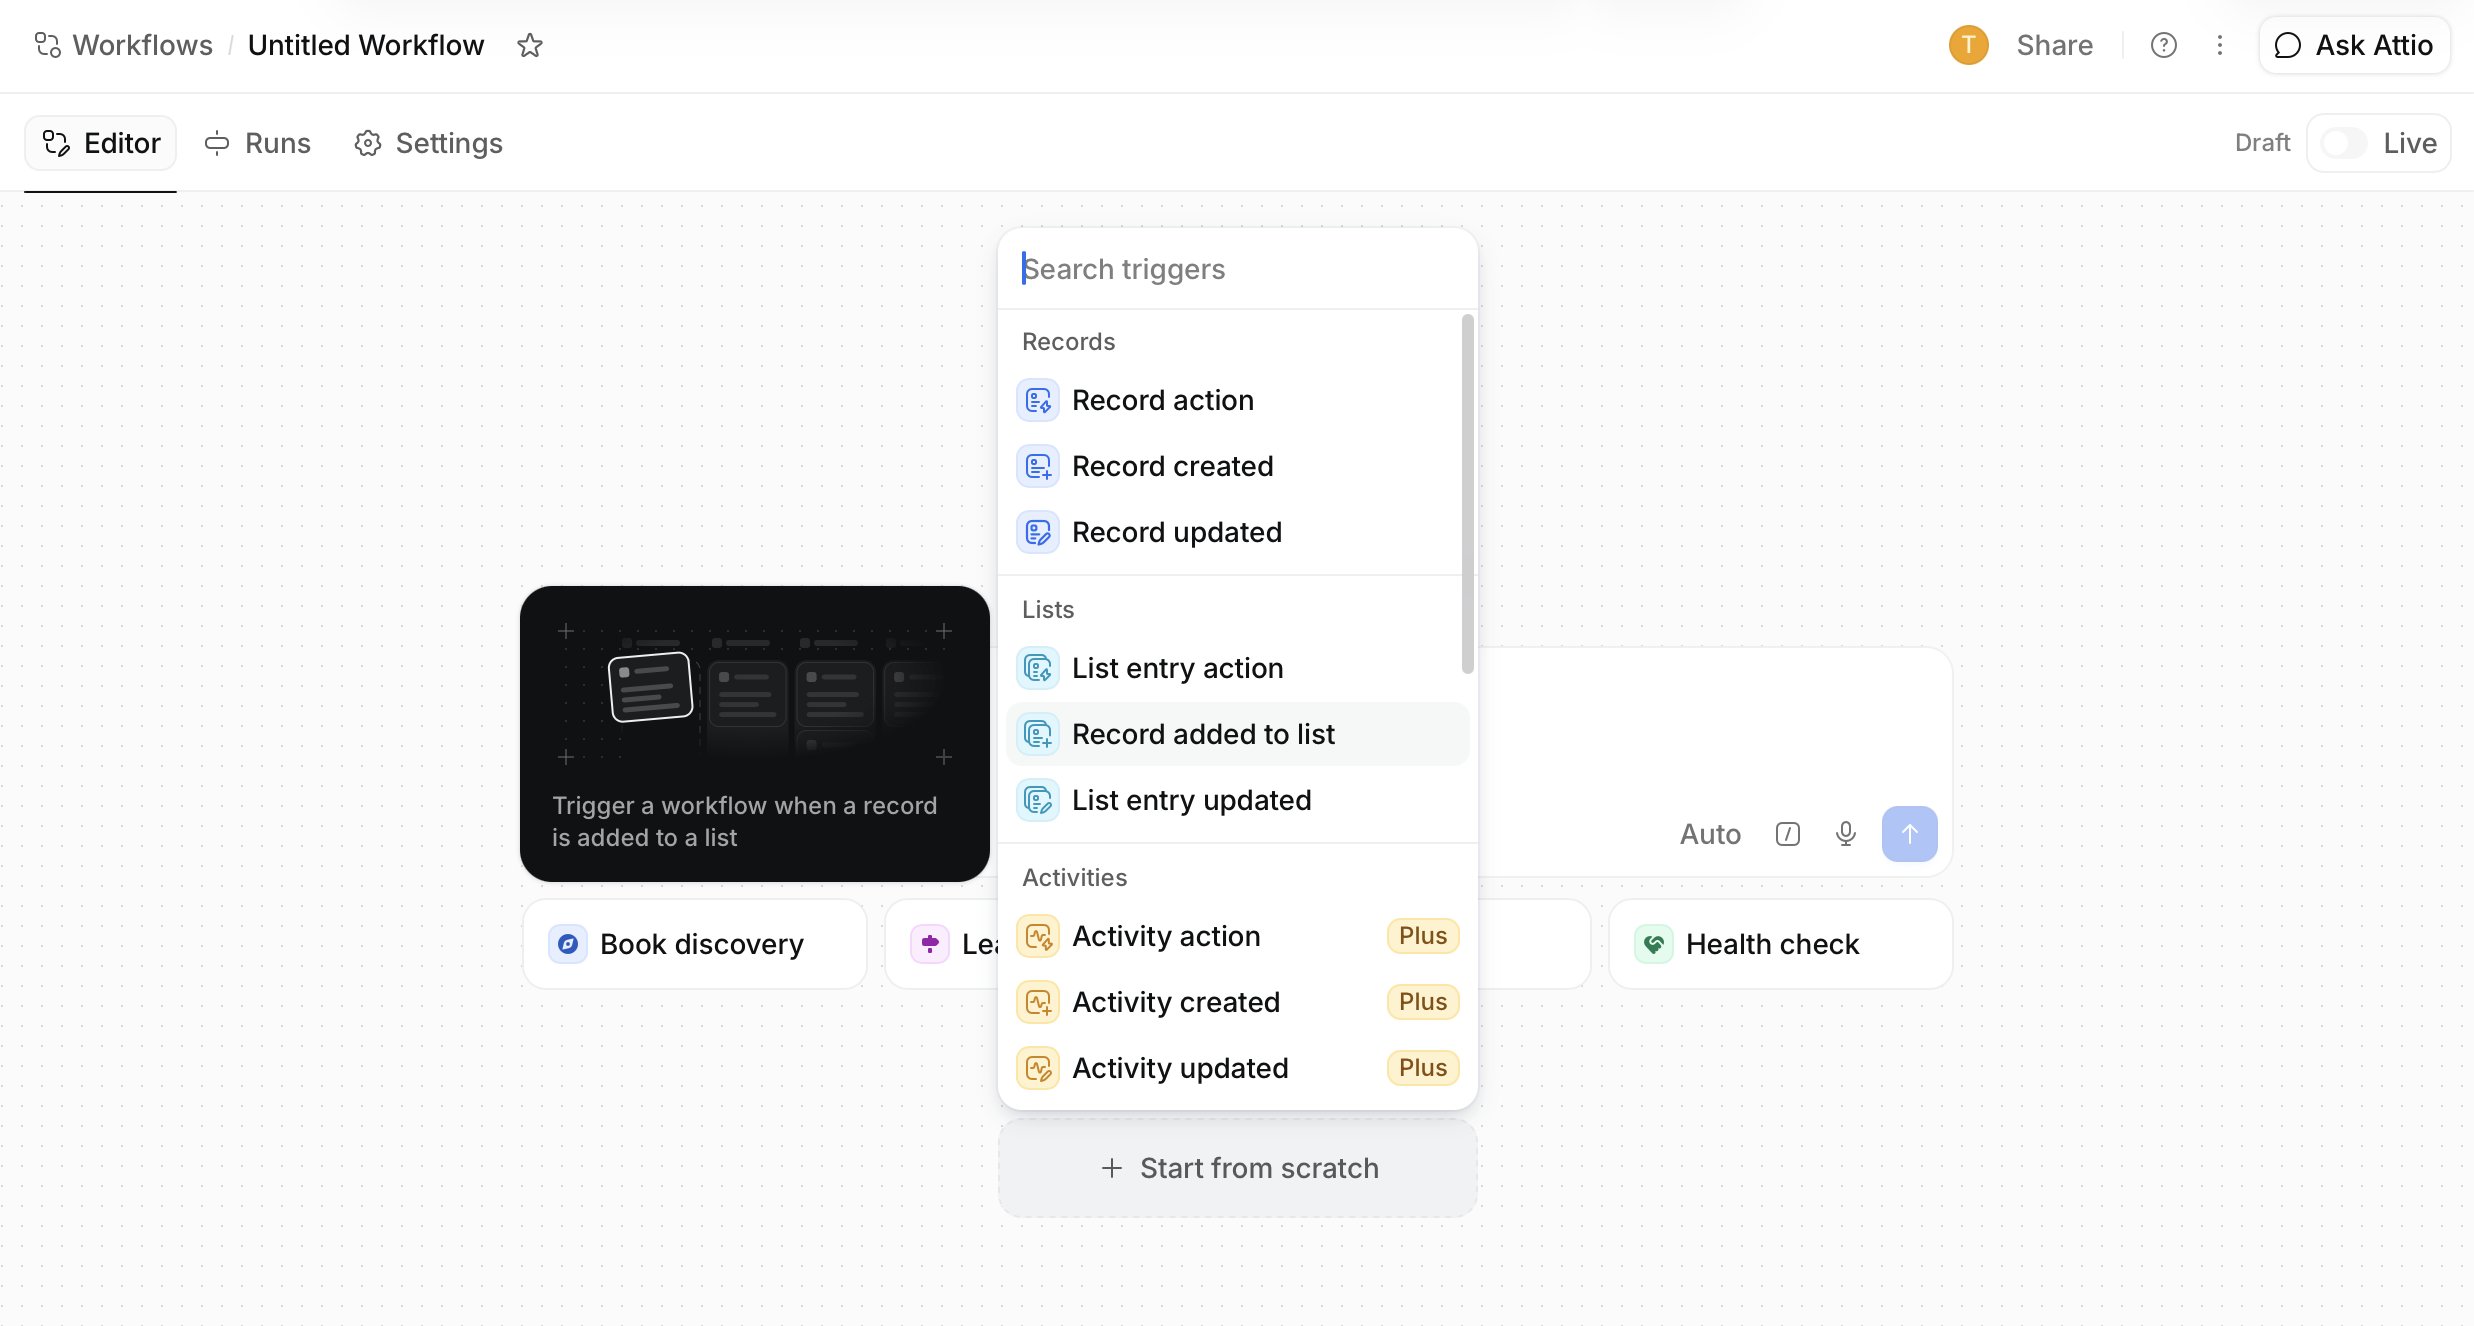
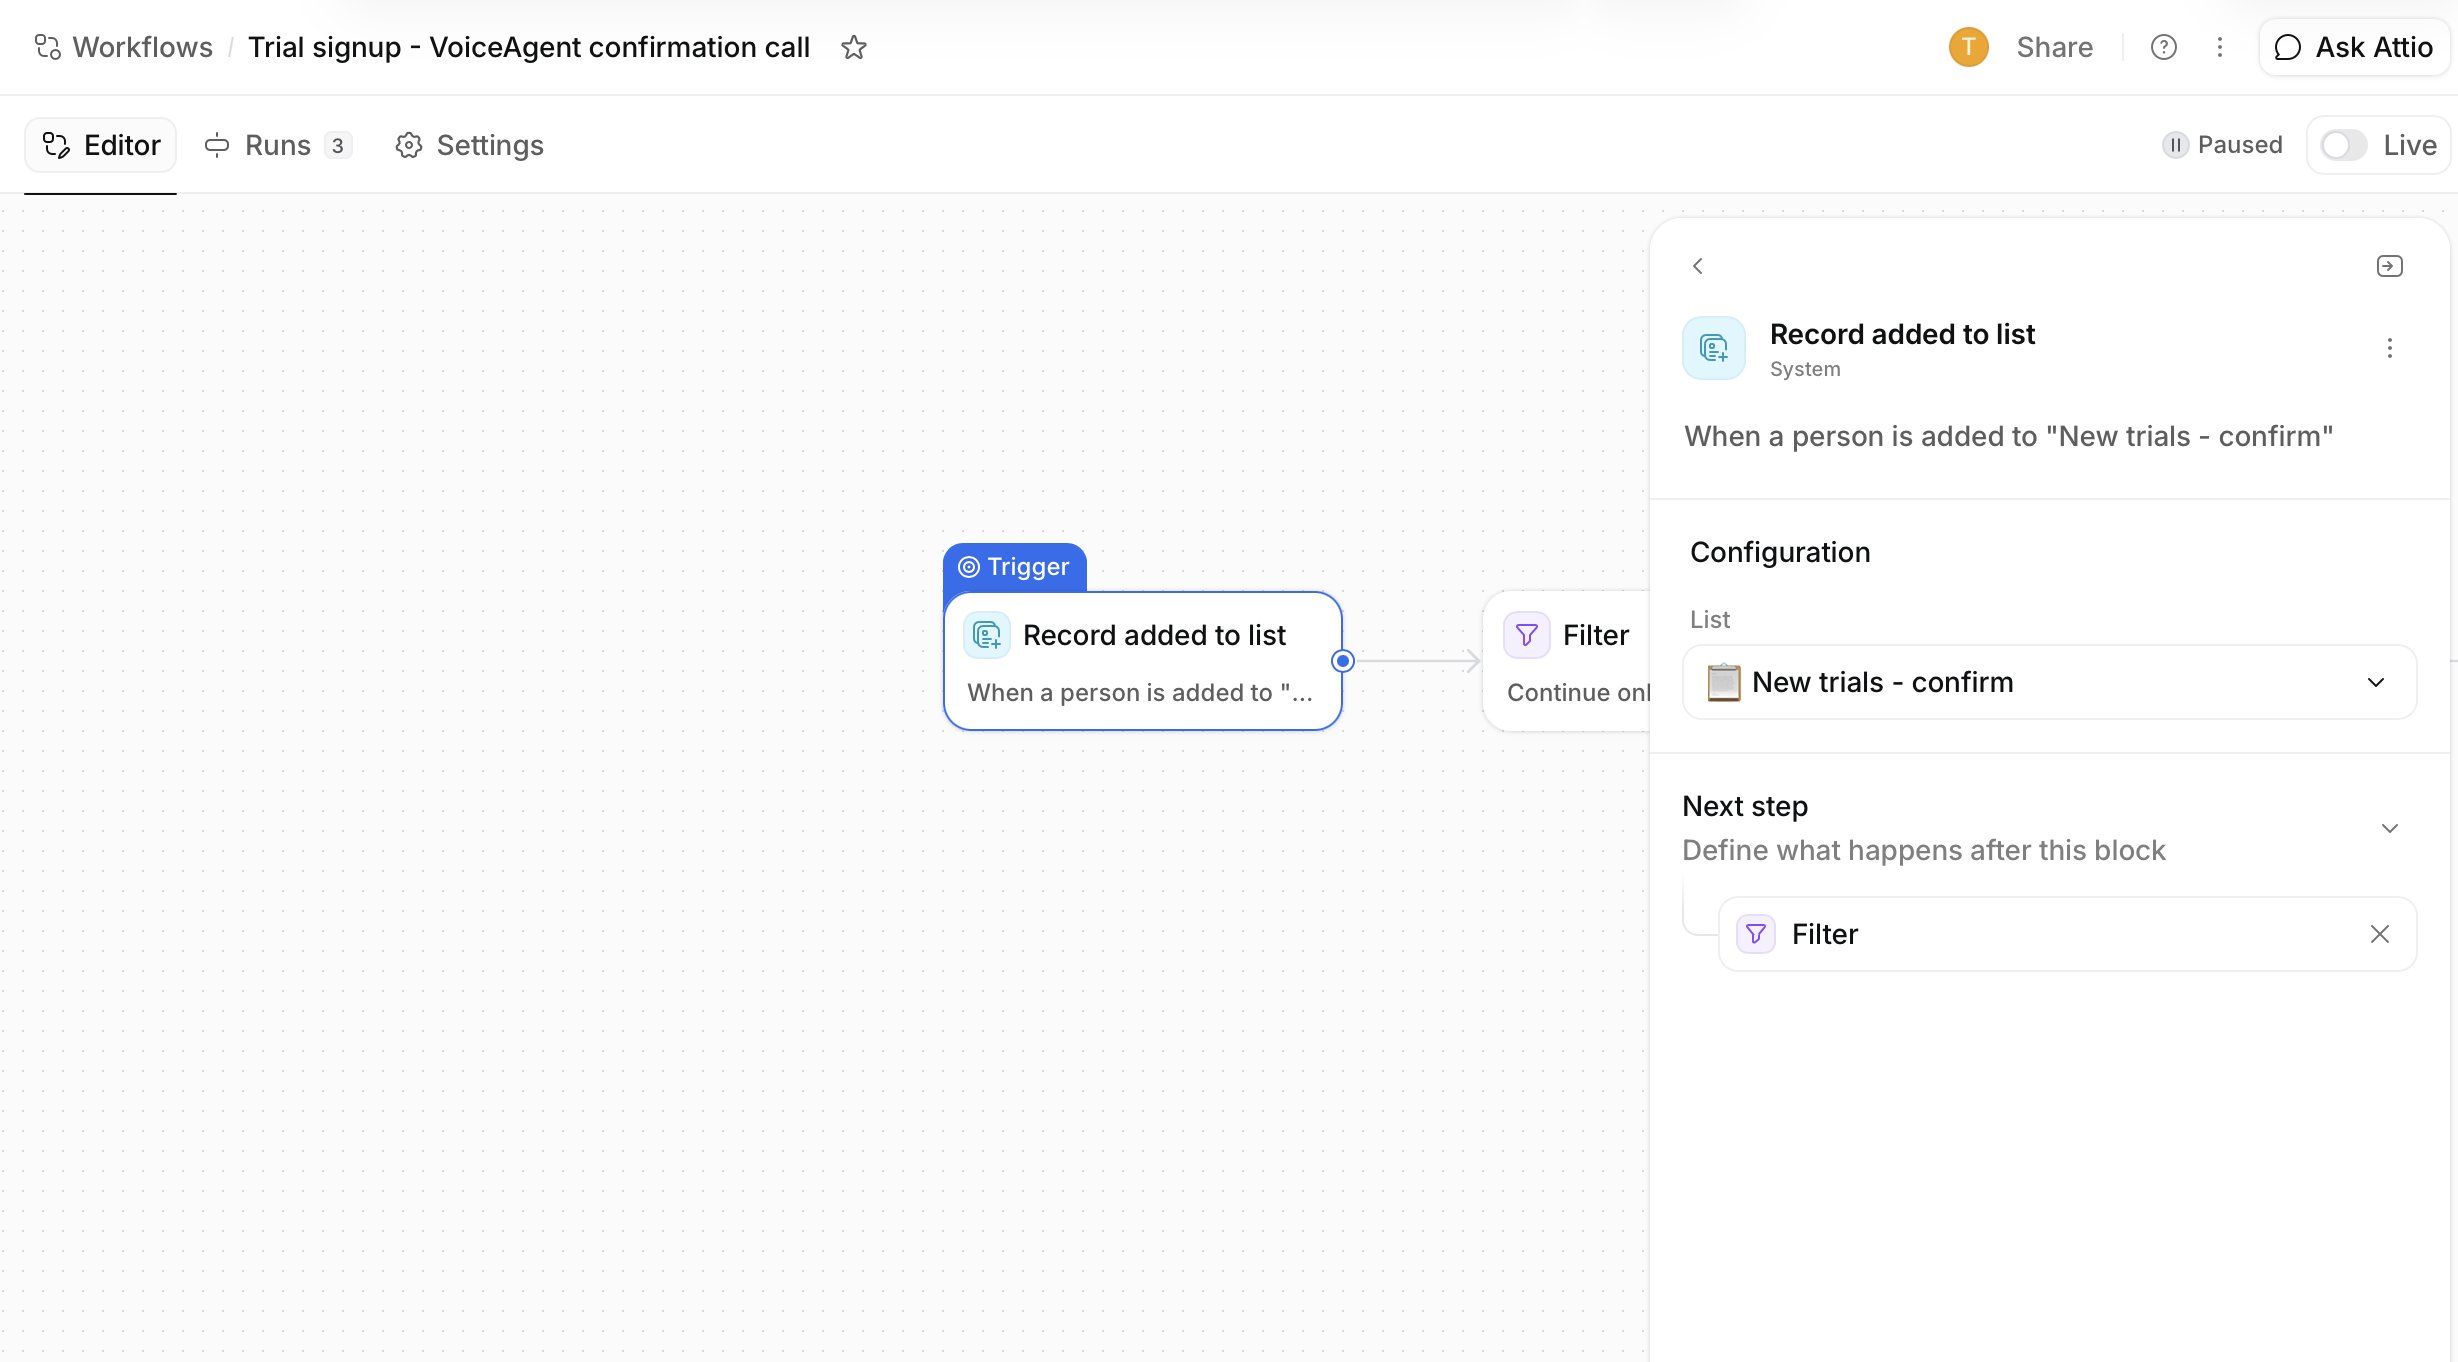
- Add the trigger Record added to list and pick your list.
Step 2: Filter out people you shouldn’t call
Add a Filter block. At a minimum, continue only when Phone numbers is not empty. To avoid calling the same person again and again, add a second condition. For example, use a date attribute called Last VoiceAgent call that must be empty, or older than a week. Create this attribute on People first. Step 4 fills it in.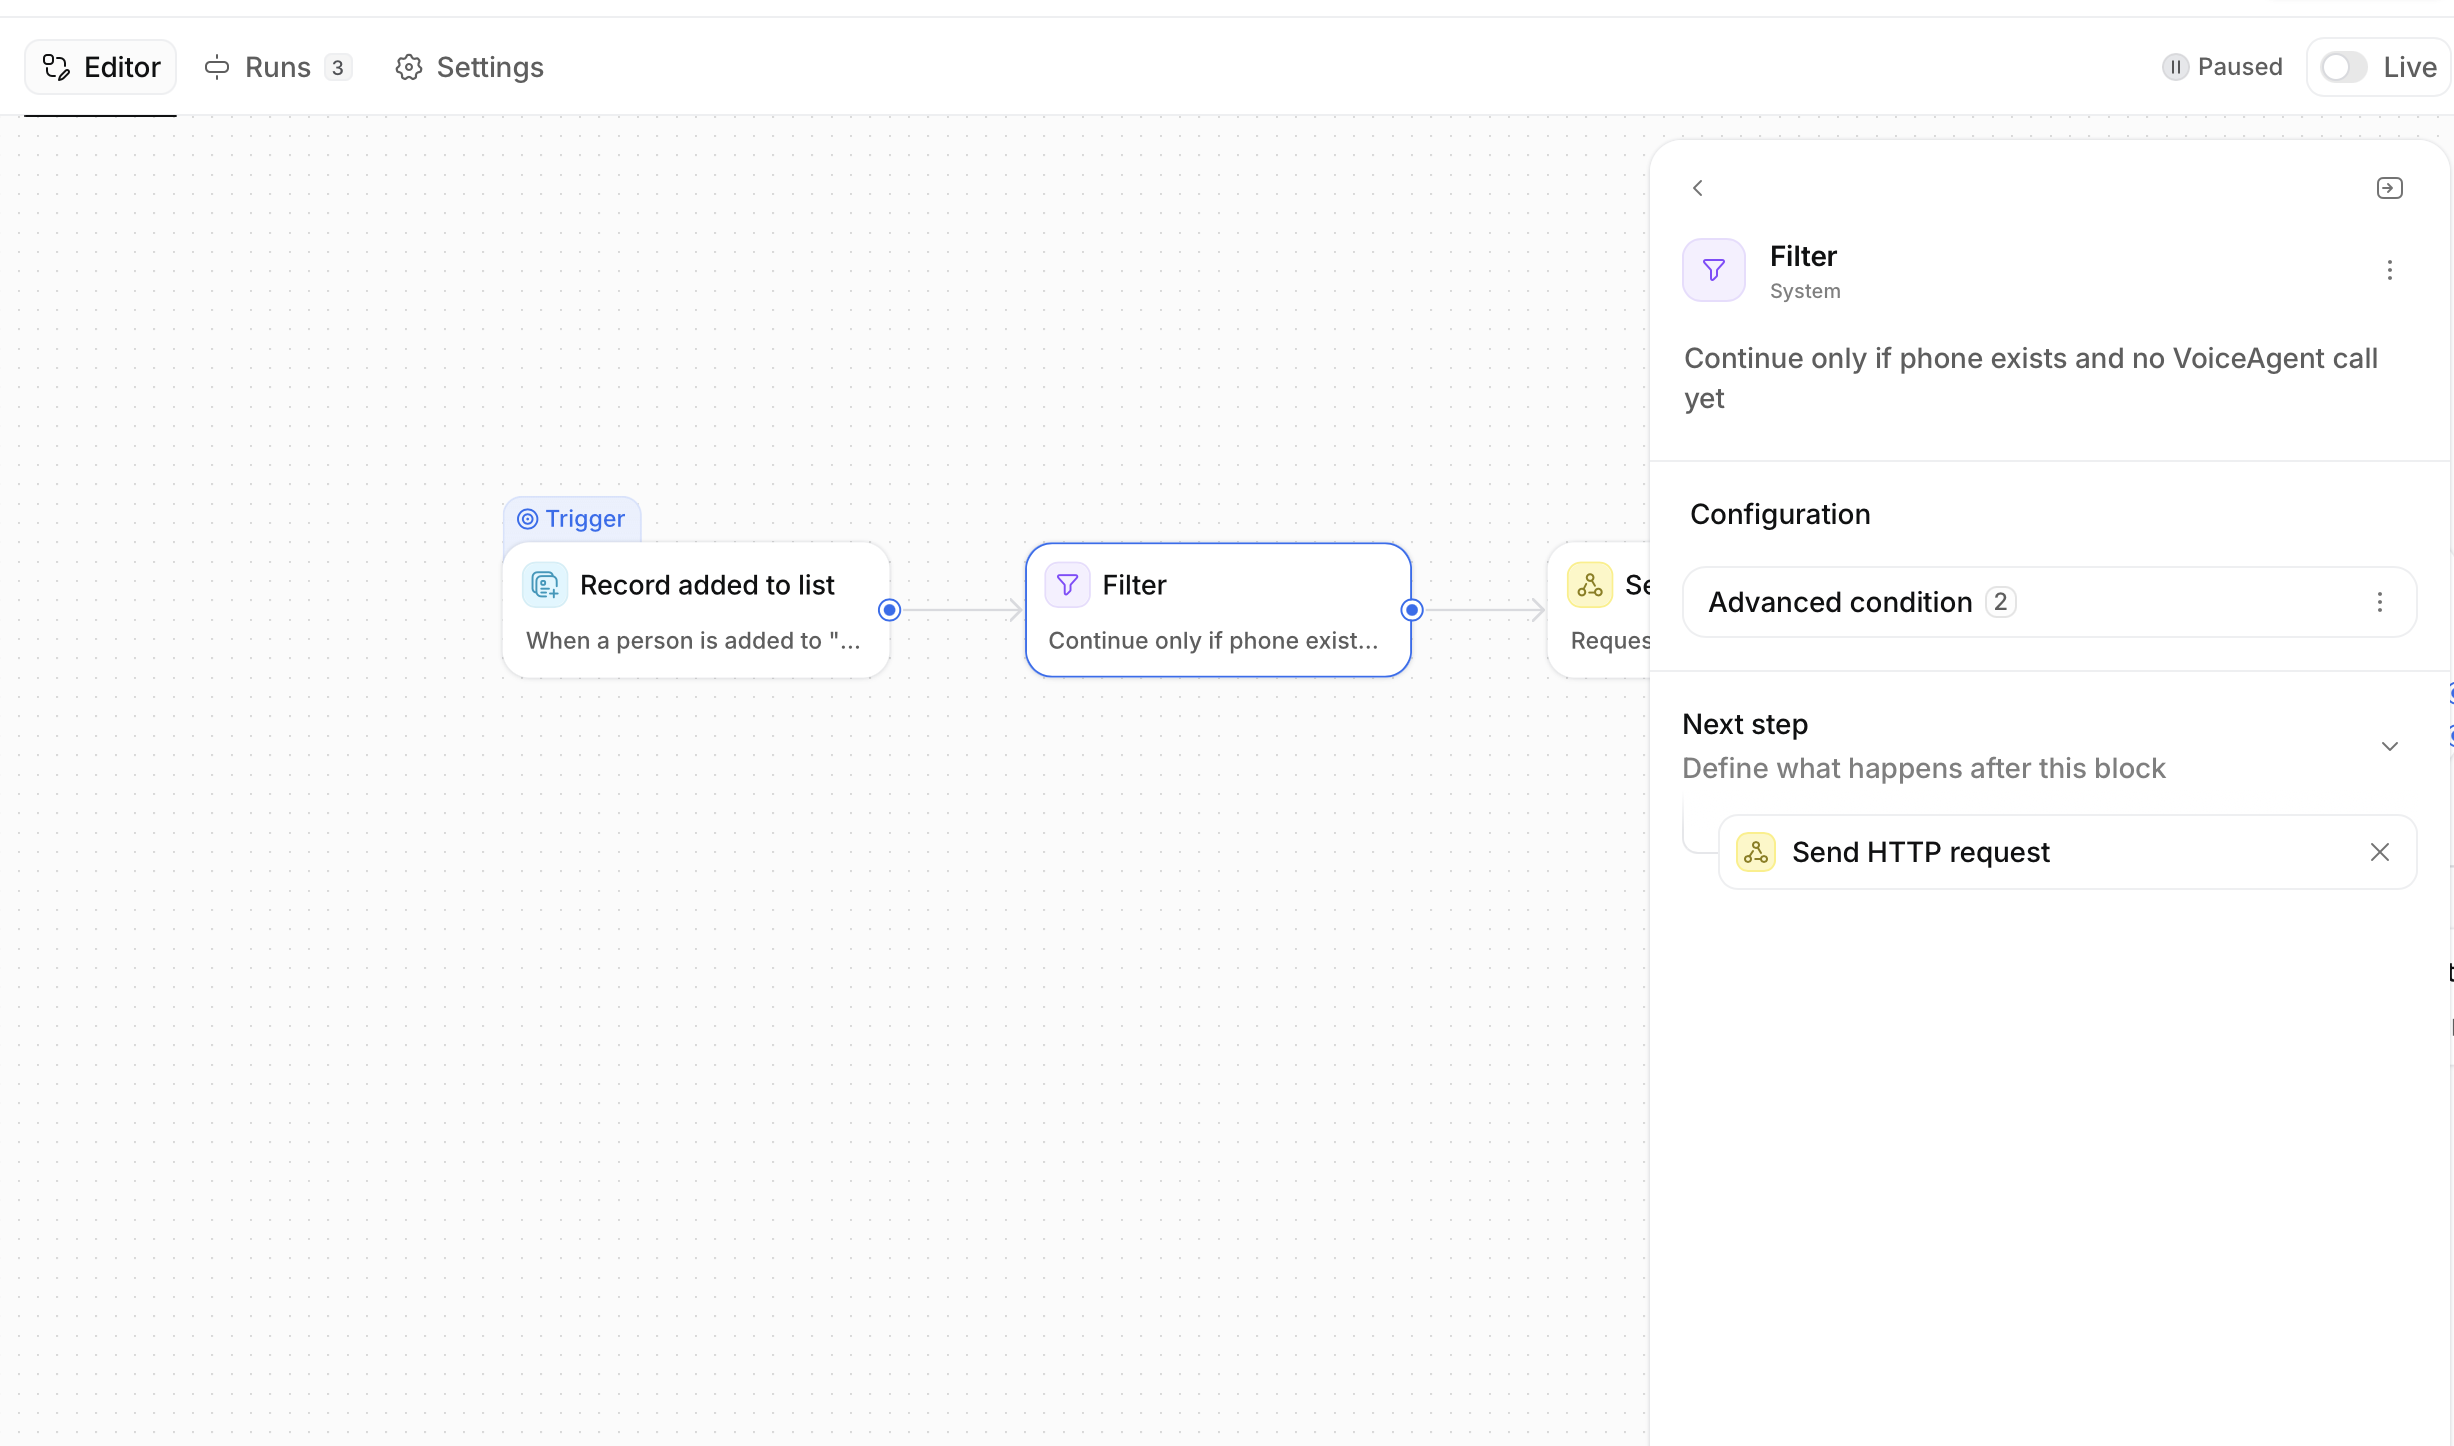
Step 3: Send the request to CloudTalk
Add a Send HTTP request block and set it up as follows: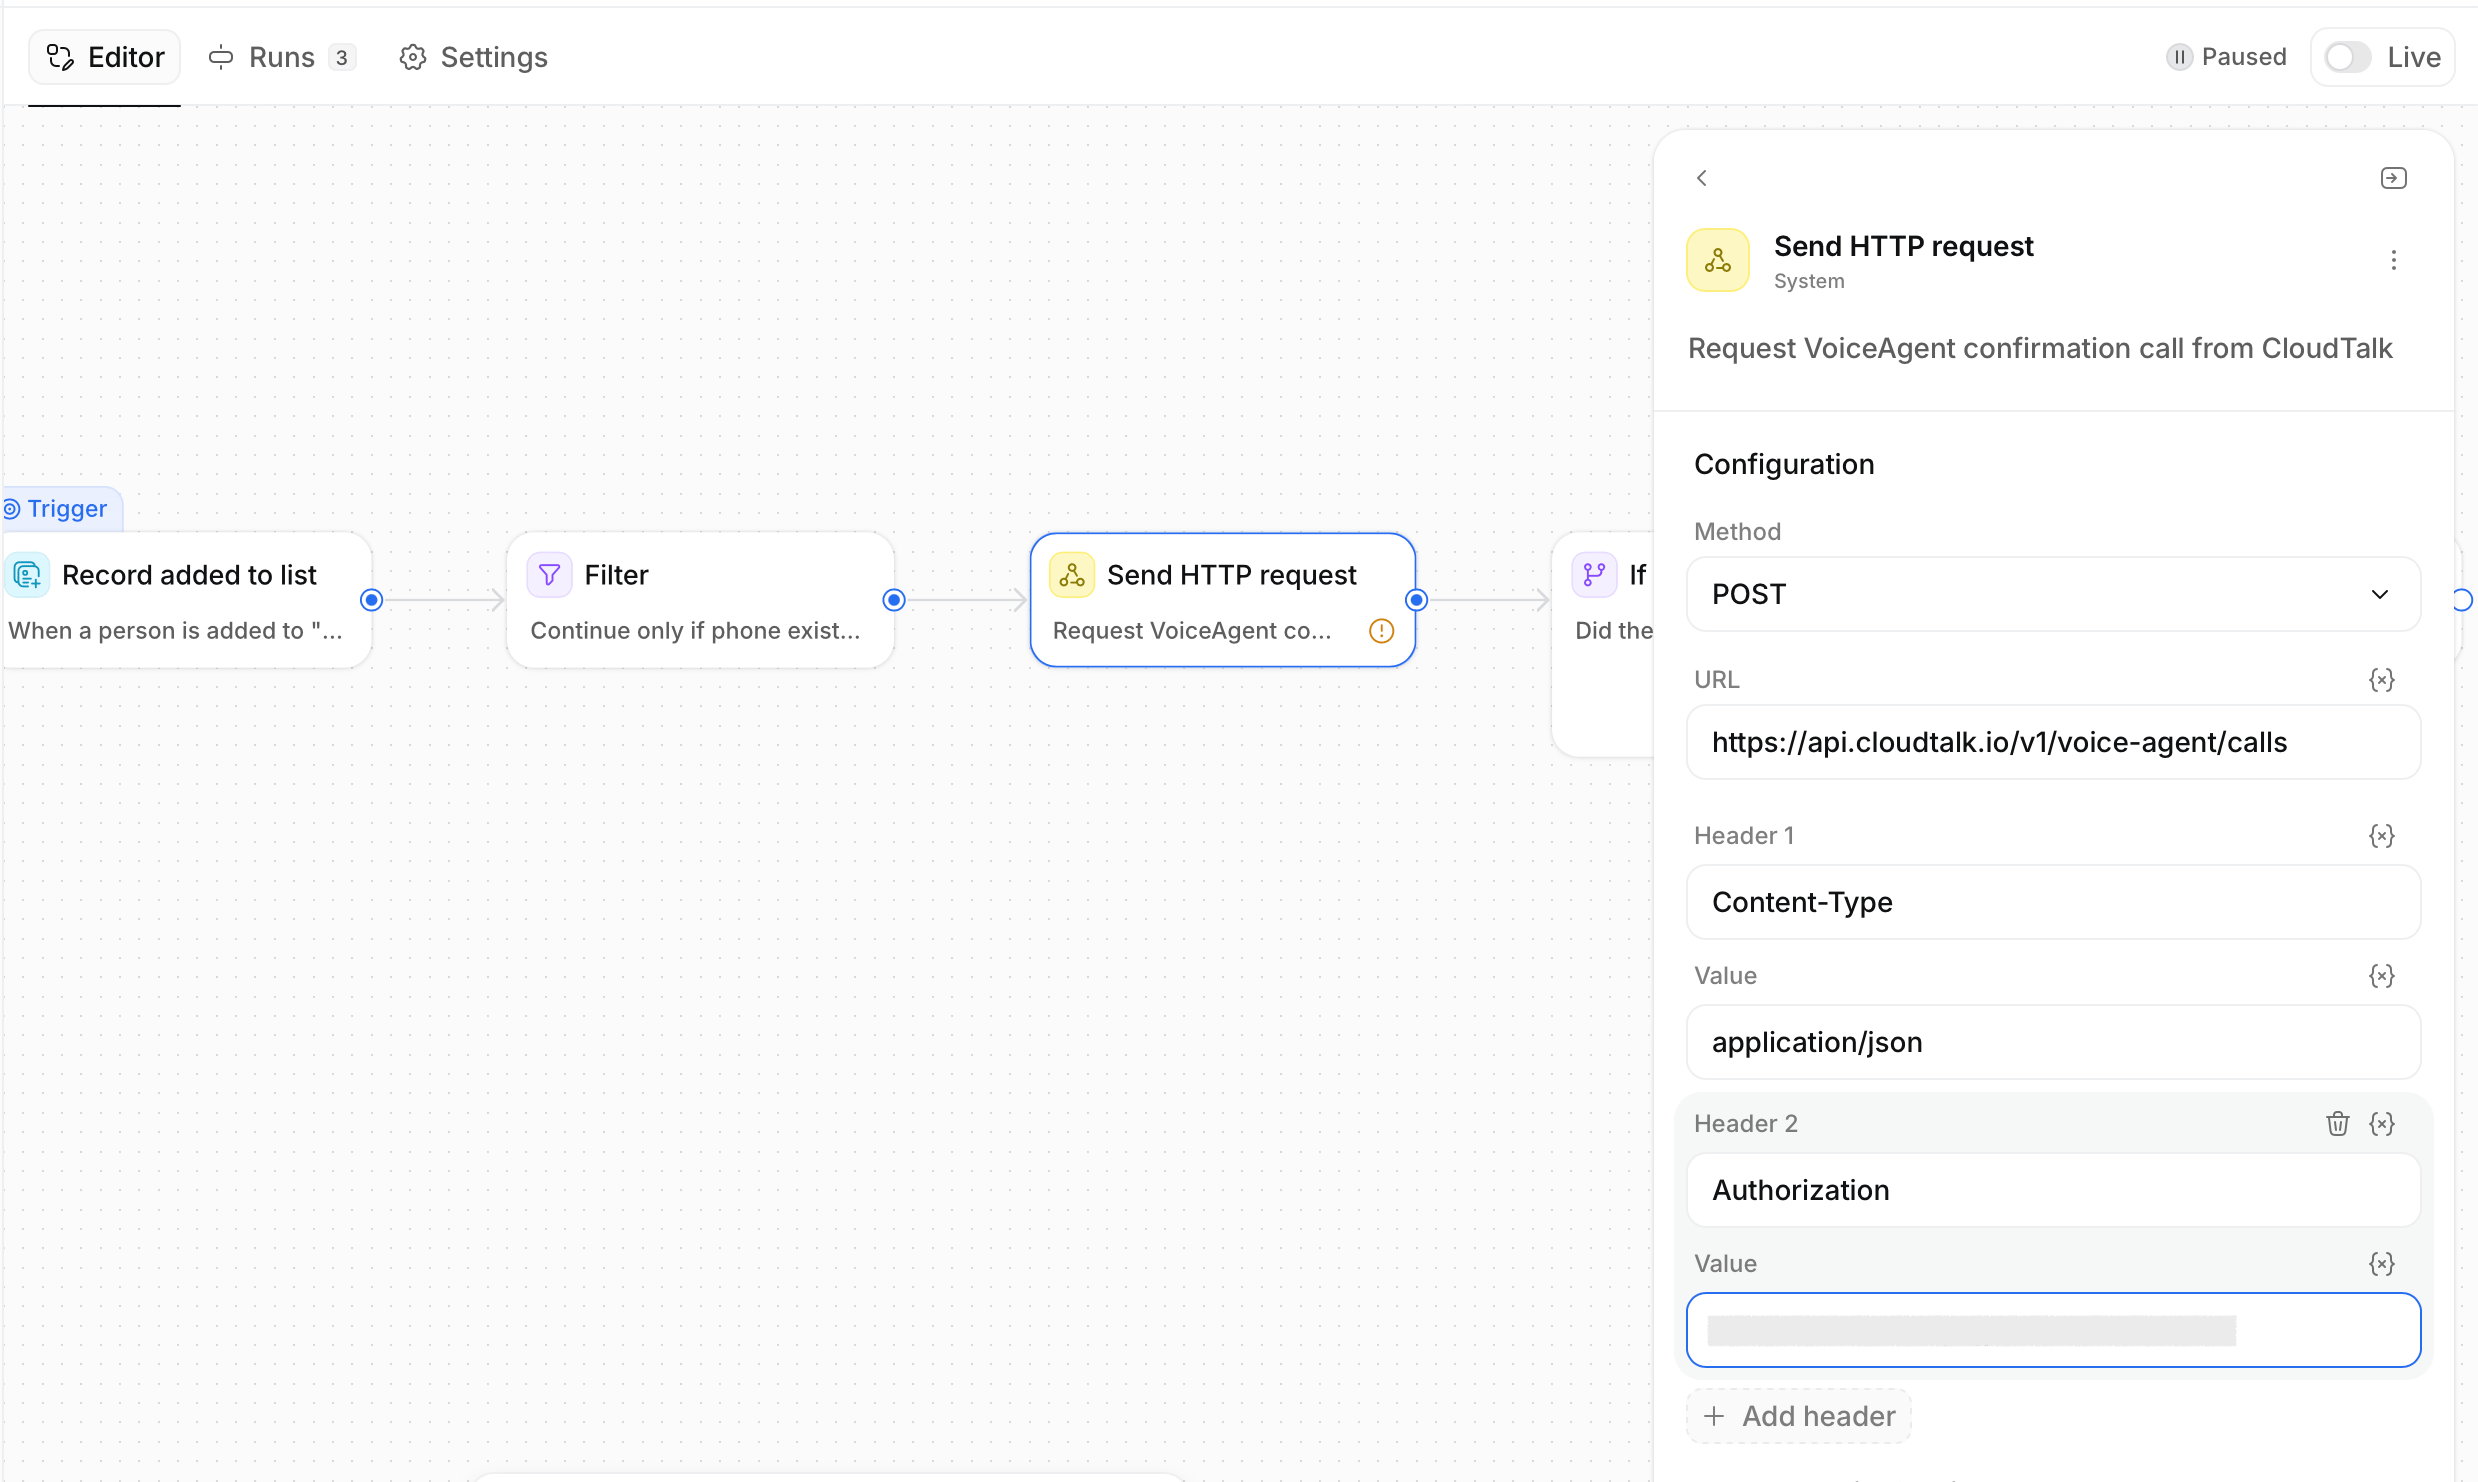
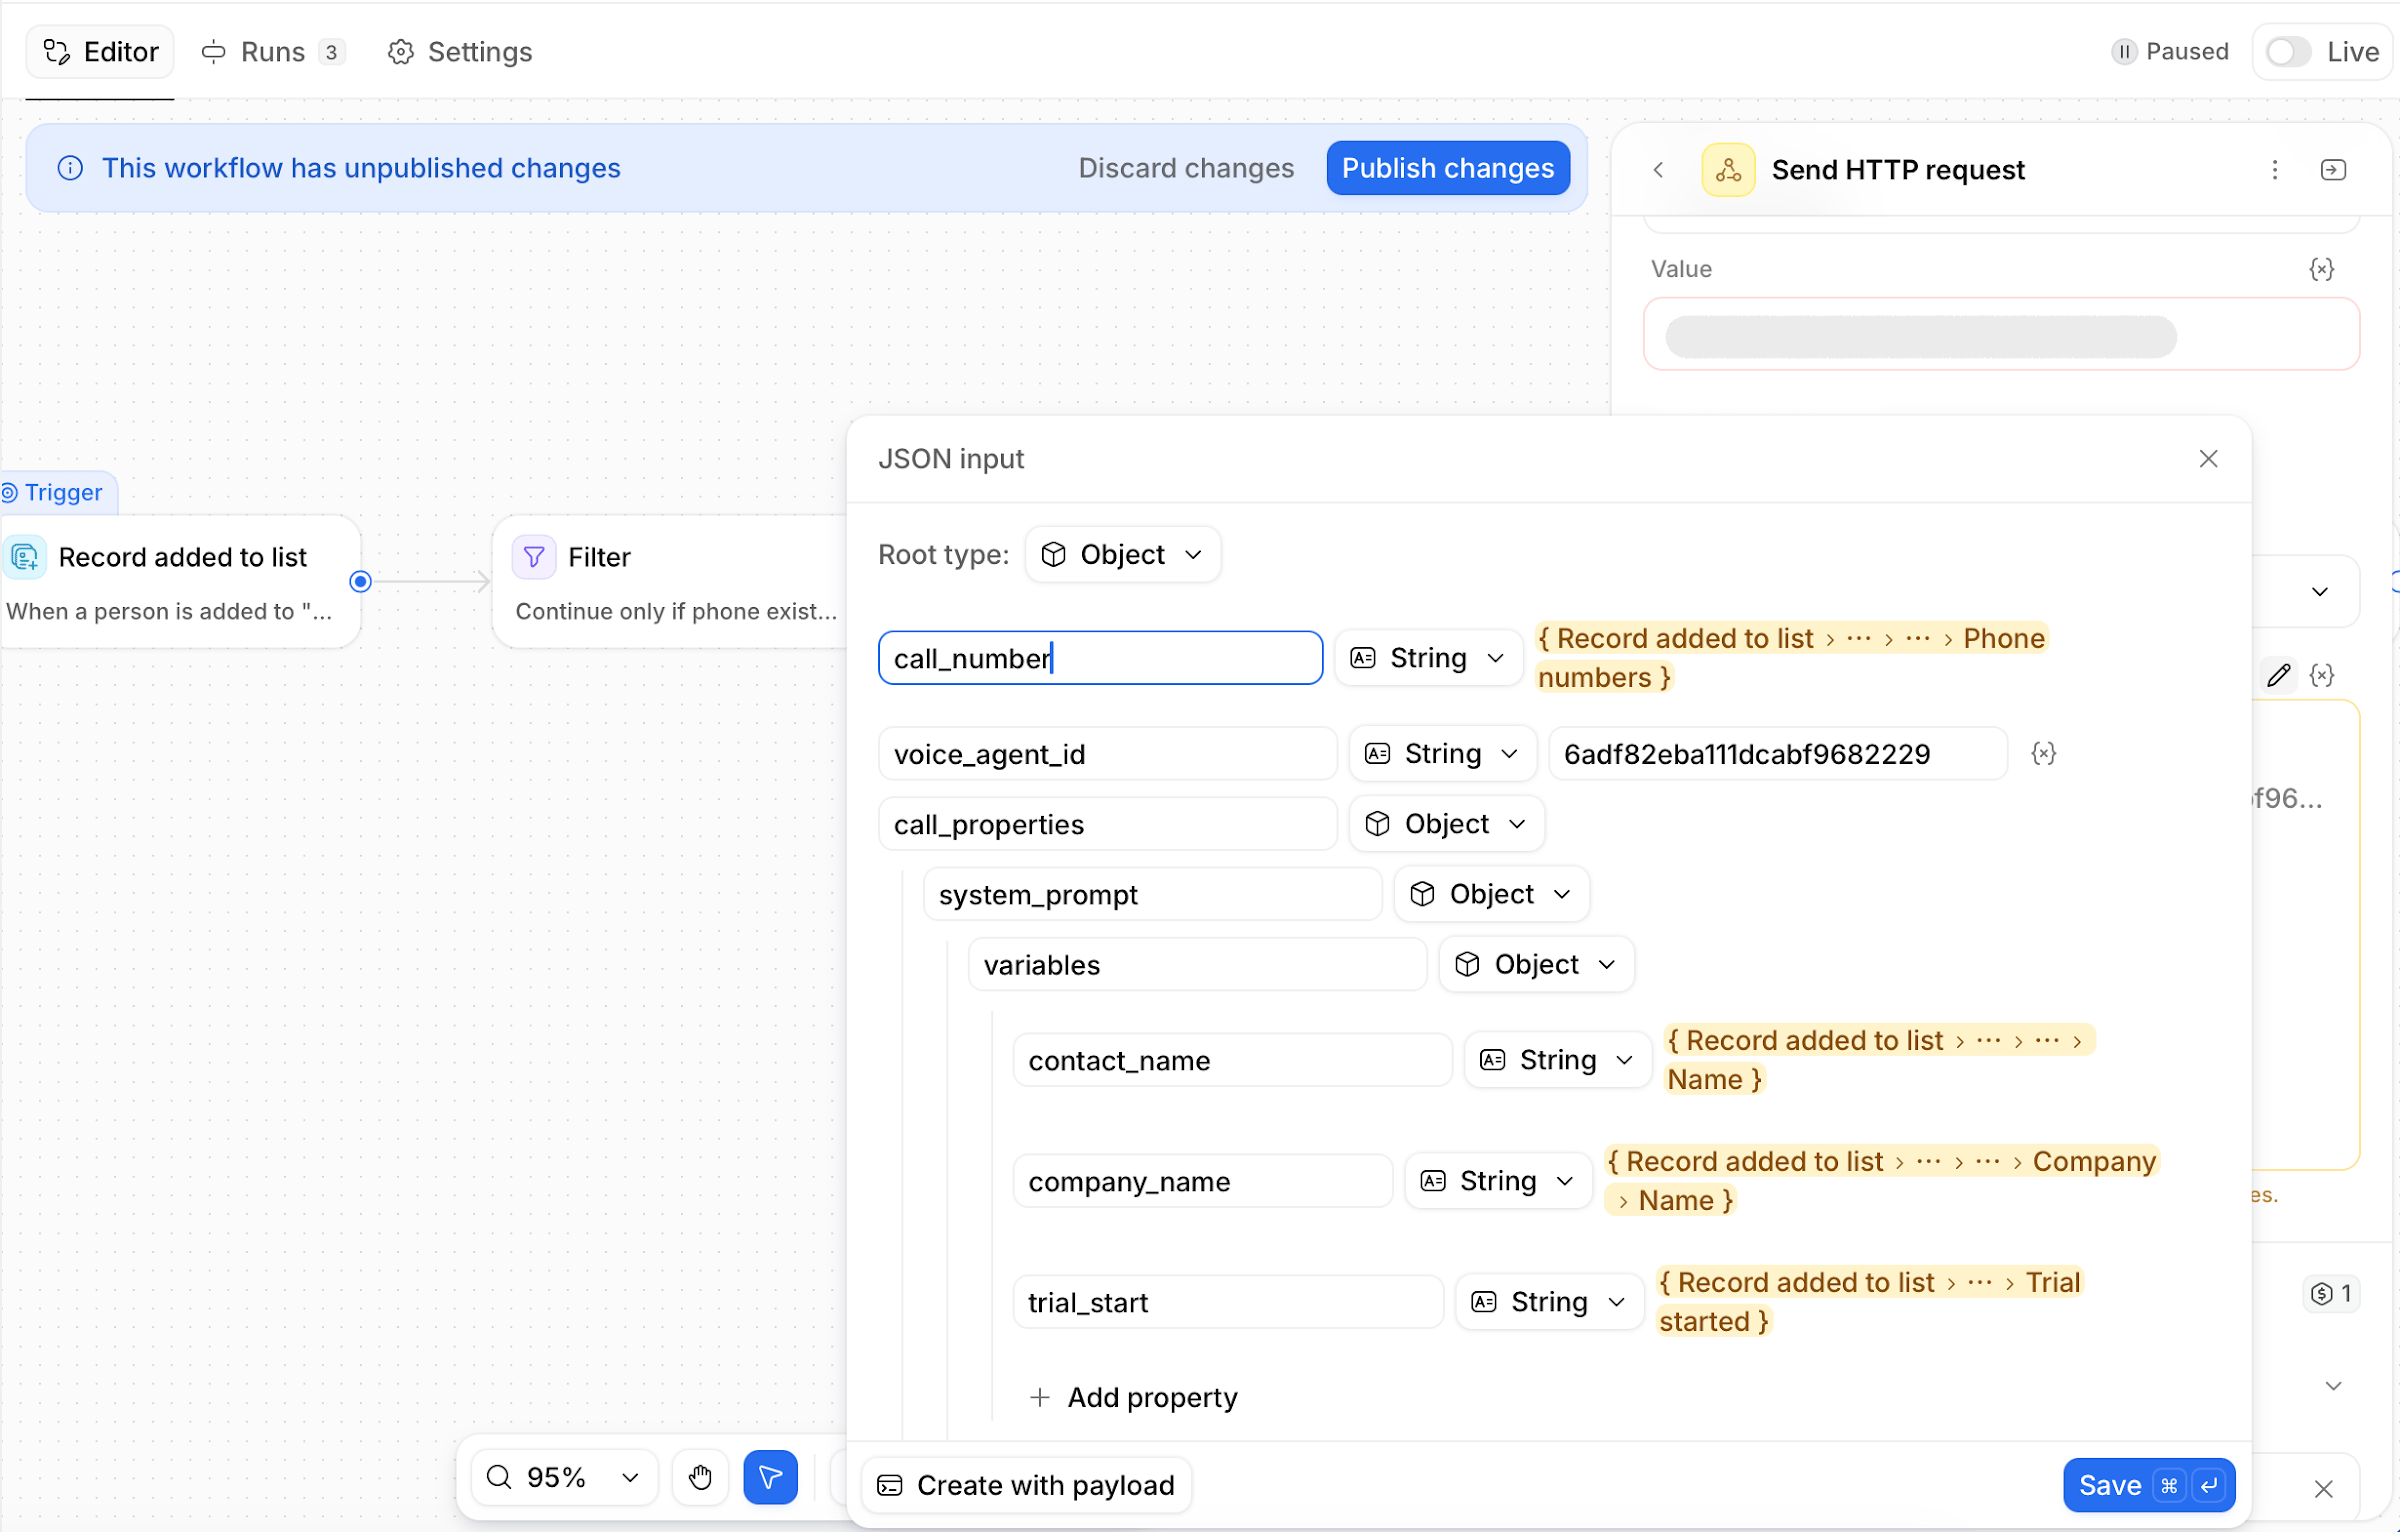
YOUR_VOICE_AGENT_ID with your VoiceAgent ID, and insert the values in double curly brackets with Attio’s variable picker rather than typing them. Then check the body preview for two things:
call_numbermust be a single phone number, as text. Phone numbers is a multi-value attribute in Attio, so select the first value. If the preview shows brackets or a list, CloudTalk rejects the request.company_namemust show the company’s name, not the company record itself.
Pass details to the VoiceAgent
Anything you want the VoiceAgent to know about the person goes insystem_prompt.variables. The VoiceAgent picks it up through matching placeholders in its own prompt, written as #{{contact_name}}. To insert one, type #{{ in the VoiceAgent’s Goal field.
The names must match exactly: contact_name in the body and #{{contact_name}} in the prompt. If they don’t match, nothing tells you. The VoiceAgent just doesn’t get the value.
If you want the VoiceAgent to capture what it hears, such as a corrected name, a role, an email or a callback time, set up extraction in the VoiceAgent’s Skills. Without it, the call still happens and is logged, but the only result recorded is the outcome, and nothing is written to your Attio fields.
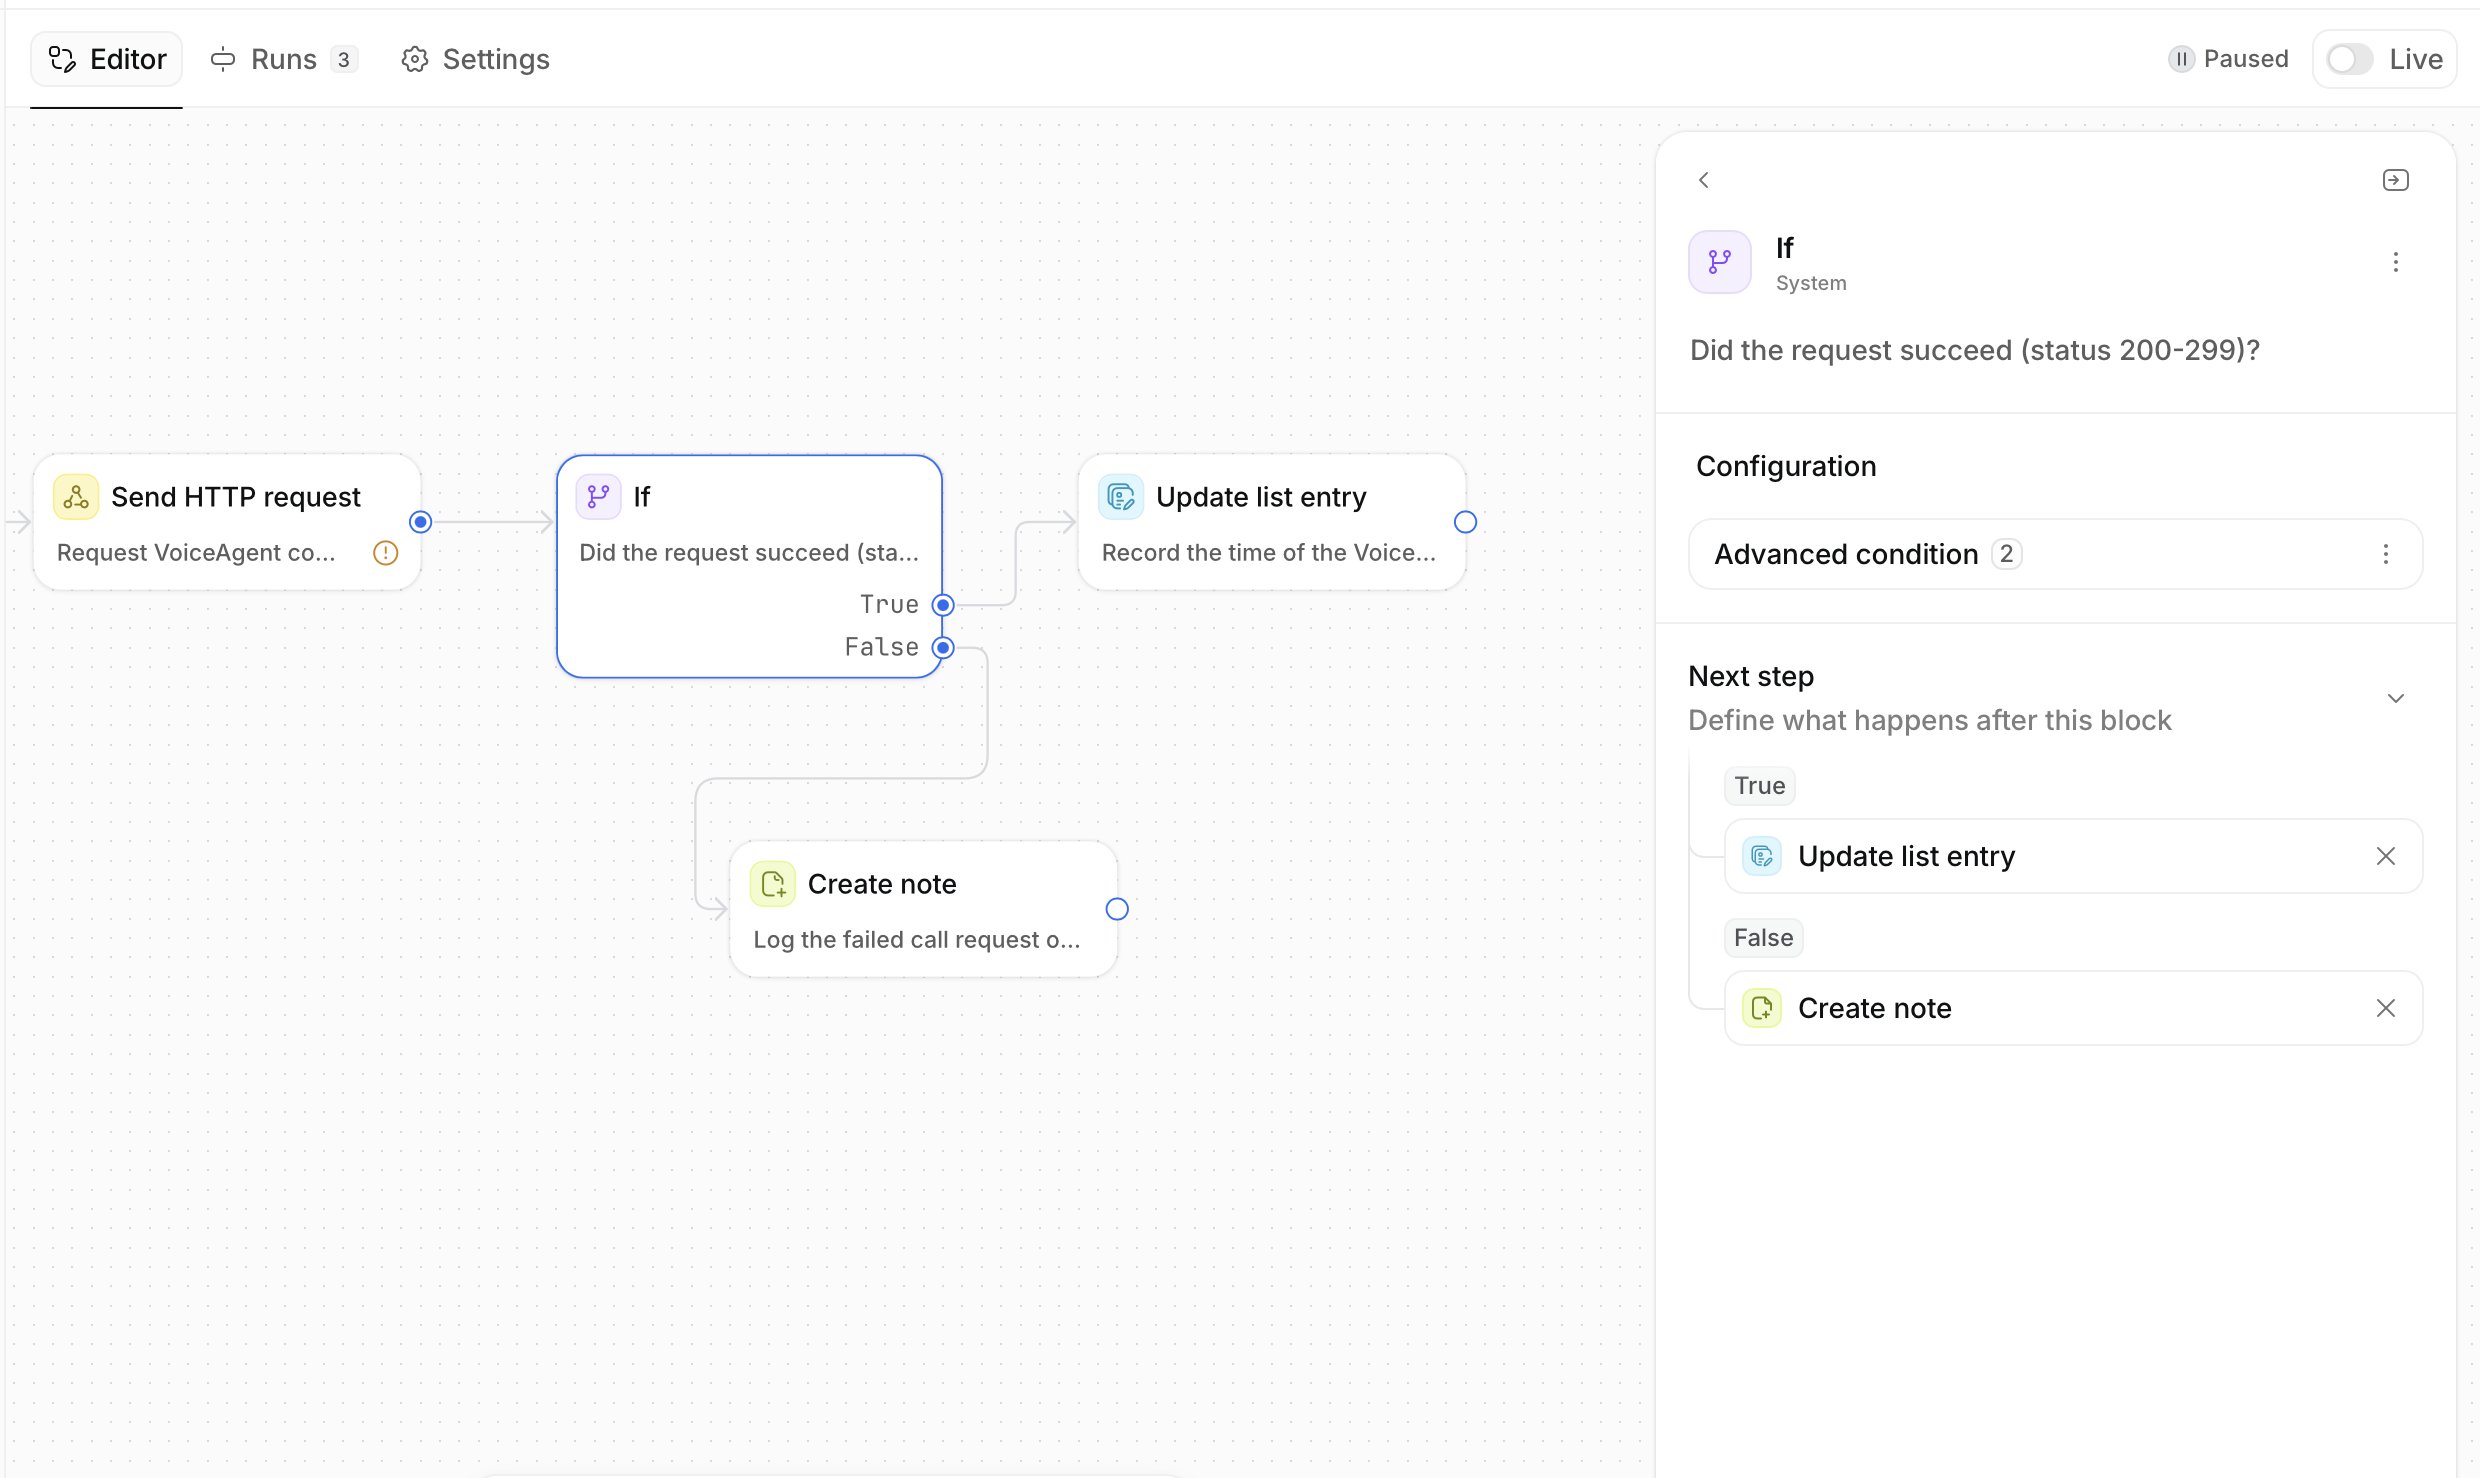
Step 4: Handle the result
Add an If block on the HTTP block’s success output:- Success: update Last VoiceAgent call to the current date and time.
- Not success: create a note on the person with the status code and the response body, so failures show up in Attio and not only in the workflow’s run log.
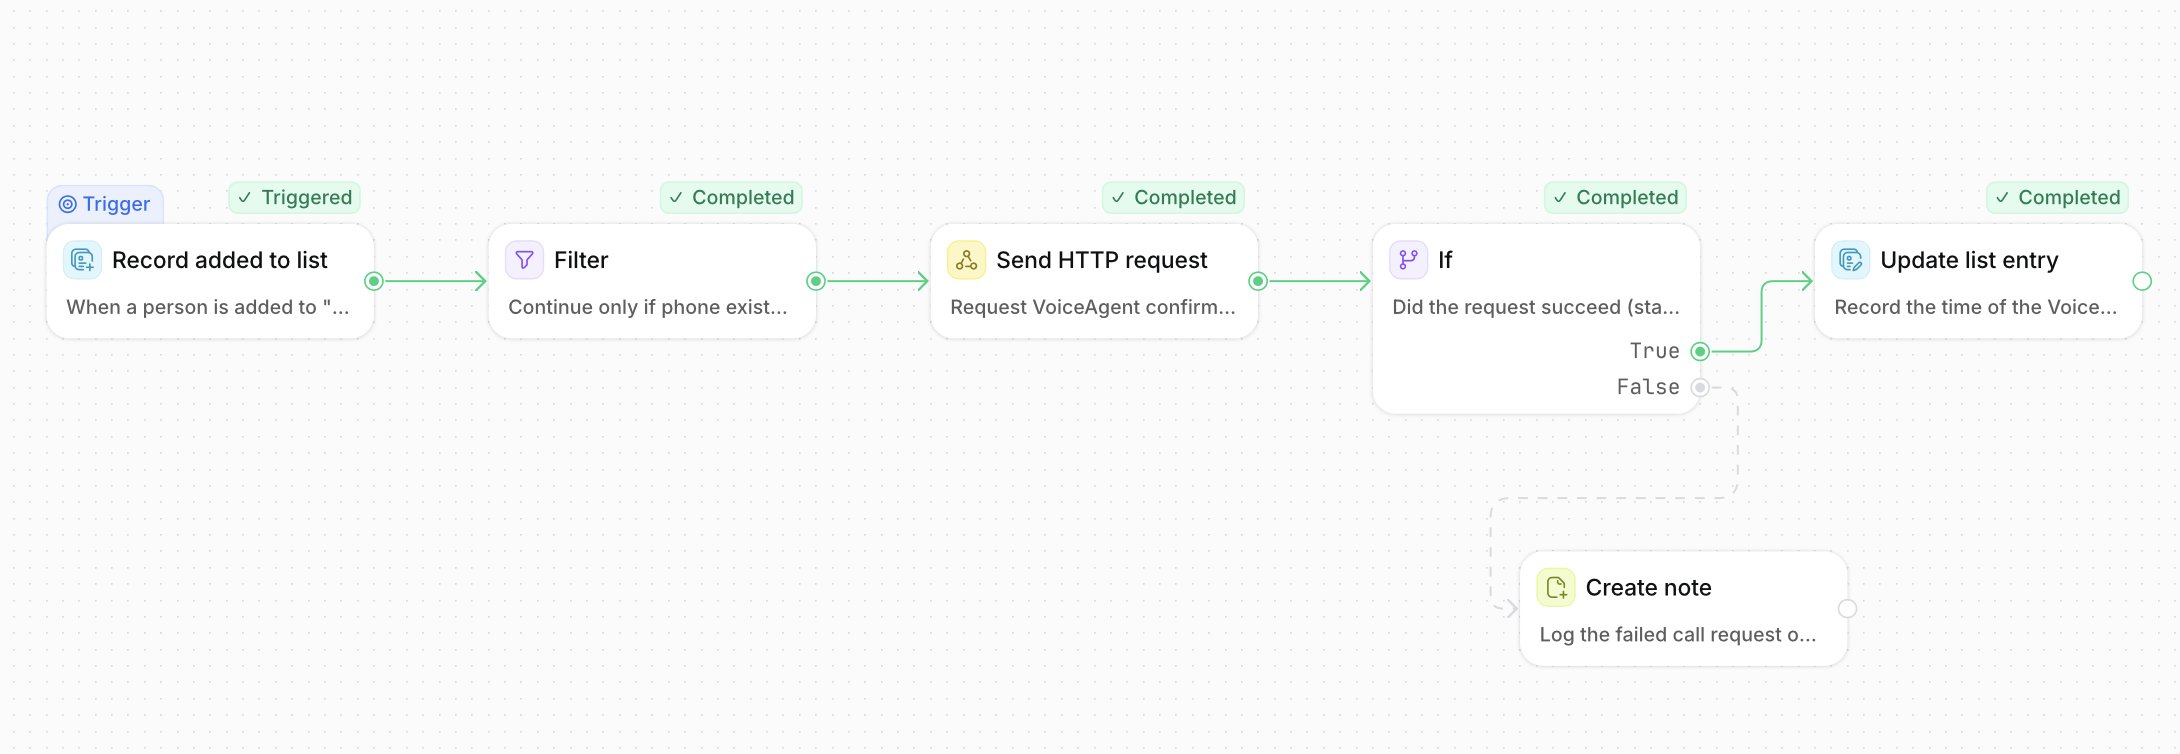
Step 5: Publish and test
- Publish the workflow.
- Add one test person, with your own phone number, to the list. The call should arrive within a minute.
- In the workflow’s run history, check that the request returned a status between 200 and 299.
- In CloudTalk, find the call under Statistics > Calls.

Option B: Build the workflow with Attio AI
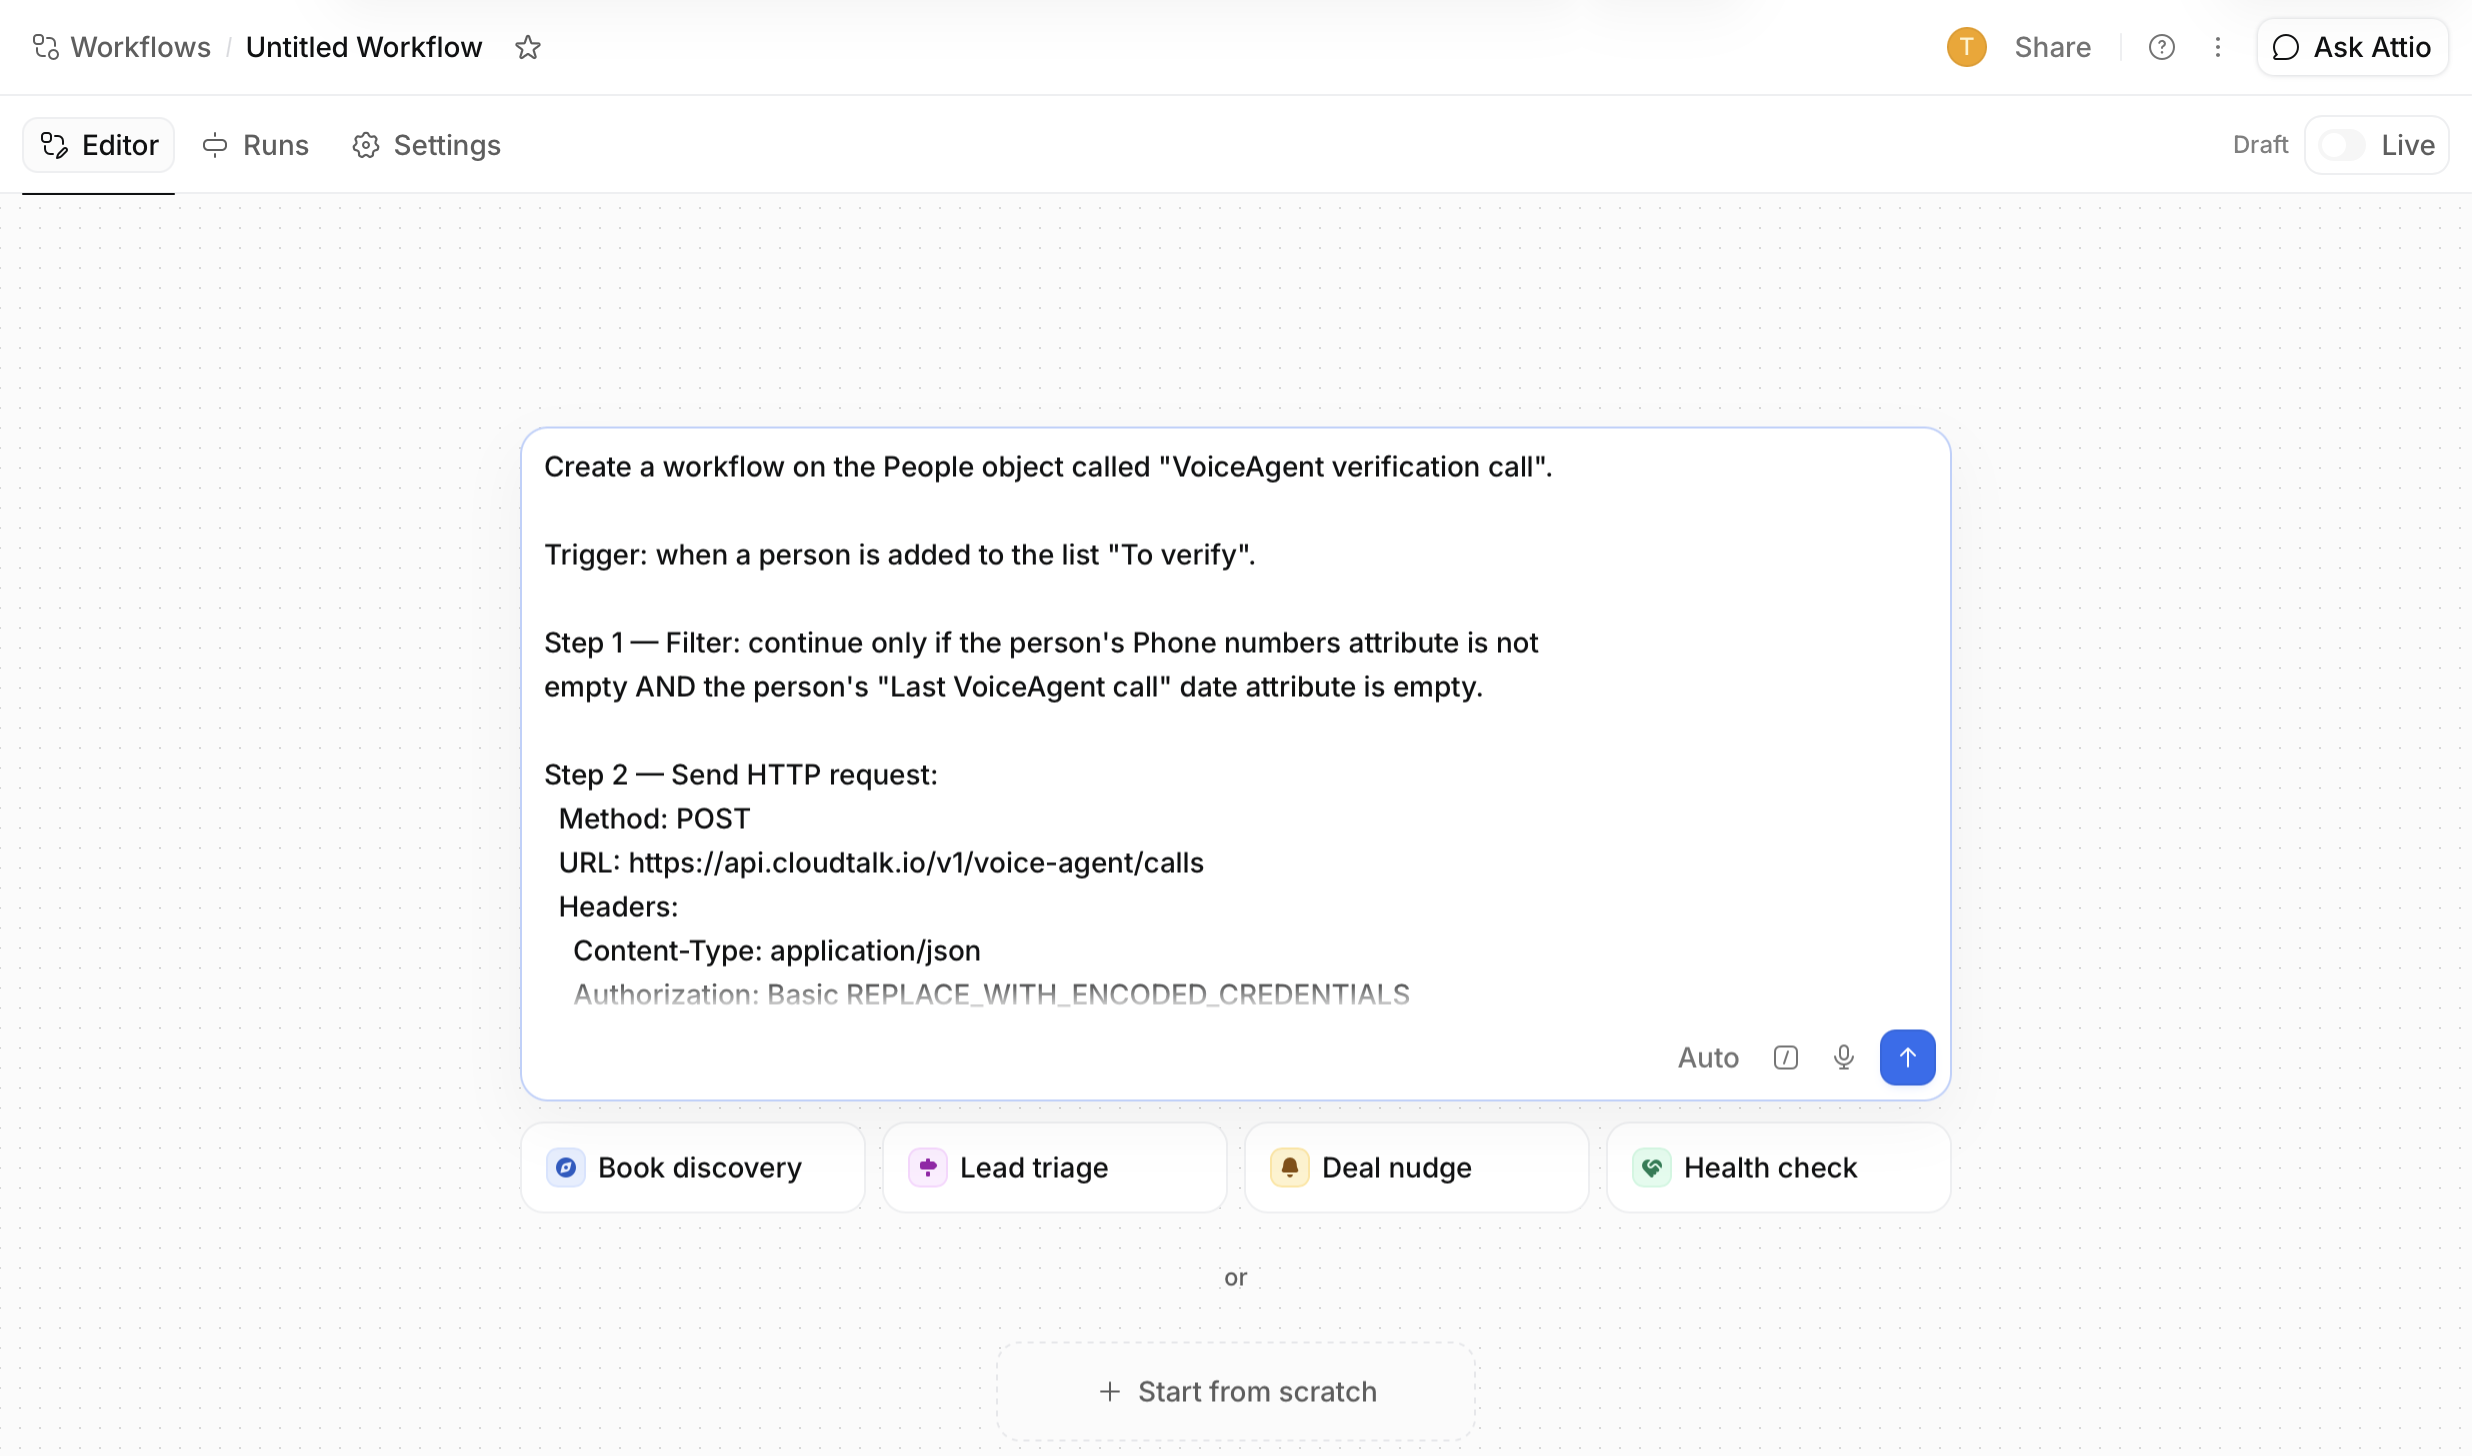
Attio can generate the whole workflow from a description:- Create a new workflow on People and choose to build it with AI.
- Paste the prompt below.
- After the workflow is generated, replace the two placeholders with your real values. Don’t paste your real credentials into the AI builder.
call_numbershows a single phone number in the body preview, not a list.company_nameshows the company’s name, not the company record.- The variable names match the
#{{...}}placeholders in your VoiceAgent’s prompt. - The
Authorizationheader holds your real encoded value, which you pasted in yourself. - The trigger is the one you asked for. Generated workflows sometimes use a broader one.
Where the call appears in Attio
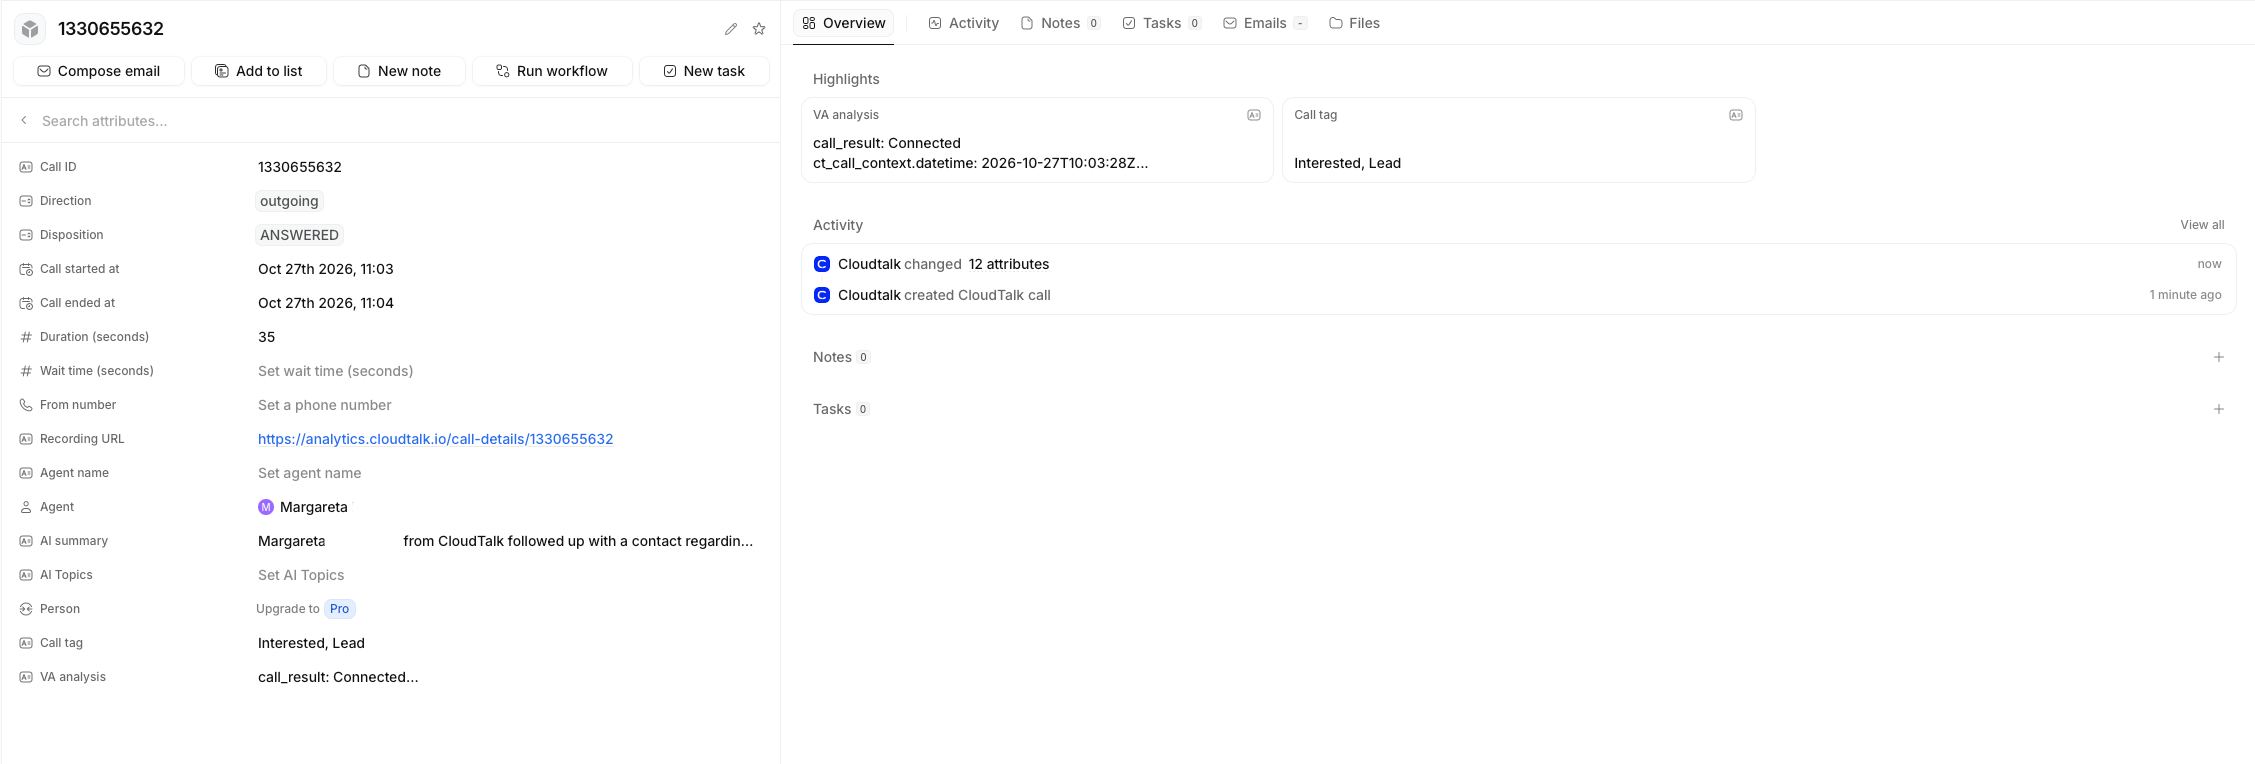
With the CloudTalk integration for Attio connected, the VoiceAgent call is logged on the person it called, just like a call made by one of your agents:- Notes mode: a note on the person with the call details, plus a VoiceAgent section with the outcome and anything the VoiceAgent captured.
- Your own call object: a call record linked to the person. Map Voice Agent Analysis to a long text attribute to have the captured data written there. If you leave it unmapped, it goes into a note on the call record instead.
Troubleshooting
- 401 Unauthorized: check that the
Authorizationheader starts withBasicand that the encoded value comes from your current API Key ID and API Secret. - 400 Bad Request: check that
call_numberis a single phone number in international format (for example,+14155550123), not a list. - The VoiceAgent doesn’t use the person’s name or company: check that the variable names in the body match the
#{{...}}placeholders in the VoiceAgent’s prompt exactly. - No call at all: check that the workflow is published and that the person meets all the filter conditions.
Need help or have a question? Reach out through our Support portal. We’re here for you.