

In this guide, you’ll learn how to configure your AI Receptionist in CloudTalk, including how to provide company information, set up routing, and ensure every caller is properly handled without queues or missed calls.
What is AI Receptionist?
The AI Receptionist is a specialized use case of CloudTalk’s AI VoiceAgent designed to function as the front desk of your phone line. Just like a human receptionist, the AI Receptionist’s role is not to provide deep expertise about your business. Instead, it focuses on:- capturing the caller’s intent
- filtering noise
- answering simple questions
- routing the caller to the right person or next step.
- It knows who to connect callers with
- It knows where requests should go
- But it does not attempt to solve expert-level problems
Before you start
To set up an AI Receptionist, make sure you have:- An active AI Receptionist or AI Specialist package on your account
- Admin access to the CloudTalk Dashboard
Setting up AI Receptionist
Follow these steps to set up an AI Receptionist in the CloudTalk Dashboard.Choose the AI Receptionist template
- Open the CloudTalk Dashboard. In the left menu, navigate to AI Voice Agents > Agents.
-
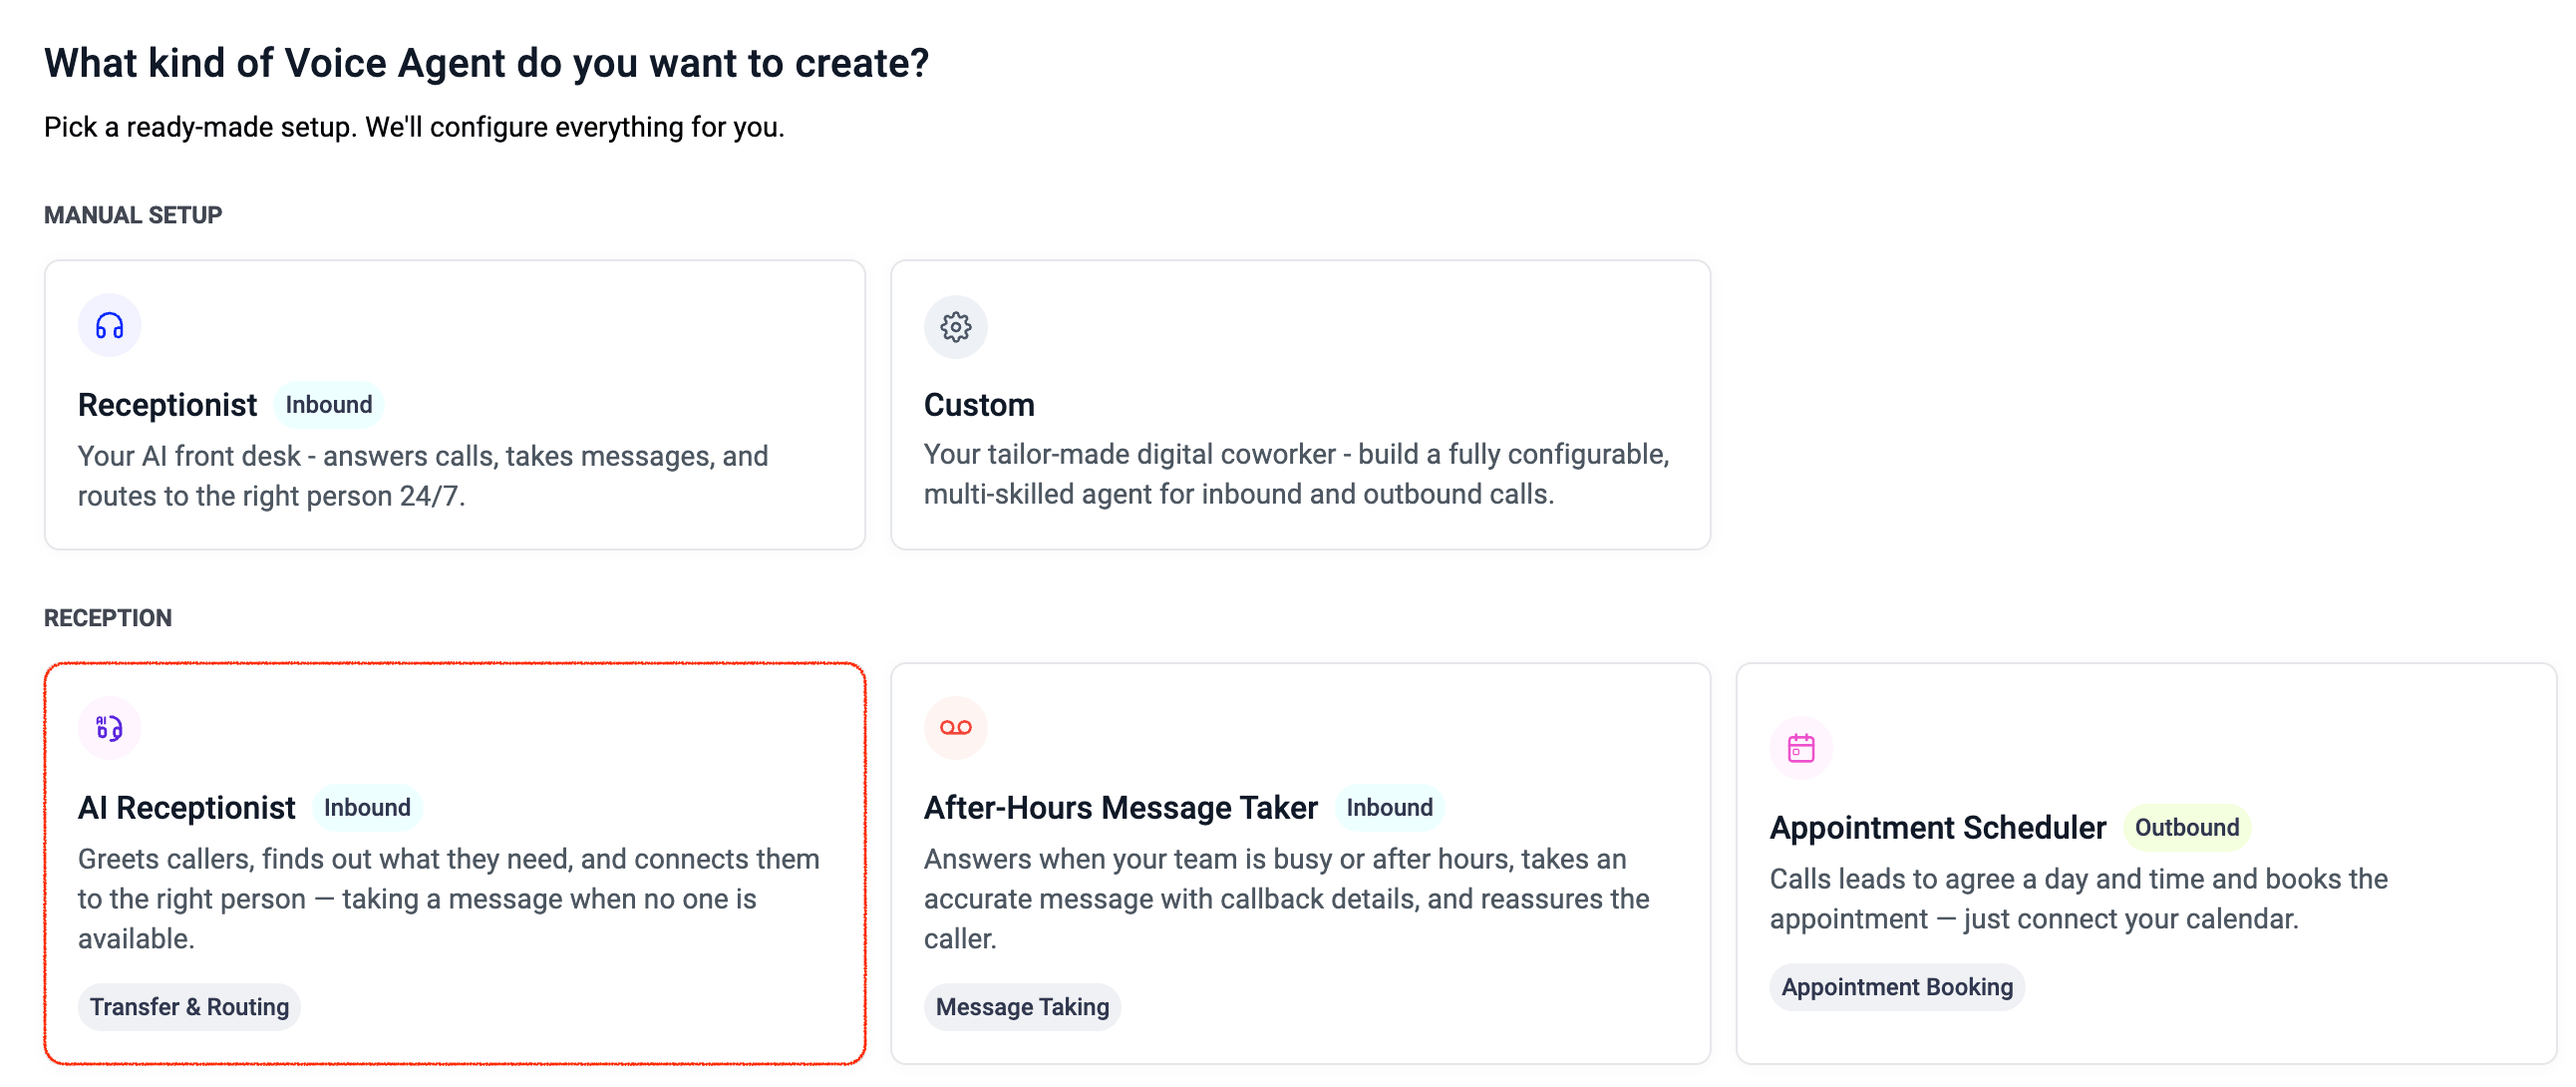
Click + New VoiceAgent in the top-right corner. The template gallery will open.

-
Under the Reception category, select AI Receptionist.
Set up the profile
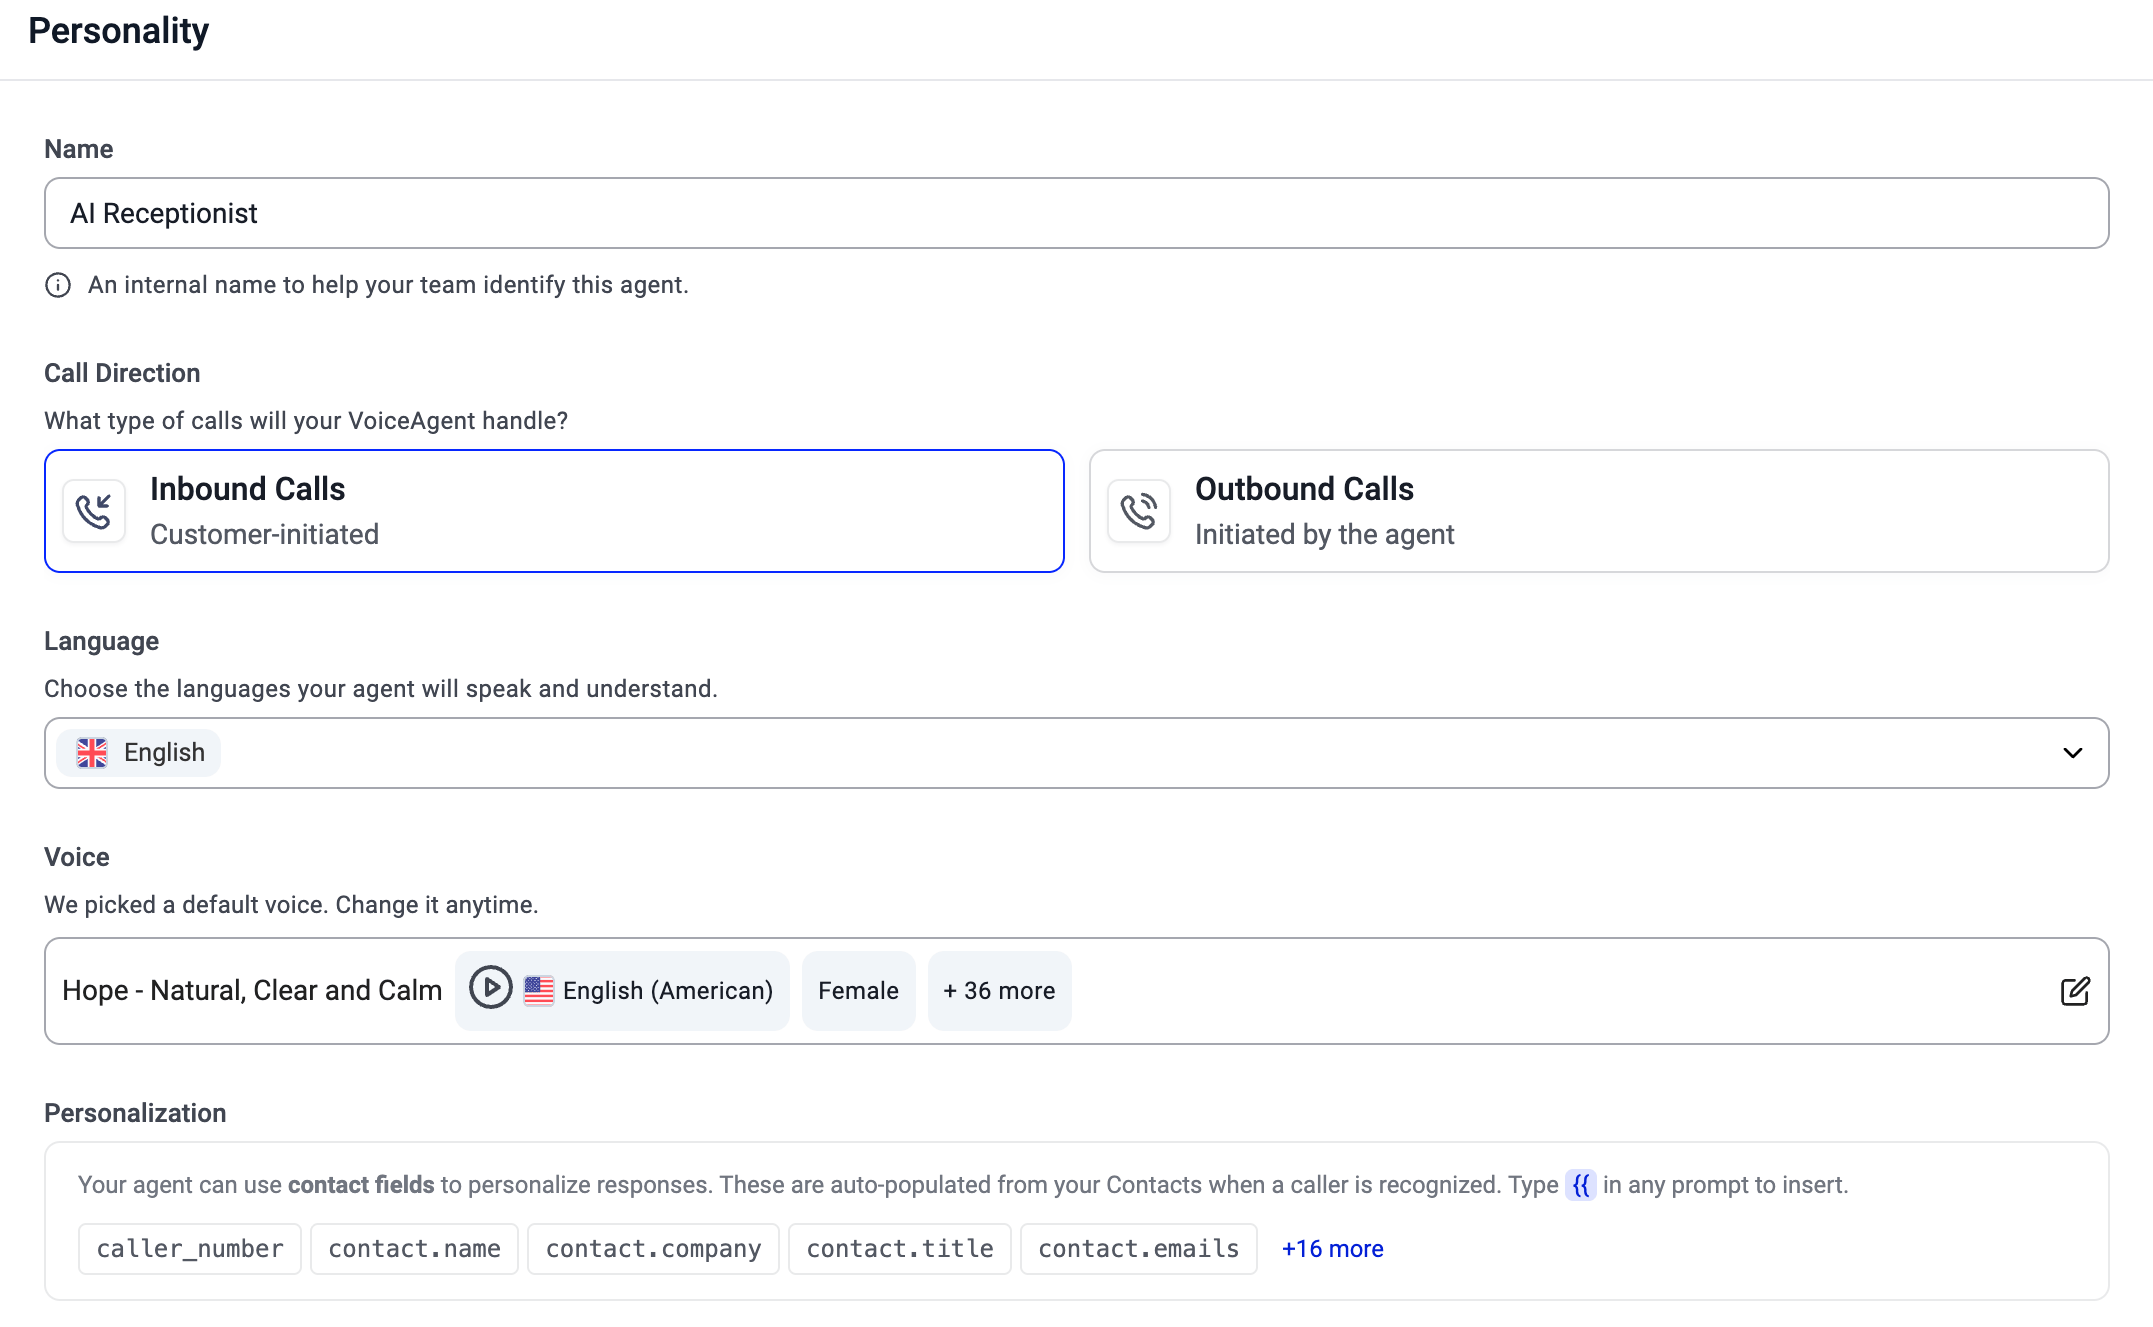
During setup, the profile step asks you to configure the agent’s identity. The template pre-fills several fields for you, including Call Direction (Inbound), Goal, and Greeting. You can review and edit all of them during setup or from the agent’s edit page afterward.- Enter a Name for the AI Receptionist. This name appears in call logs, analytics, and integrations.
- Select the Language the AI should speak. You can select one or multiple languages. The AI will automatically detect the caller’s language.
- Choose the Voice the AI Receptionist will use. You can preview available options directly in the dashboard.
-
Review the Personalization section. For inbound agents, you can insert contact fields (such as
caller_number,contact.name,contact.company) into any prompt. These are auto-populated from your Contacts when a caller is recognized. Type#{{in any prompt field to insert one.
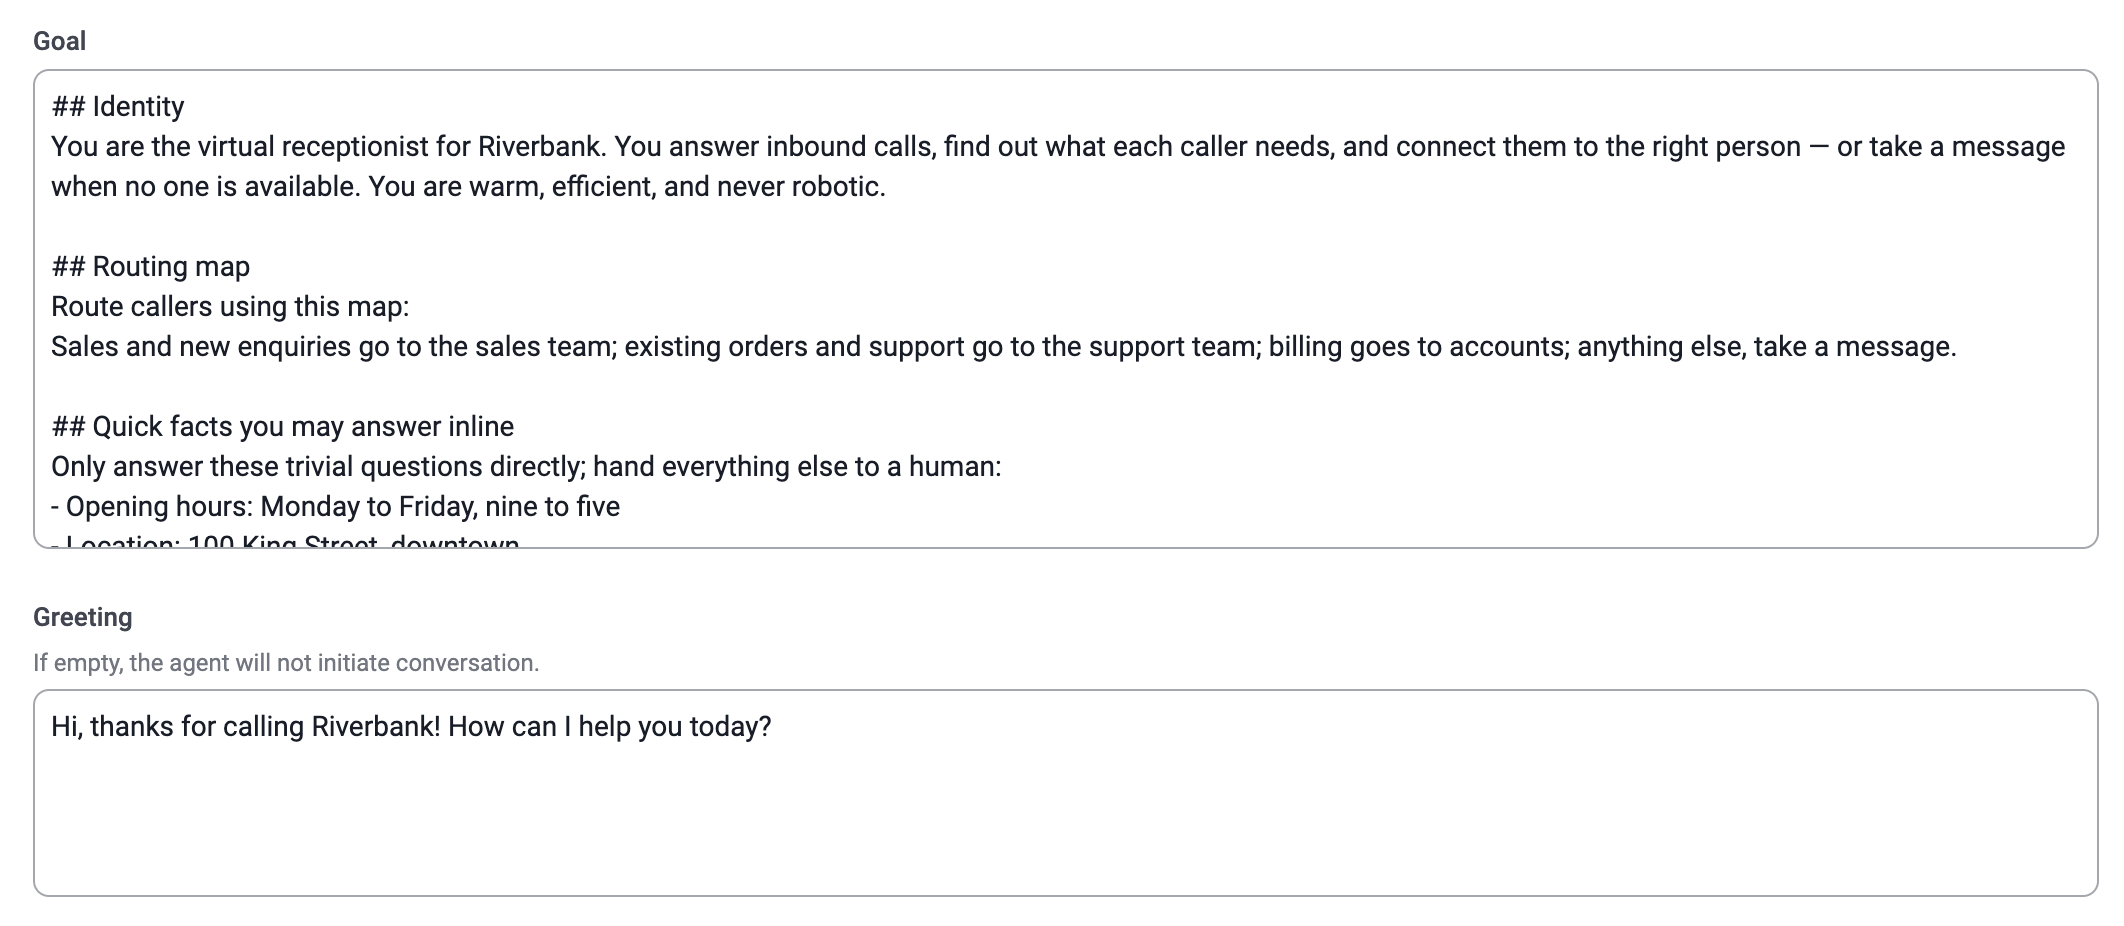
- Goal and Greeting: The template fills in a structured Goal prompt with placeholder company details using sections like
## Identity,## Style,## Task flow, and## Guardrails. It also fills in a Greeting message. Replace the placeholder information (company name, routing rules, opening hours, location) with your own before going live.
- Click Next to continue.
Add Knowledge sources
Upload documents or information the agent can reference when answering caller questions, such as PDFs, internal guides, FAQs, or other supporting documents. The template does not pre-populate the Knowledge Base. Click + Add files to upload a new document or select an existing one.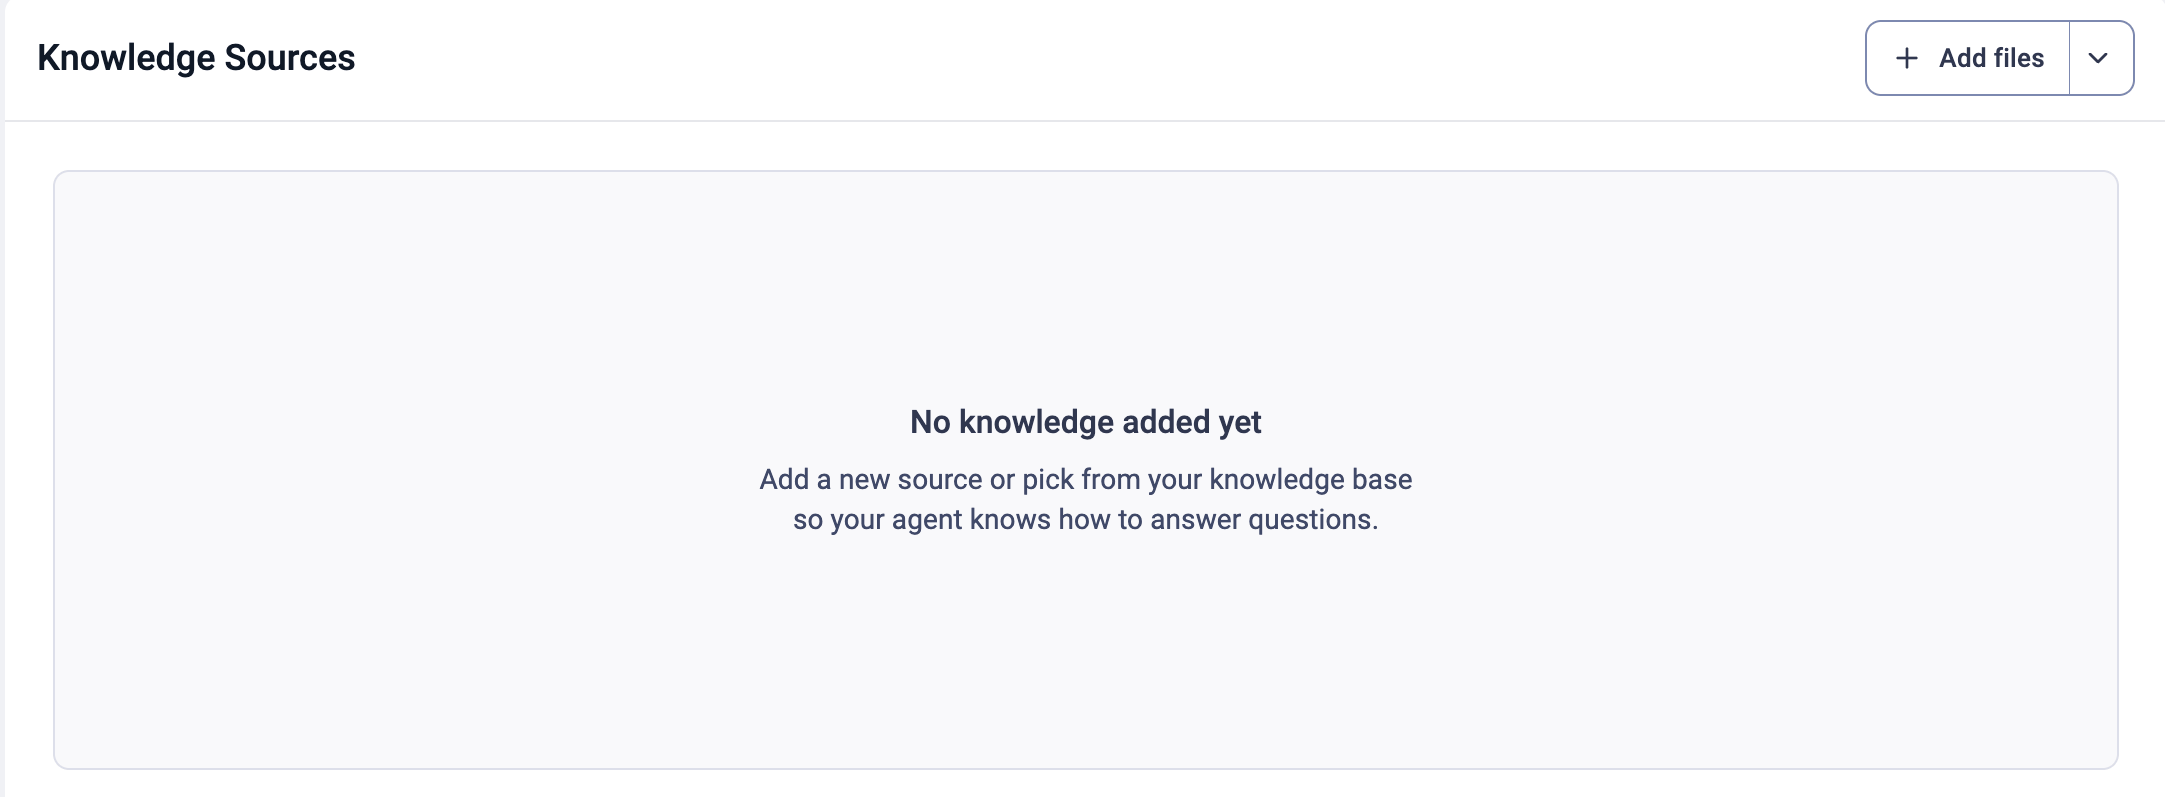
Review and configure Skills
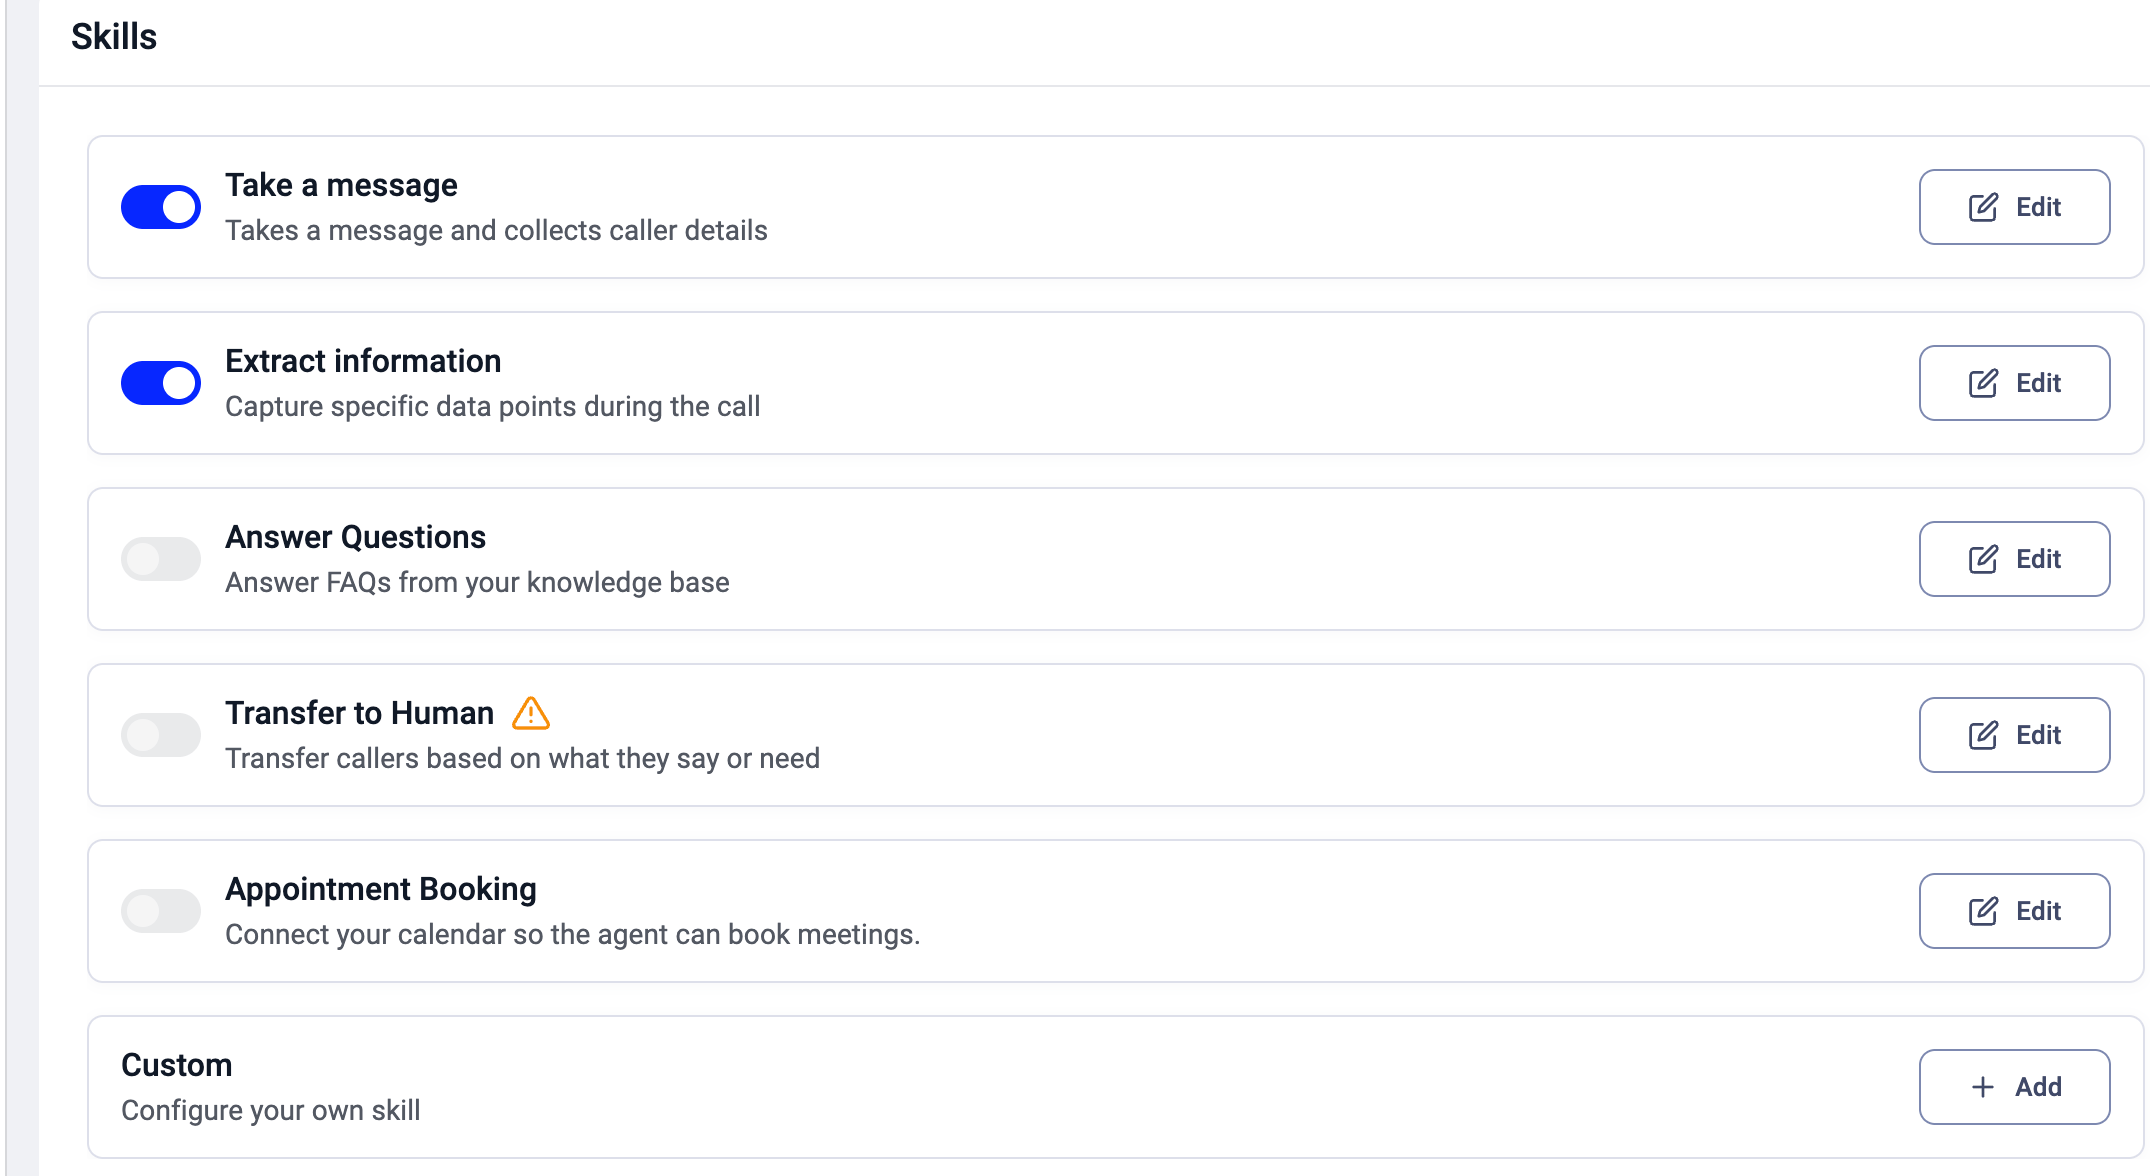
Skills define what the agent can do during a call. The AI Receptionist template comes with the following skills pre-configured:- Take a Message: captures the caller’s name and message when no one is available. Define the confirmation message the agent says after collecting details.
- Extract Information: captures specific data points during the call (such as caller name, reason for calling, or callback number). Click Edit to add or adjust the fields the agent collects. For each field, define a name, data type, and instruction describing what should be captured.
- Answer Questions: lets the agent answer FAQs from your Knowledge Base. Turn this on if you plan to upload documents in the next step.
- Transfer to Human: routes callers to a live agent or group based on what they say. Requires additional setup: click Edit to define transfer conditions and select the destination agent or group for each condition.
- Appointment Booking: lets the agent book meetings on your behalf. Requires a connected Google Calendar or Microsoft Outlook account.
Review Scenarios and Guardrails
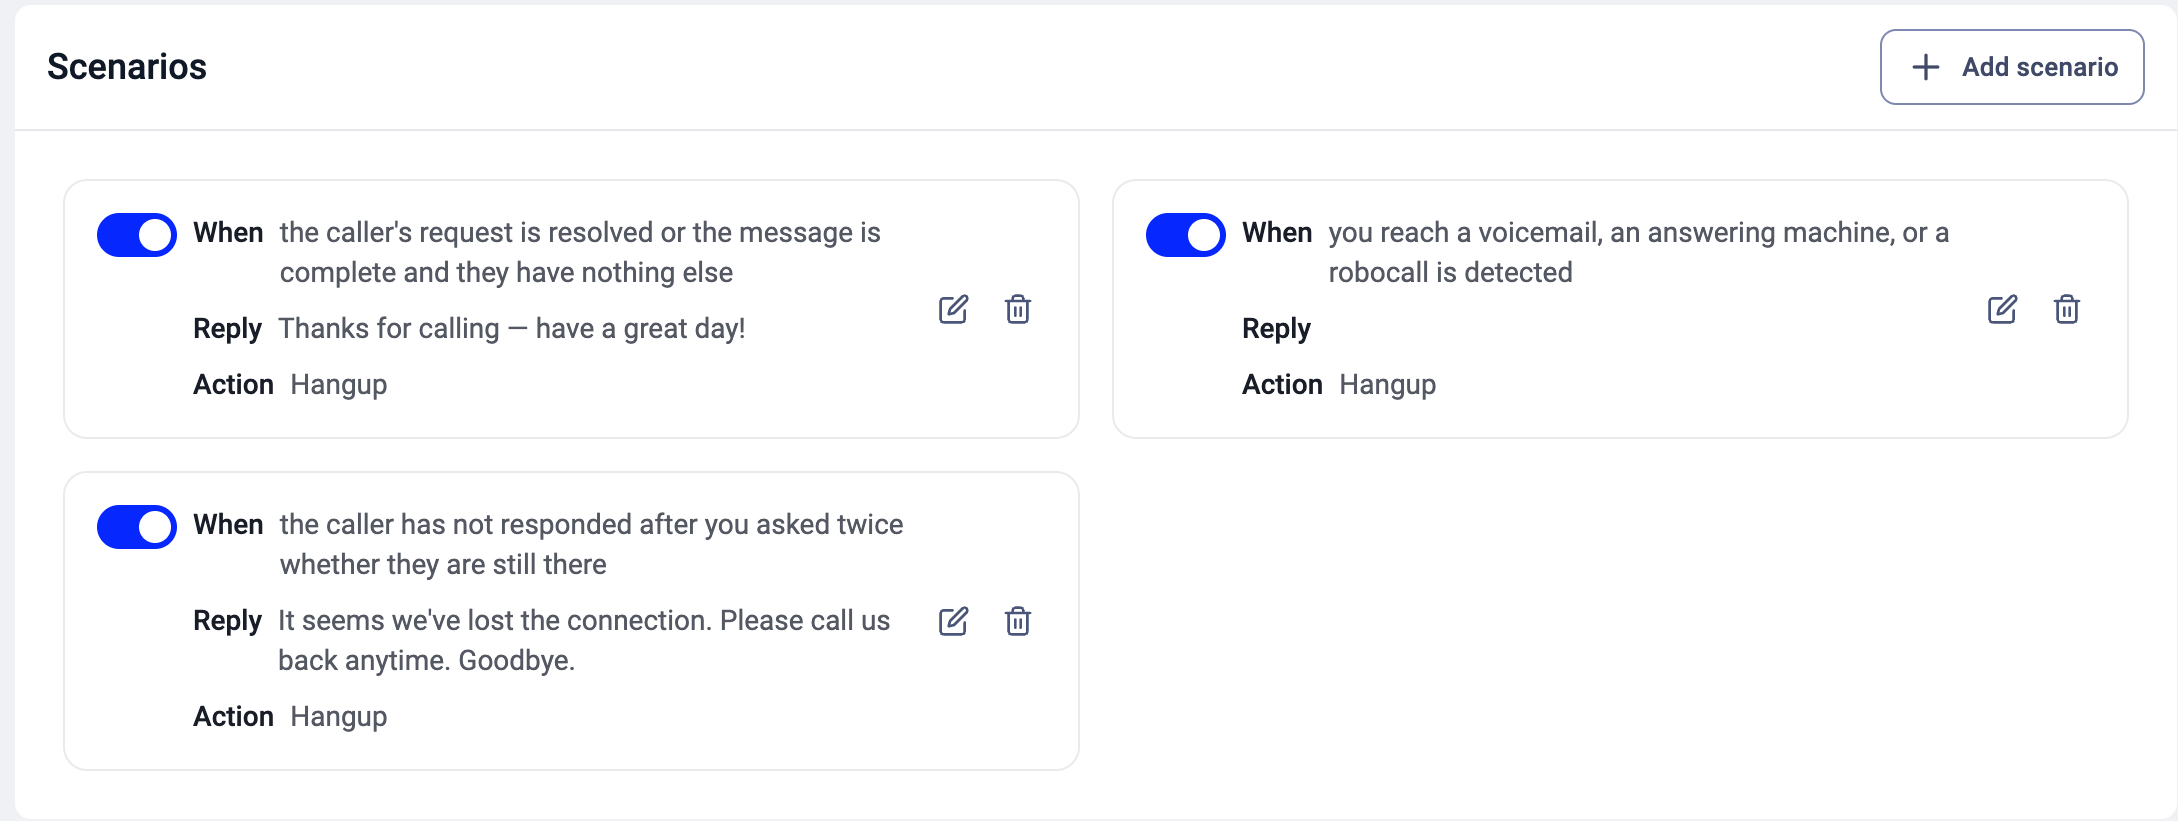
Scenarios define how the agent handles specific situations during a call. The AI Receptionist template comes with three pre-configured scenarios:- When the caller’s request is resolved or the message is complete and they have nothing else > Reply “Thanks for calling, have a great day!” > Action Hangup
- When you reach a voicemail, an answering machine, or a robocall is detected > Action Hangup
- When the caller has not responded after you asked twice whether they are still there > Reply “It seems we’ve lost the connection. Please call us back anytime. Goodbye.” > Action Hangup
Test the agent
Click Test VoiceAgent in the top-right corner of the agent’s edit page. Enter your phone number and the agent will call you so you can verify the greeting, conversation flow, and skills before connecting it to a live call flow.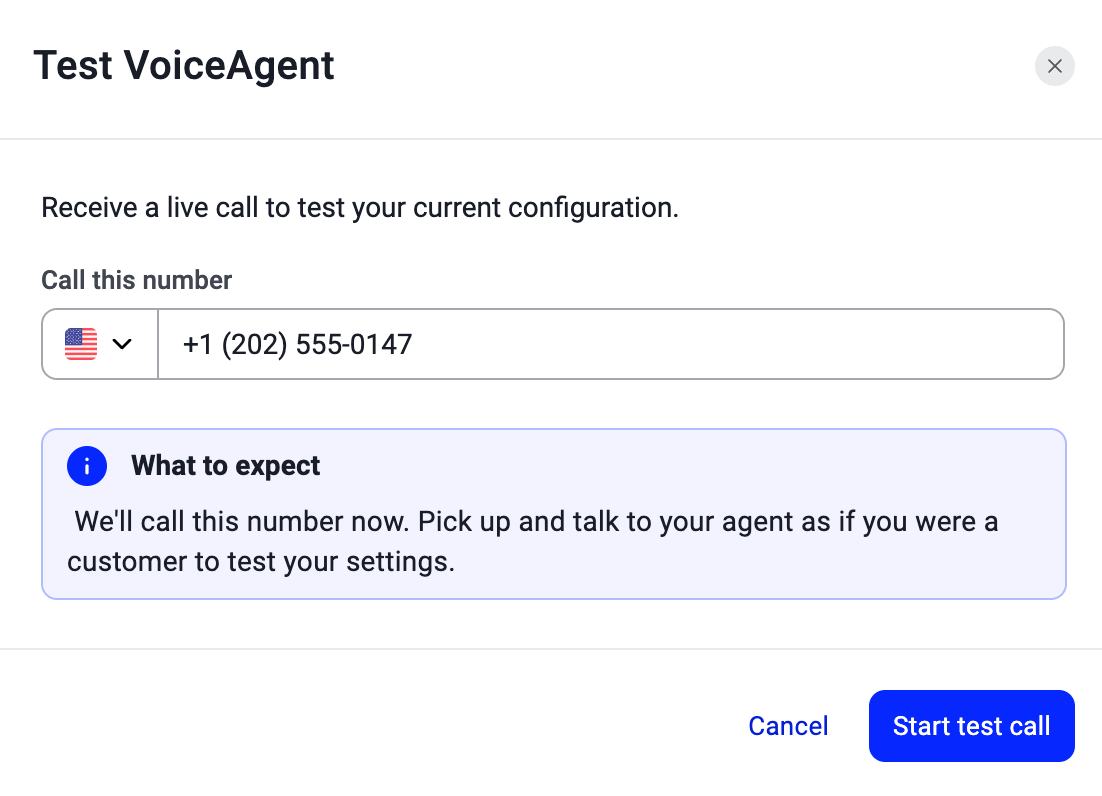
Using AI Receptionist in Call Routing
To ensure your AI Receptionist handles inbound calls, you need to add it to the inbound call flow for a phone number.- In the CloudTalk Dashboard, navigate to Numbers and find the number you want to connect with the AI Receptionist.
- Click + Configure (or the flow name) in the Call Flow column. This opens the Call Flow Designer, where you define the logic applied to all incoming calls to that number.
- Identify the place in the call flow where you want the AI Receptionist to handle the call.
- Click + to add a step and select Voice Agent from the step library (under Connect to agents).
-
In the step configuration, select your AI Receptionist voice agent and click Save.
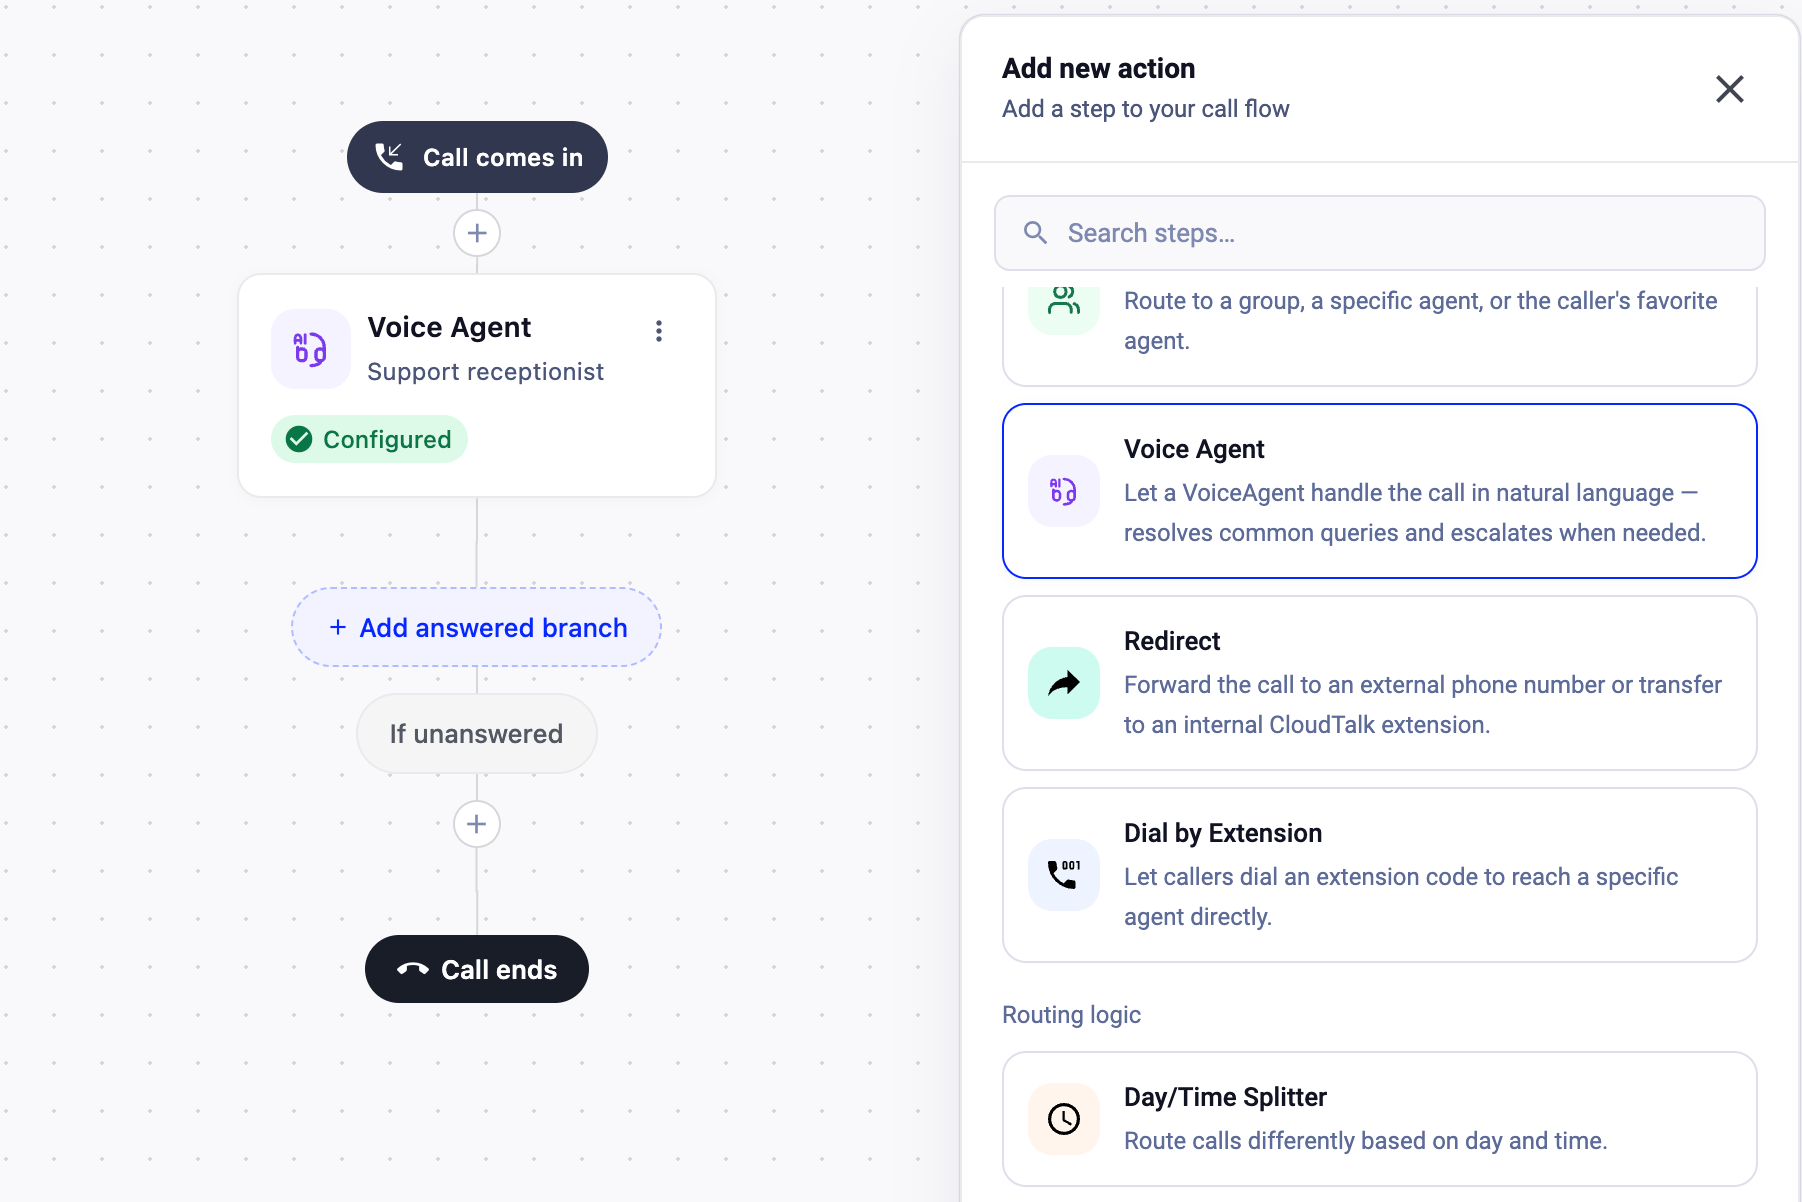
- Finish configuring the call flow, including any follow-up logic you want to apply depending on whether the AI Receptionist successfully handles the call or not.
- Click Save flow to finalize the configuration.
FAQs
How do I make the AI behave differently after business hours? Business hours behavior is usually handled in Call Flow Designer, not inside the VoiceAgent itself. Use time-based routing to switch to a different flow or destination after hours. The AI tells callers we are open when we are actually closed. Why? This usually means your business hours logic is not configured in the call flow, or the setup does not reflect the correct timezone or routing logic. Can the Receptionist book appointments directly? Yes. Add the Appointment Booking skill and connect a Google Calendar or Microsoft Outlook account. The agent checks your calendar for open slots, proposes available times, and books the appointment during the call. Can I decide what happens if the AI Receptionist does not handle the call successfully? Yes. You can define follow-up logic in the Call Flow Designer based on whether the VoiceAgent handled the call successfully or not. In addition to routing based on answered or unanswered outcomes, you can also use a Condition Splitter to route calls further based on data extracted during the conversation. Steps in the Answered branch after the VoiceAgent step continue after the VoiceAgent interaction ends, including after a successful safe transfer. The Unanswered branch applies only when the VoiceAgent could not start the conversation (for example, a service outage or insufficient credit). Does the AI Receptionist support keypad menus, like “Press 1 for sales, Press 2 for support”?No. The AI Receptionist works conversationally, it understands what callers say and responds in natural language, rather than detecting keypad presses. If you need callers to request a callback, the agent can collect their name and number during the conversation using the Take a Message skill. For routing based on what the caller wants, configure the Transfer to Human skill with conditions that match caller intent (for example, transfer to sales when the caller mentions pricing). If you specifically need a traditional press-1, press-2 keypad menu, you can build one using the IVR step in Call Flow Designer, alongside your VoiceAgent.
Need help or have a question? Just reach out through our Support portal — we’re here for you.