

Learn how to start a session, work your queue, set dispositions, use call controls, and end your session in the AI Sales Dialer.
When you join a campaign, the AI Sales Dialer feeds you contacts, handles the dialing, and keeps score so you can focus on the conversation.
Opening the new dialer
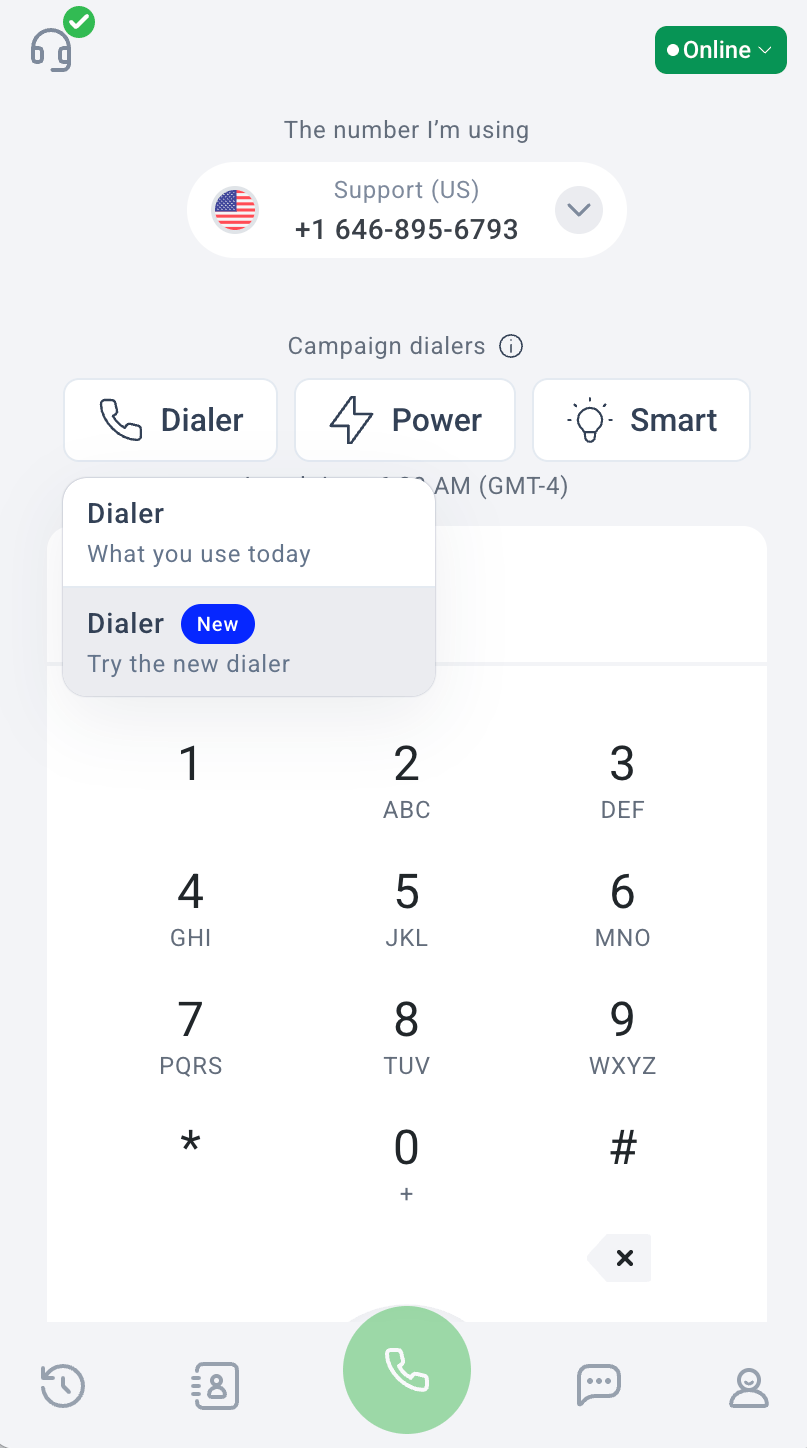
In the CloudTalk Phone app, click Dialer under Campaign dialers. If your account has the new dialer enabled, you’ll see two options:- Dialer: what you use today (legacy).
- Dialer with a New badge and the subtitle “Try the new dialer”: the new AI Sales Dialer. Click this one.
Starting a session
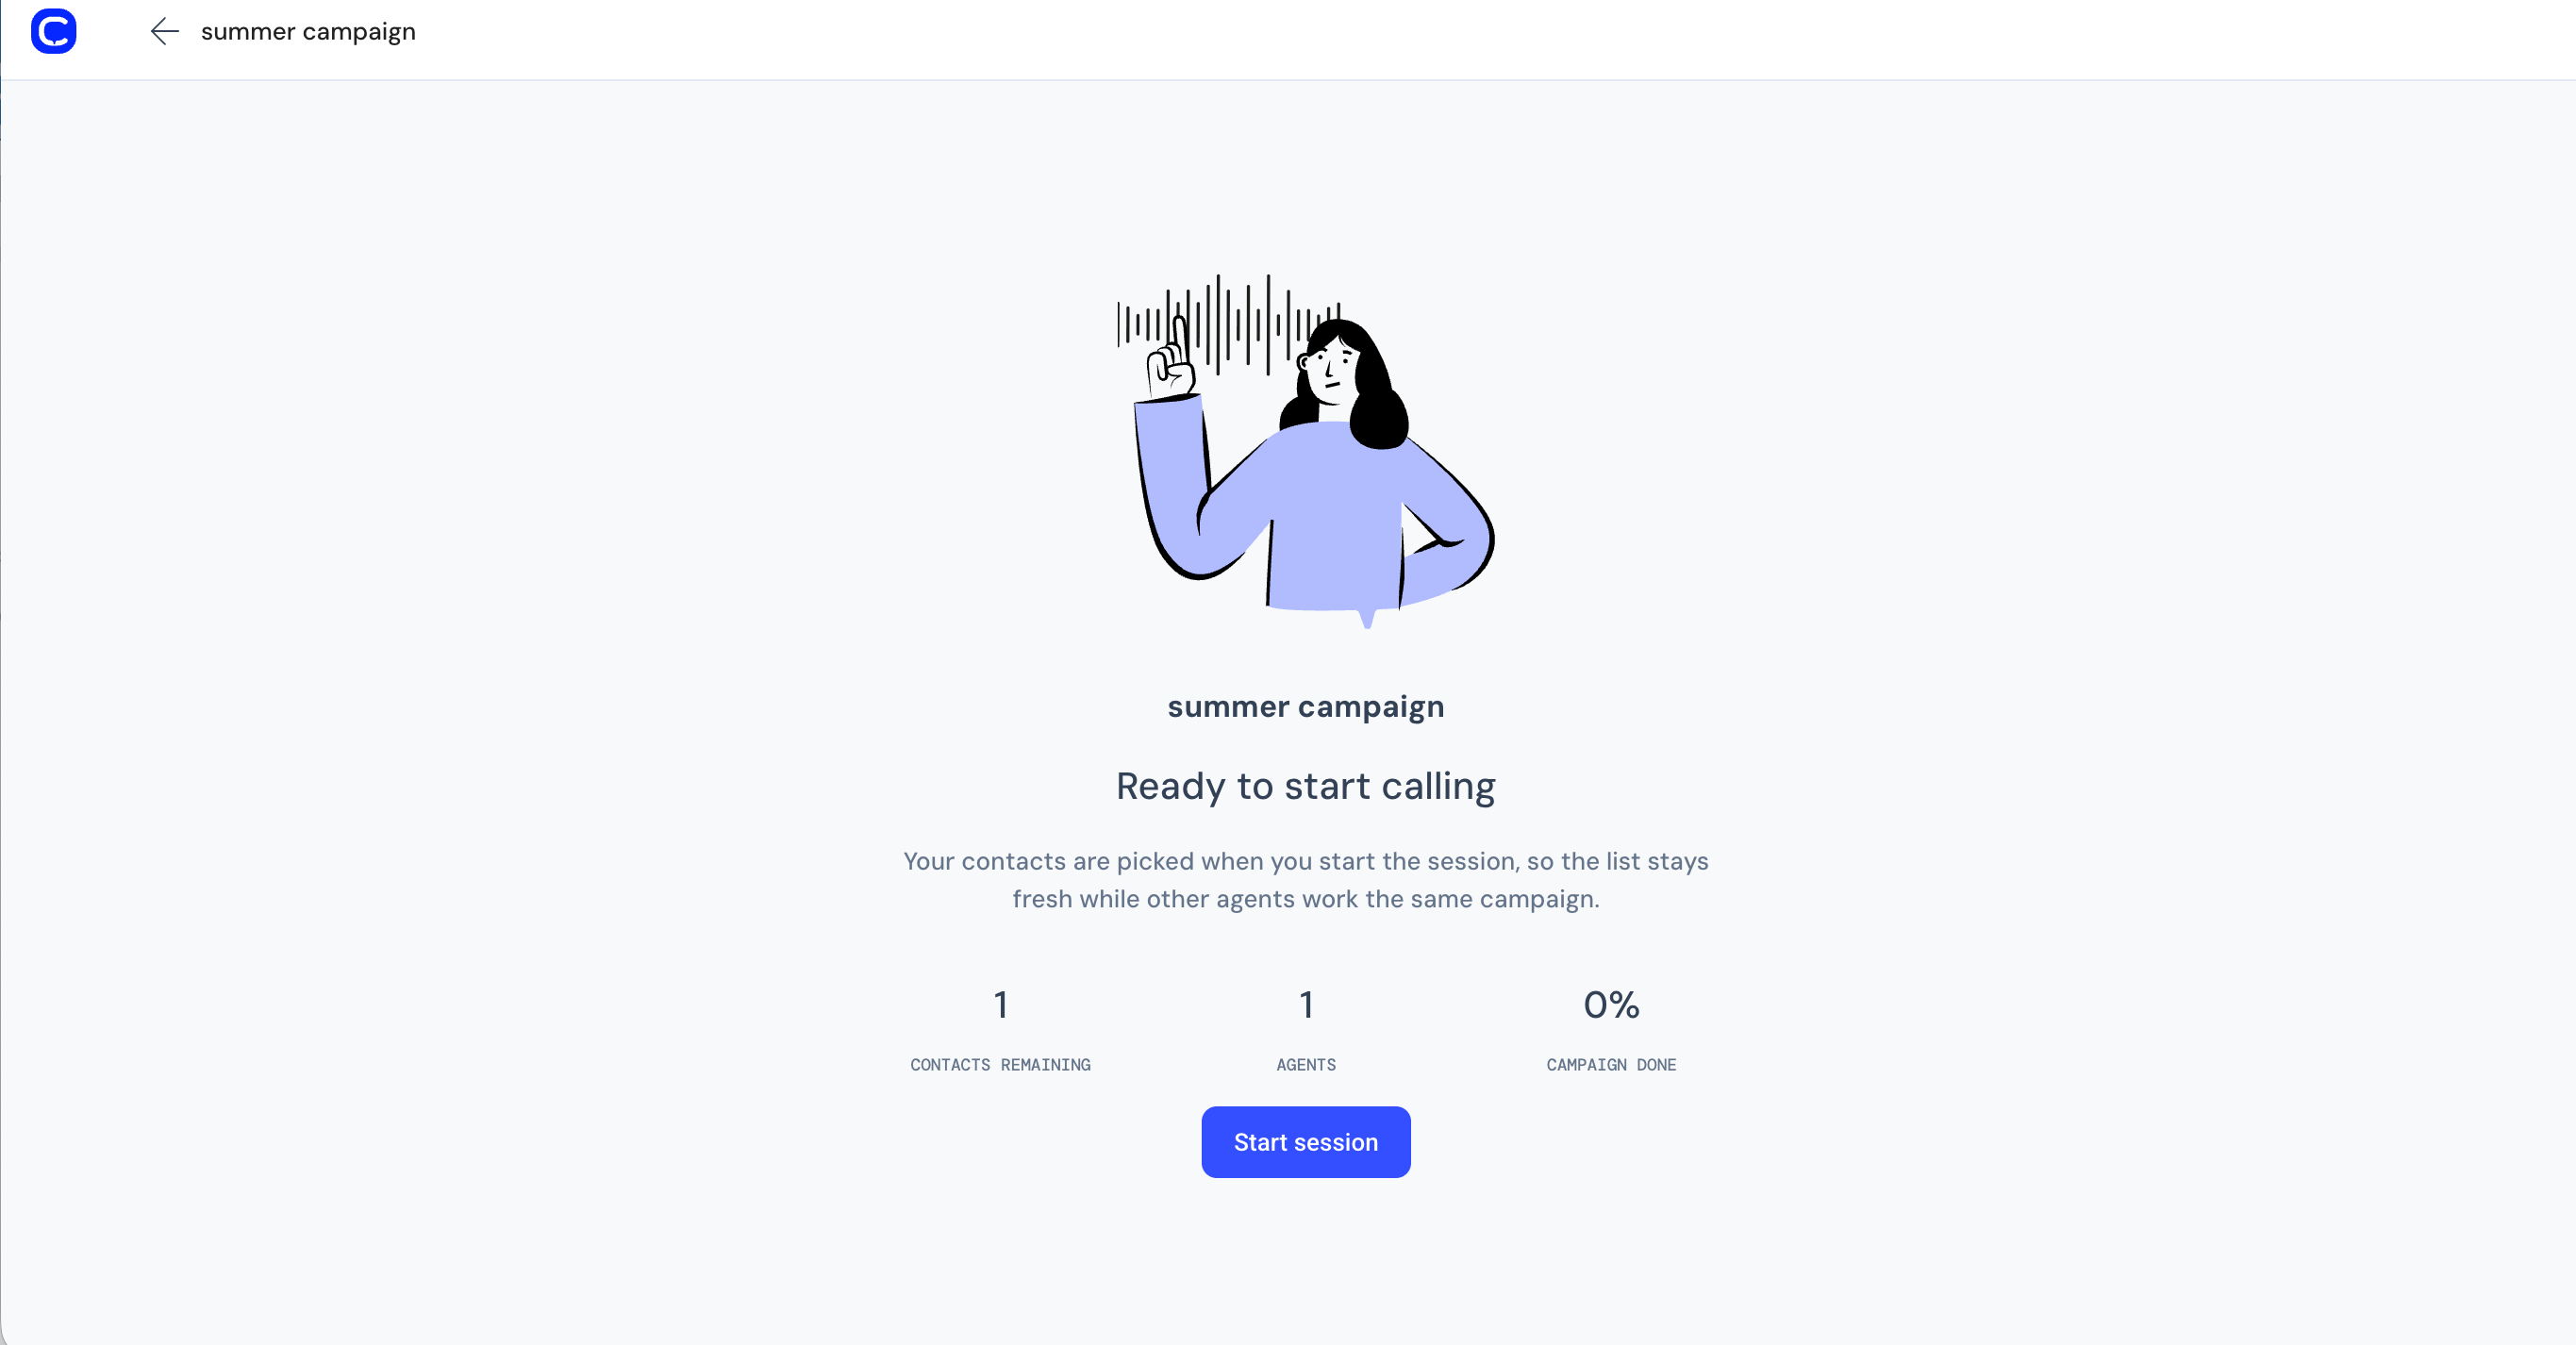
Pick a campaign from your list. You’ll see a pre-session screen with:- Contacts remaining: how many contacts are left to call.
- Agents: how many agents are assigned to this campaign.
- Campaign done: what percentage of the list has been worked.
The dialer screen
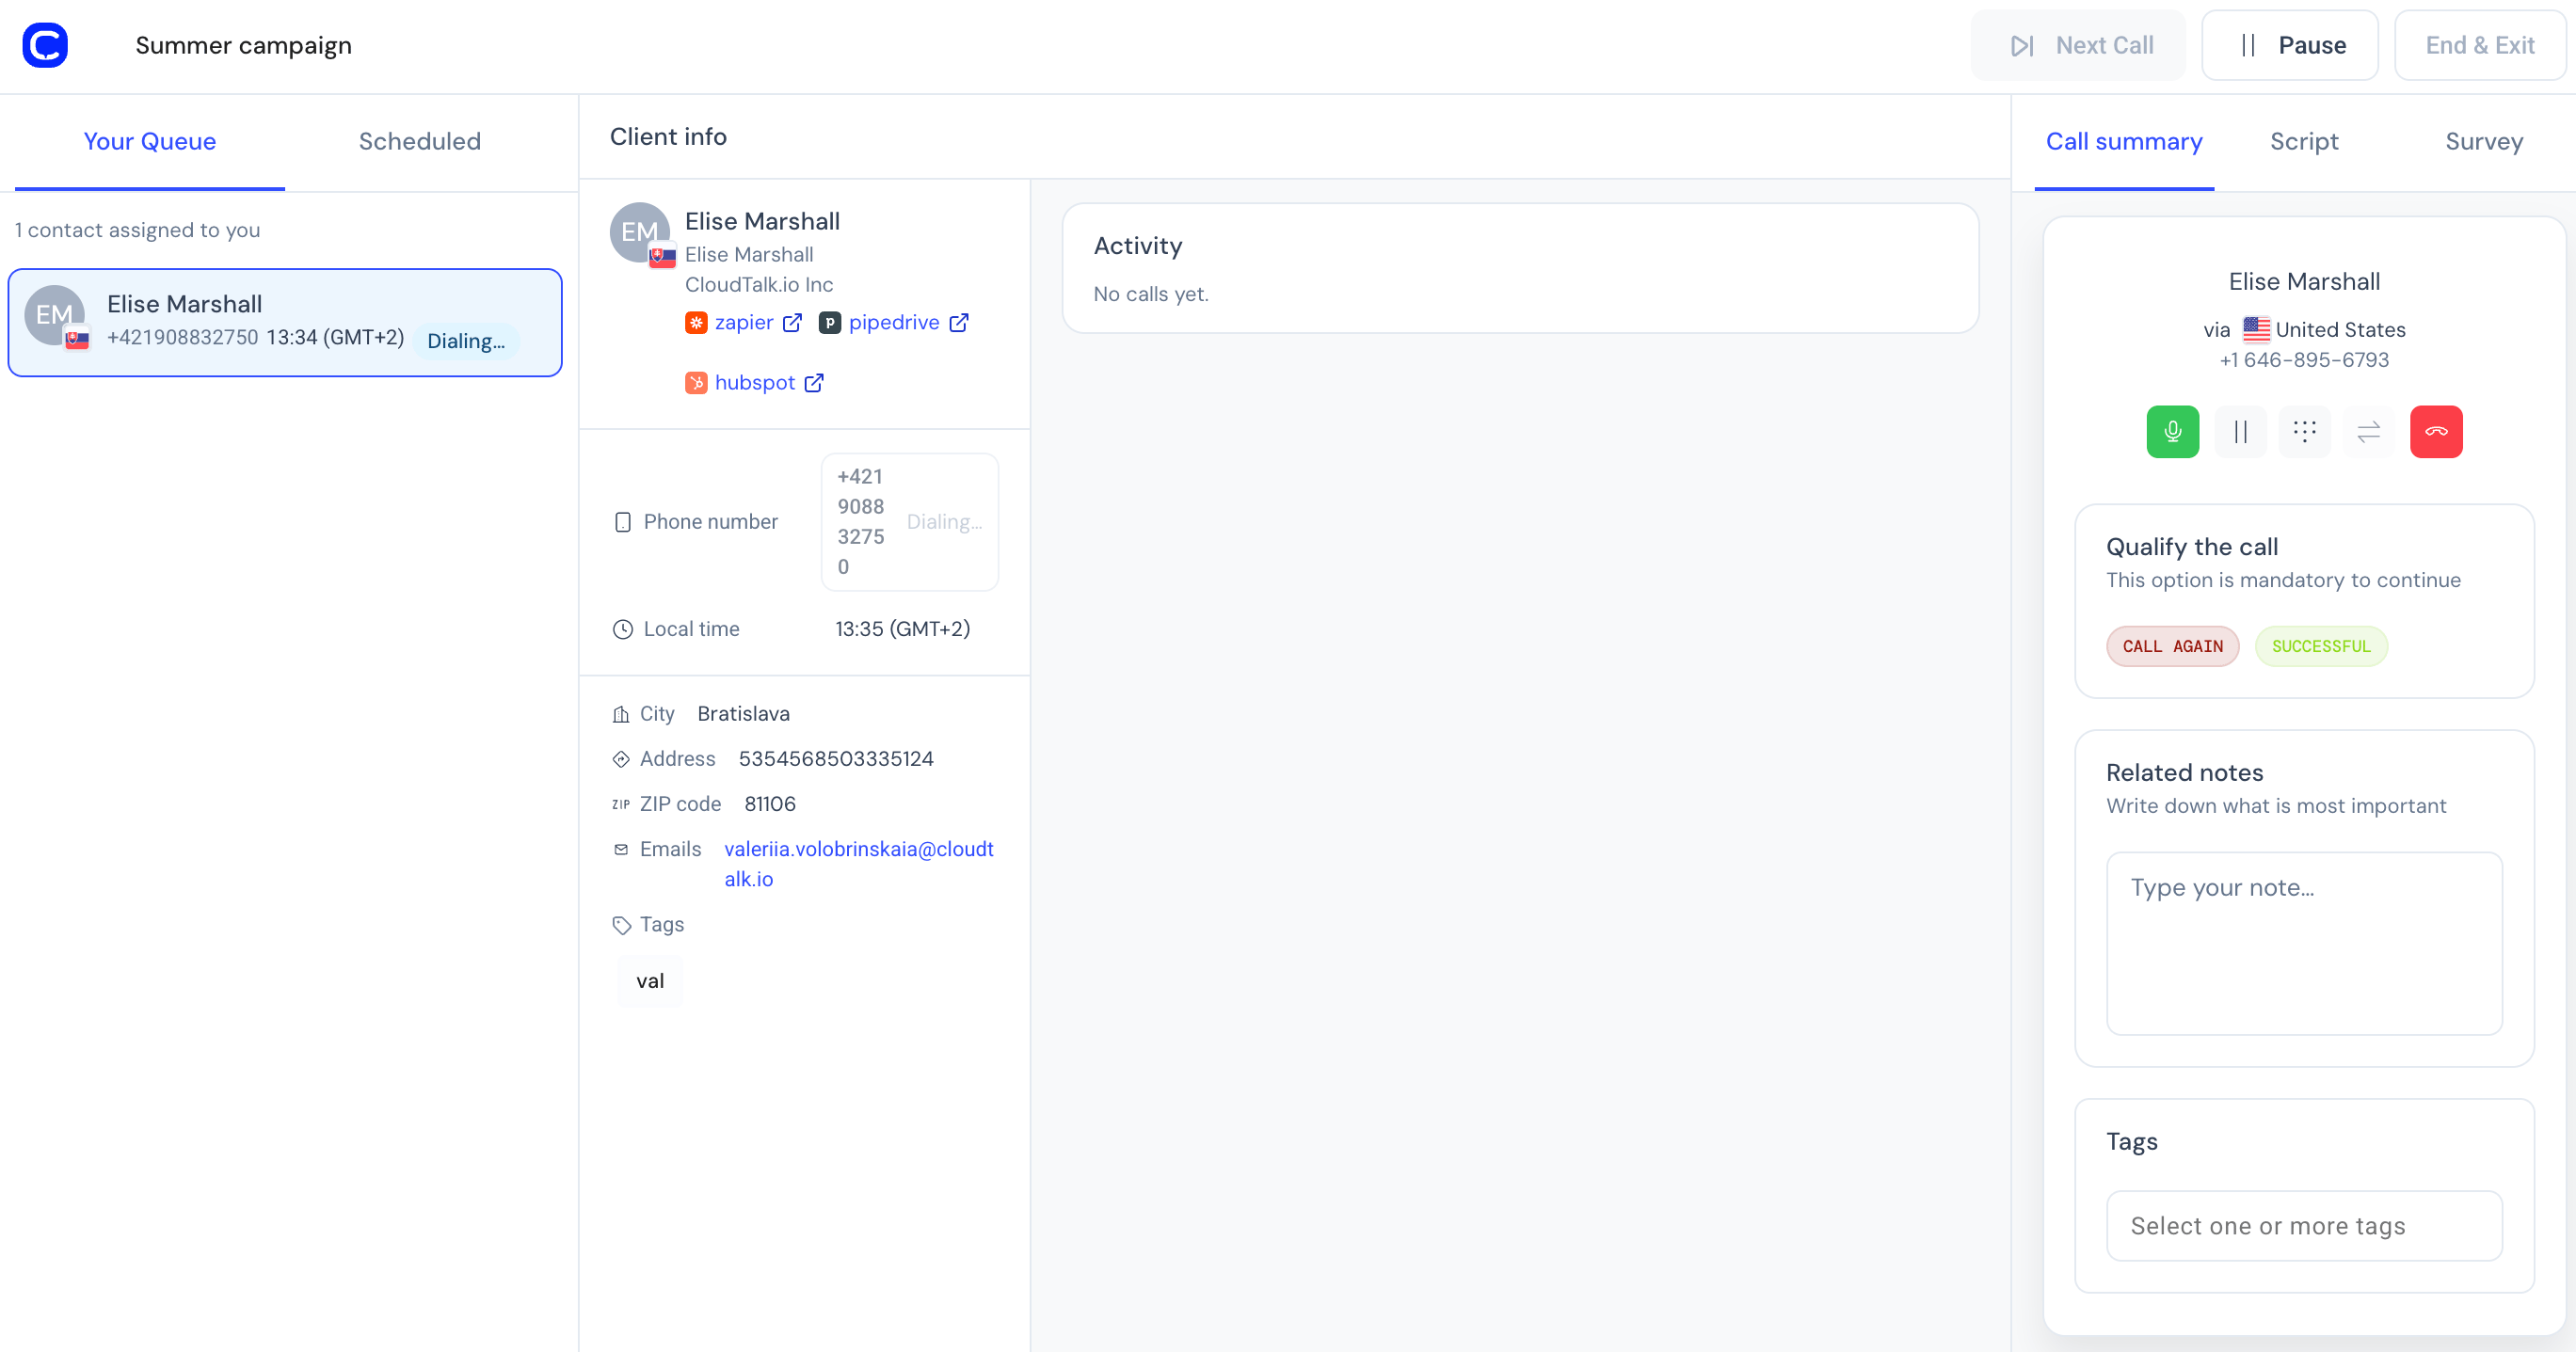
Your session is split into three areas:- Your Queue (left). The contacts assigned to you, in the order they’ll be dialed. You also have a Scheduled tab for contacts with future callbacks. The count at the top tells you how many contacts are assigned to you. See How contacts are prioritized for how the order is decided.
- Client info (center). When you select a contact or start dialing, this panel shows their details: name, phone number, local time, city, address, email, tags, and links to connected CRMs (Zapier, Pipedrive, HubSpot, etc.). An Activity section shows their past call history on this campaign, including AI insights when Conversational Intelligence is enabled.
-
Call summary (right). Three tabs sit here:
- Call summary: during a call, shows the contact name, outbound number, call timer, recording indicator, and call controls. After the call, shows the number dialed, outcome (Answered/Missed), and duration.
- Script: the campaign’s call script, visible during the call so you can follow it on screen.
- Survey: the campaign’s survey form. Fill it in during or after the call and click Submit survey.
Placing a call
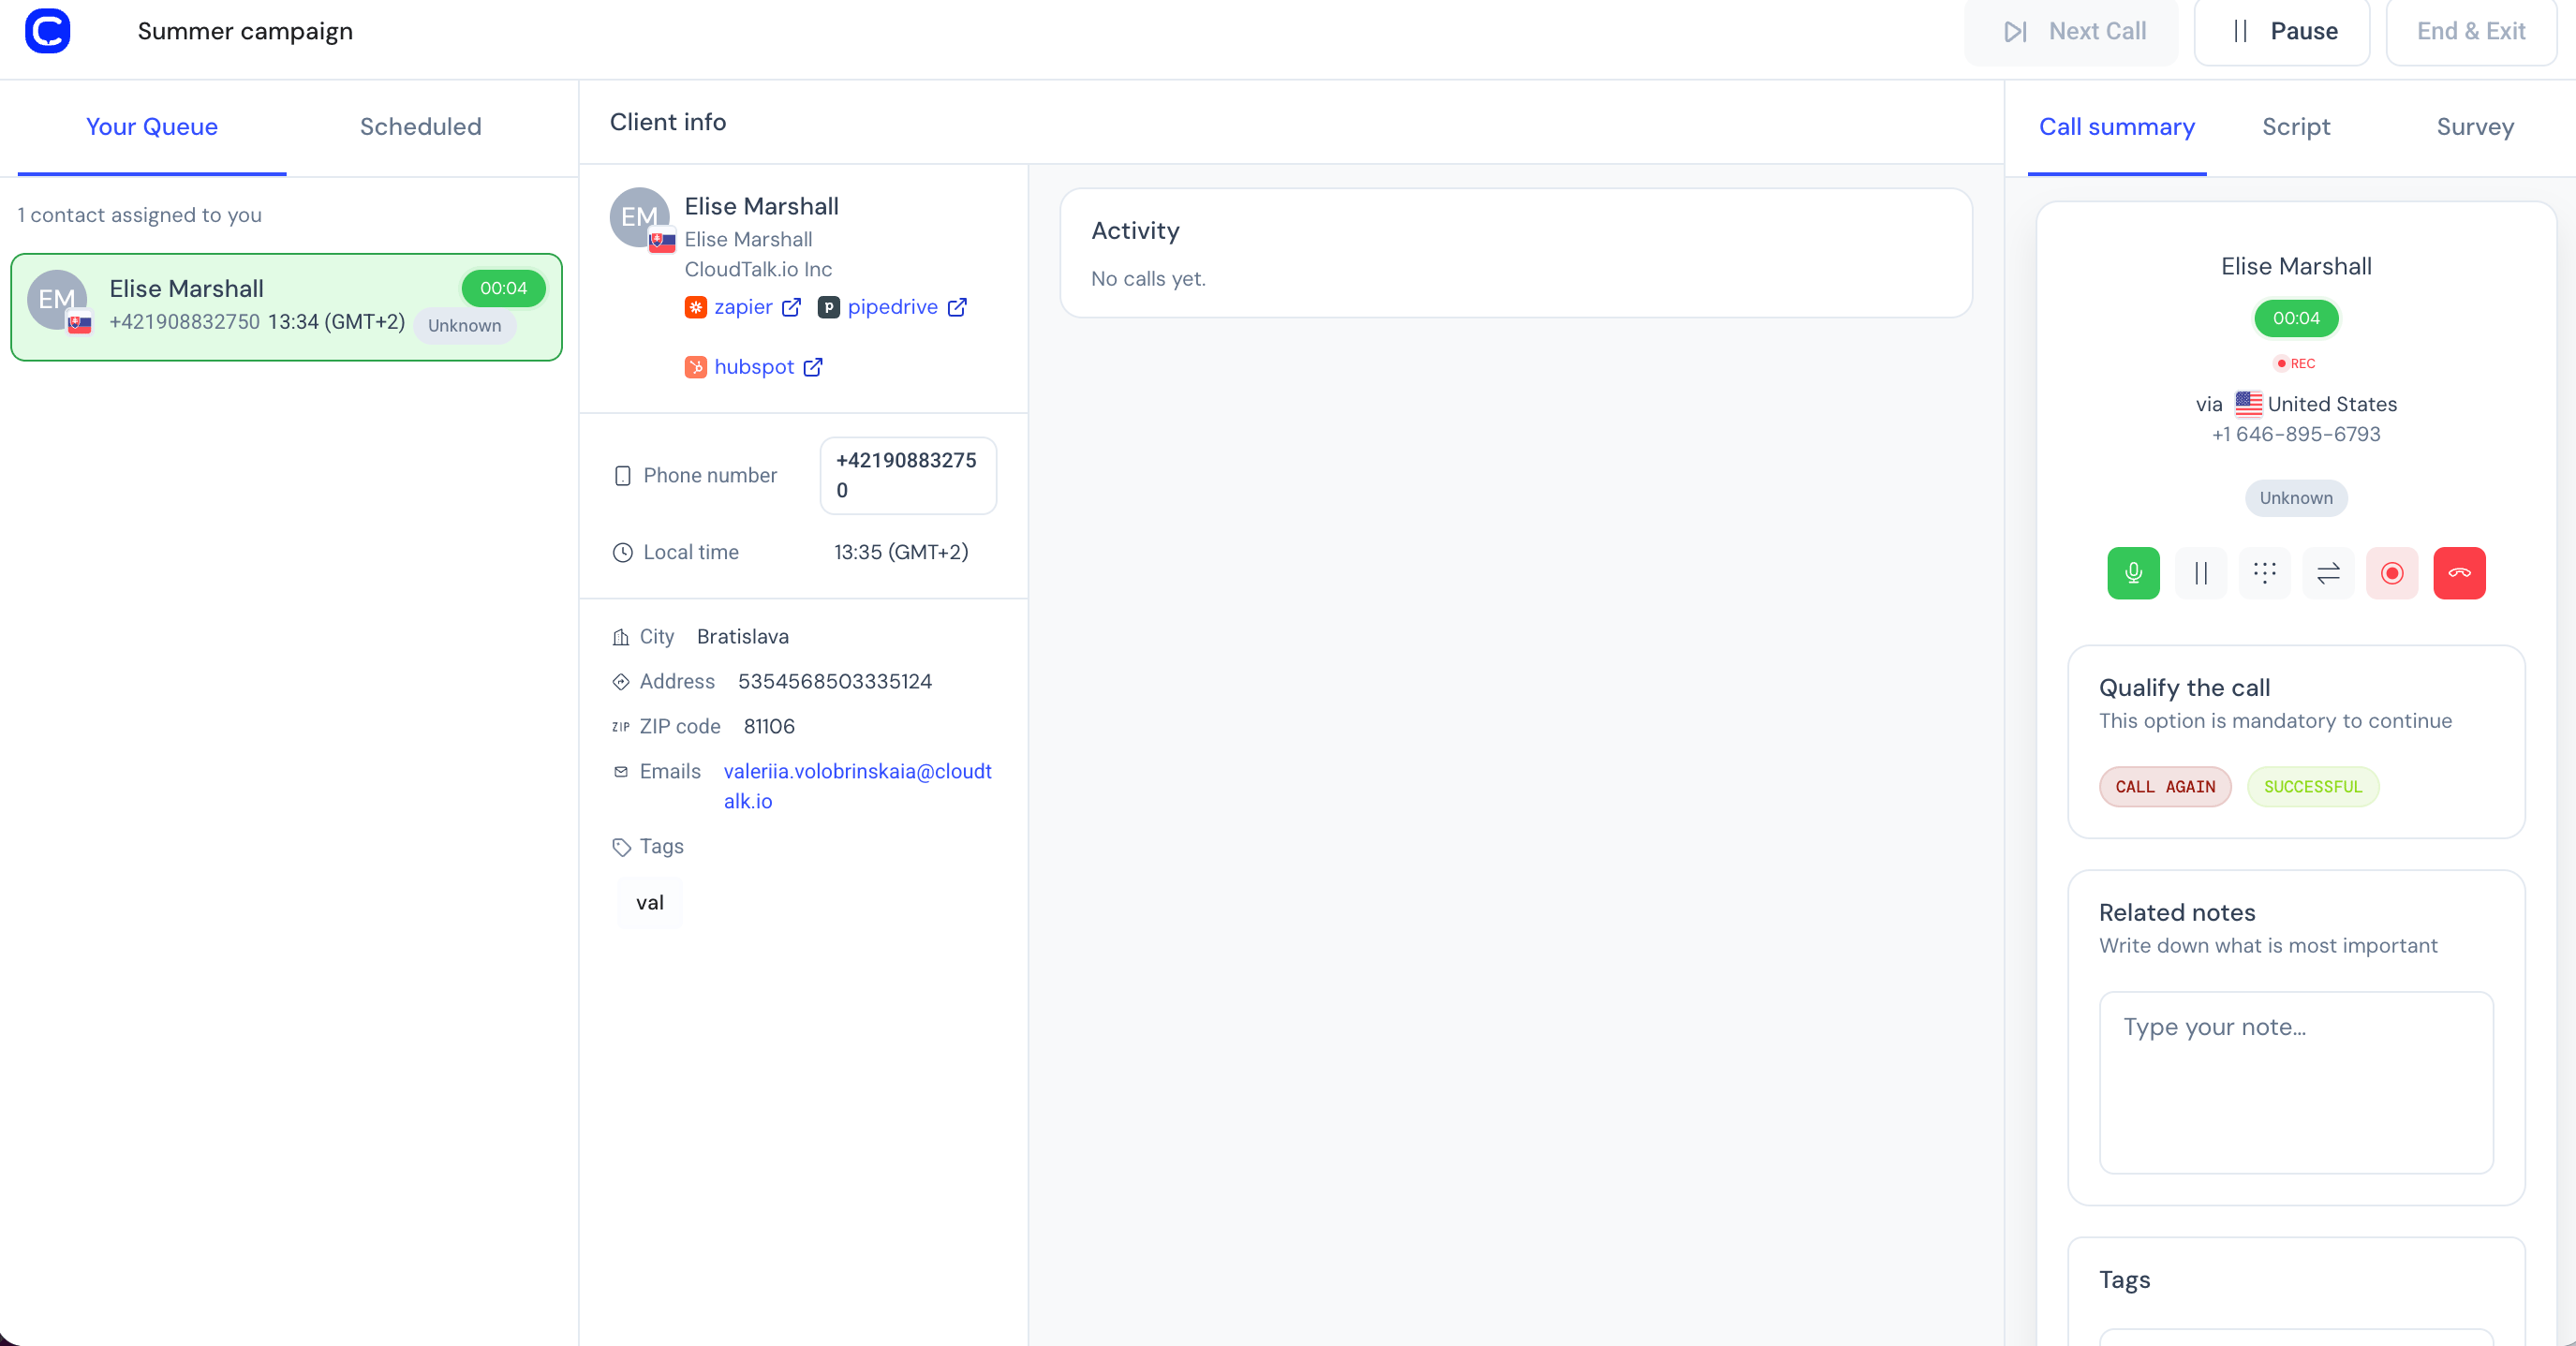
Click Start dialing to dial the first contact. While the call is connecting you’ll see “Dialing…” on the contact in your queue and in the Client info panel. Once connected, the Call summary panel shows:- A call timer (green) counting up.
- A REC indicator if recording is active.
- Call controls: mute, hold, keypad, transfer, voicemail drop, record, and hang up.
Setting a disposition
After every call, you must record the outcome before the dialer moves you forward. The Qualify the call section appears in the Call summary panel with the label “This option is mandatory to continue.” Pick a disposition chip (e.g., CALL AGAIN, SUCCESSFUL, or whichever outcomes your admin configured for this campaign). See Dispositions and outcomes. After the call ends, the Call summary also shows:- Number dialed
- Outcome (e.g., Answered)
- Duration of the call
Notes and tags
Related notes. Below the disposition chips, there’s a “Write down what is most important” note field. Type your note and it saves automatically when you click away. Notes are attached to the call and visible the next time anyone opens this contact’s history. Tags. Below the notes, a “Select one or more tags” field lets you add call tags. These are for your own categorization and are separate from dispositions.Call controls
During a live call, the Call summary panel shows these controls:
Transfer a call. To hand a live call to a colleague or external number, click the Transfer button (arrows icon) in the call controls. You can choose between a cold transfer (immediate handoff) or a warm transfer (speak privately with the target first). For the full walkthrough, see Call Transfers.
Moving to the next contact
After you set a disposition, click Next Call to dial the next contact. If automatic dialing is enabled on the campaign, a countdown starts and the next call is placed automatically after the wrap-up time. The Next Call button is greyed out while a call is in progress or while you haven’t set a disposition.Pause and resume
Click Pause to take a break. Your held contacts stay assigned to you (they’re not released back to the queue), but no new calls are placed. Click Resume to continue where you left off.Ending a session
Click End & Exit when you’re done. A Session results screen shows your work:
From here you can Start new campaign or Exit to return to the dialer home screen.
Need help or have a question? Just reach out through our Support portal — we’re here for you.