

CloudTalk allows you to create a blacklist of phone numbers to block unwanted calls. In this article, you’ll learn how to add, edit, and remove blacklisted numbers, how to change many numbers at once with a CSV file, and how to manage them using the CloudTalk API.
Blacklist phone numbers in CloudTalk
You can add phone numbers to your Blacklist to prevent unwanted calls. This is useful if you regularly receive calls from:- Bots
- Annoying vendors
- Persistent telemarketers
- Spam callers
How to add a number to the blacklist
-
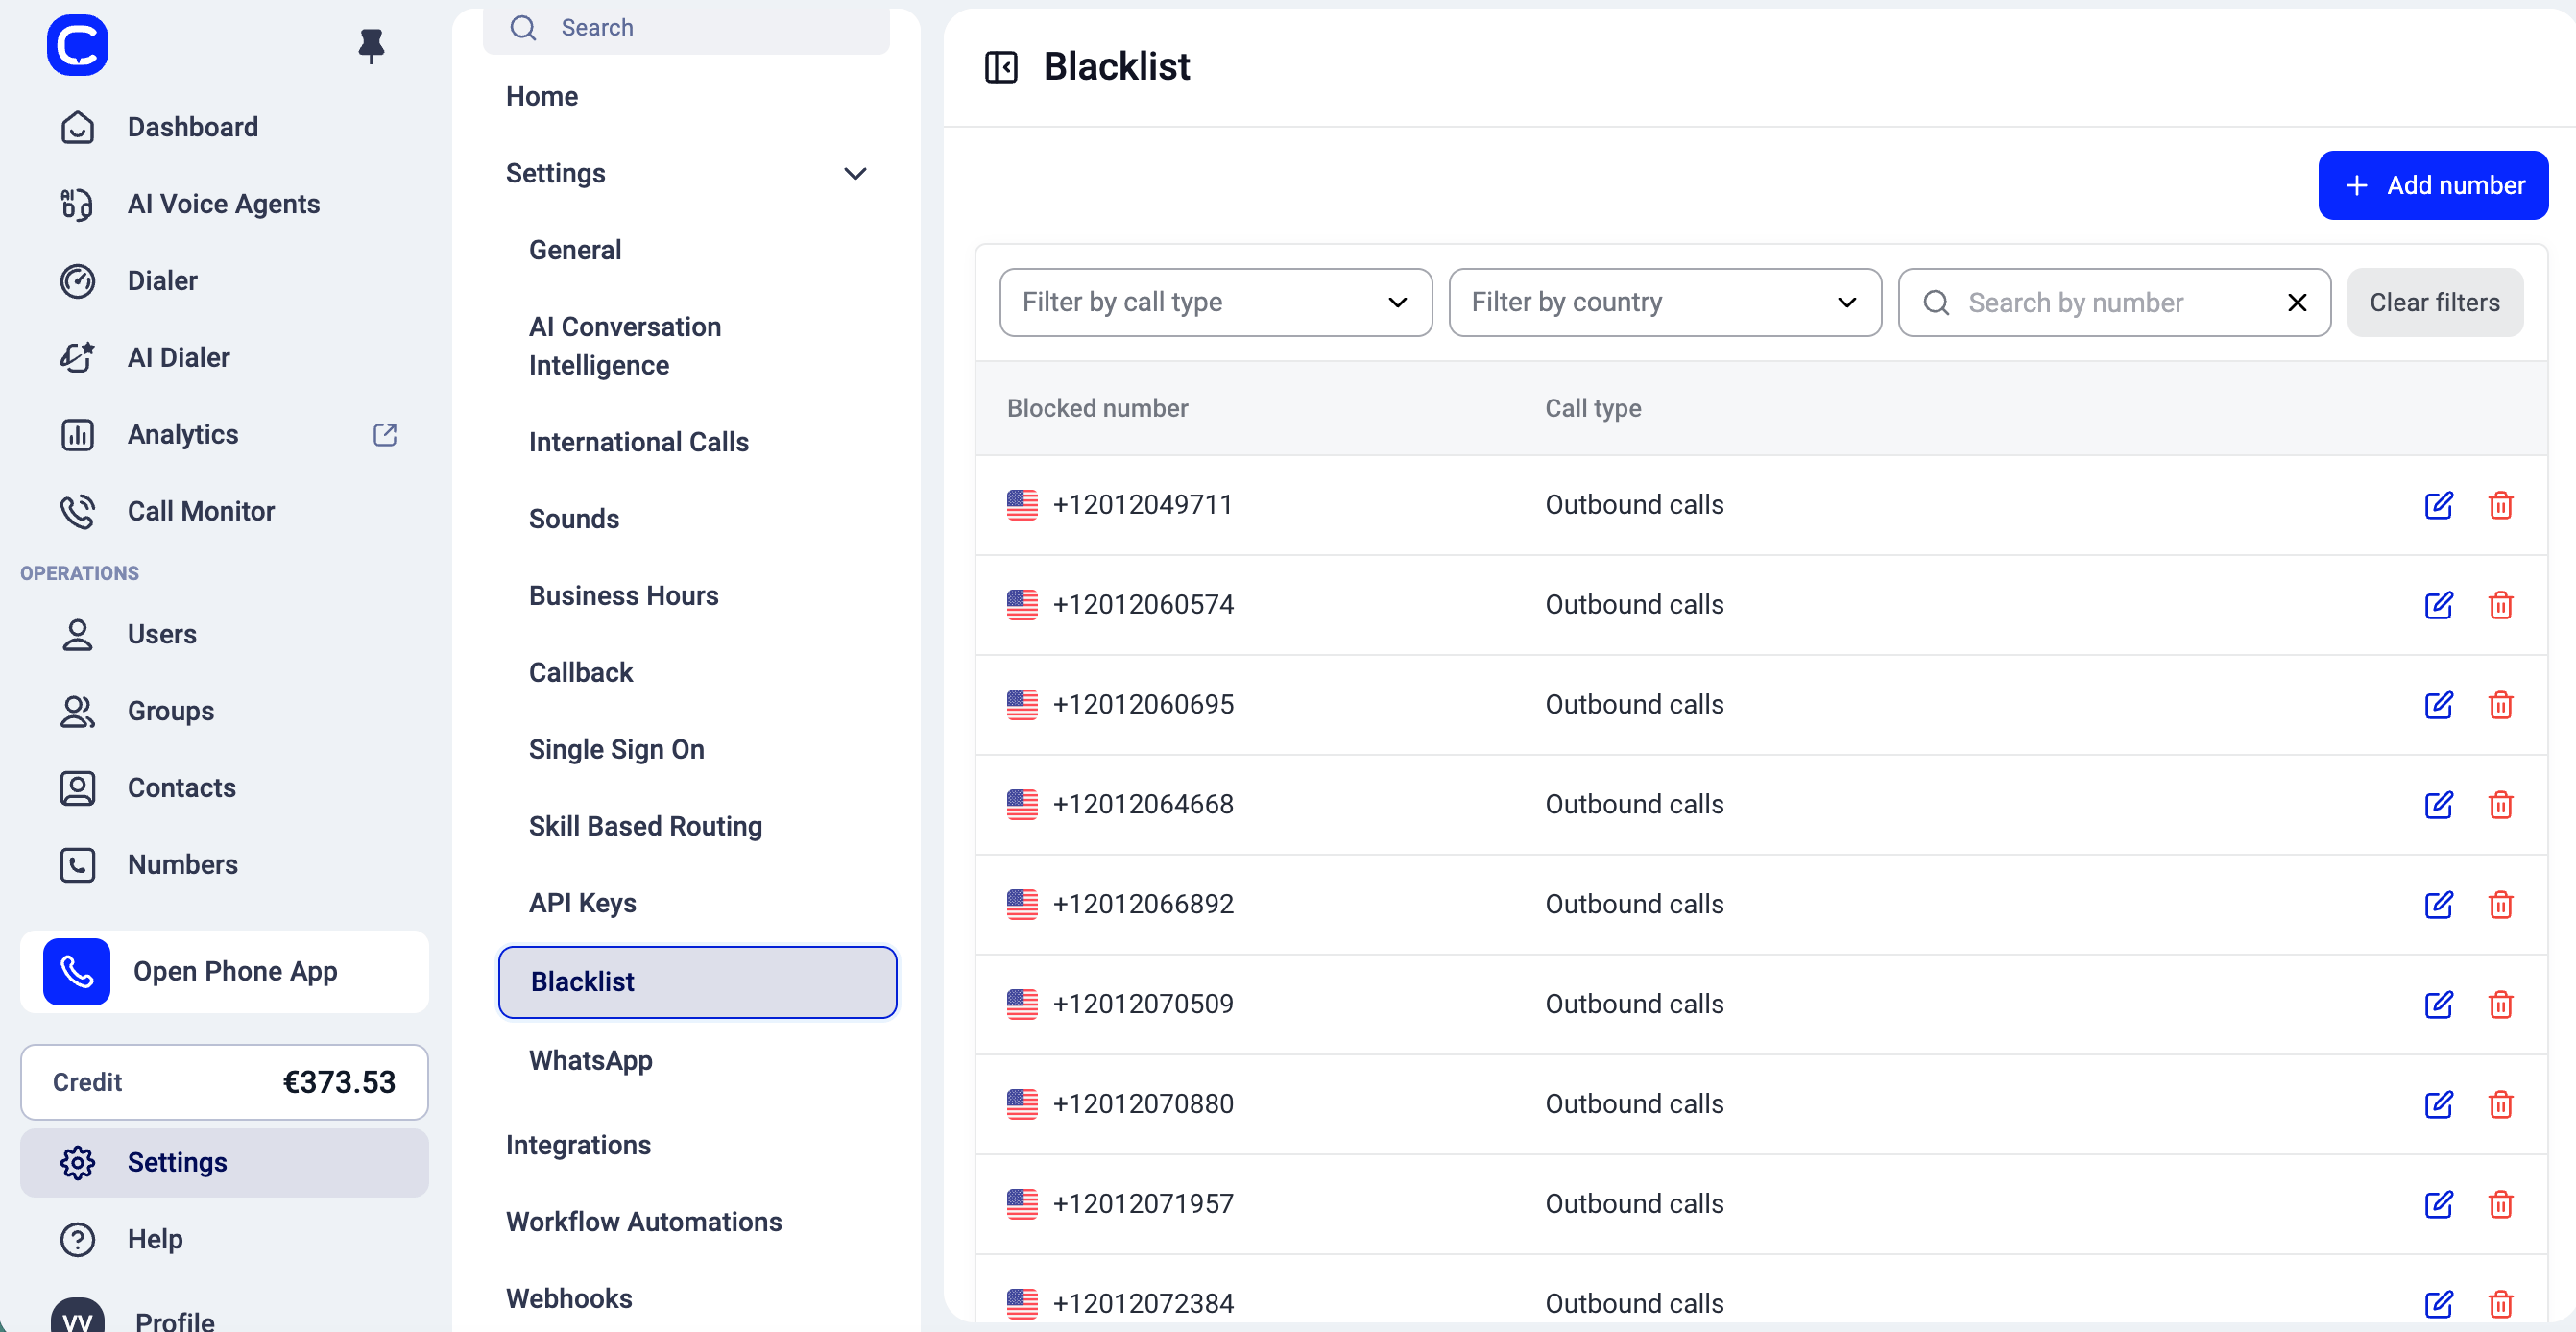
In the Dashboard, go to Settings > Blacklist.
-
Click
Add Number. -
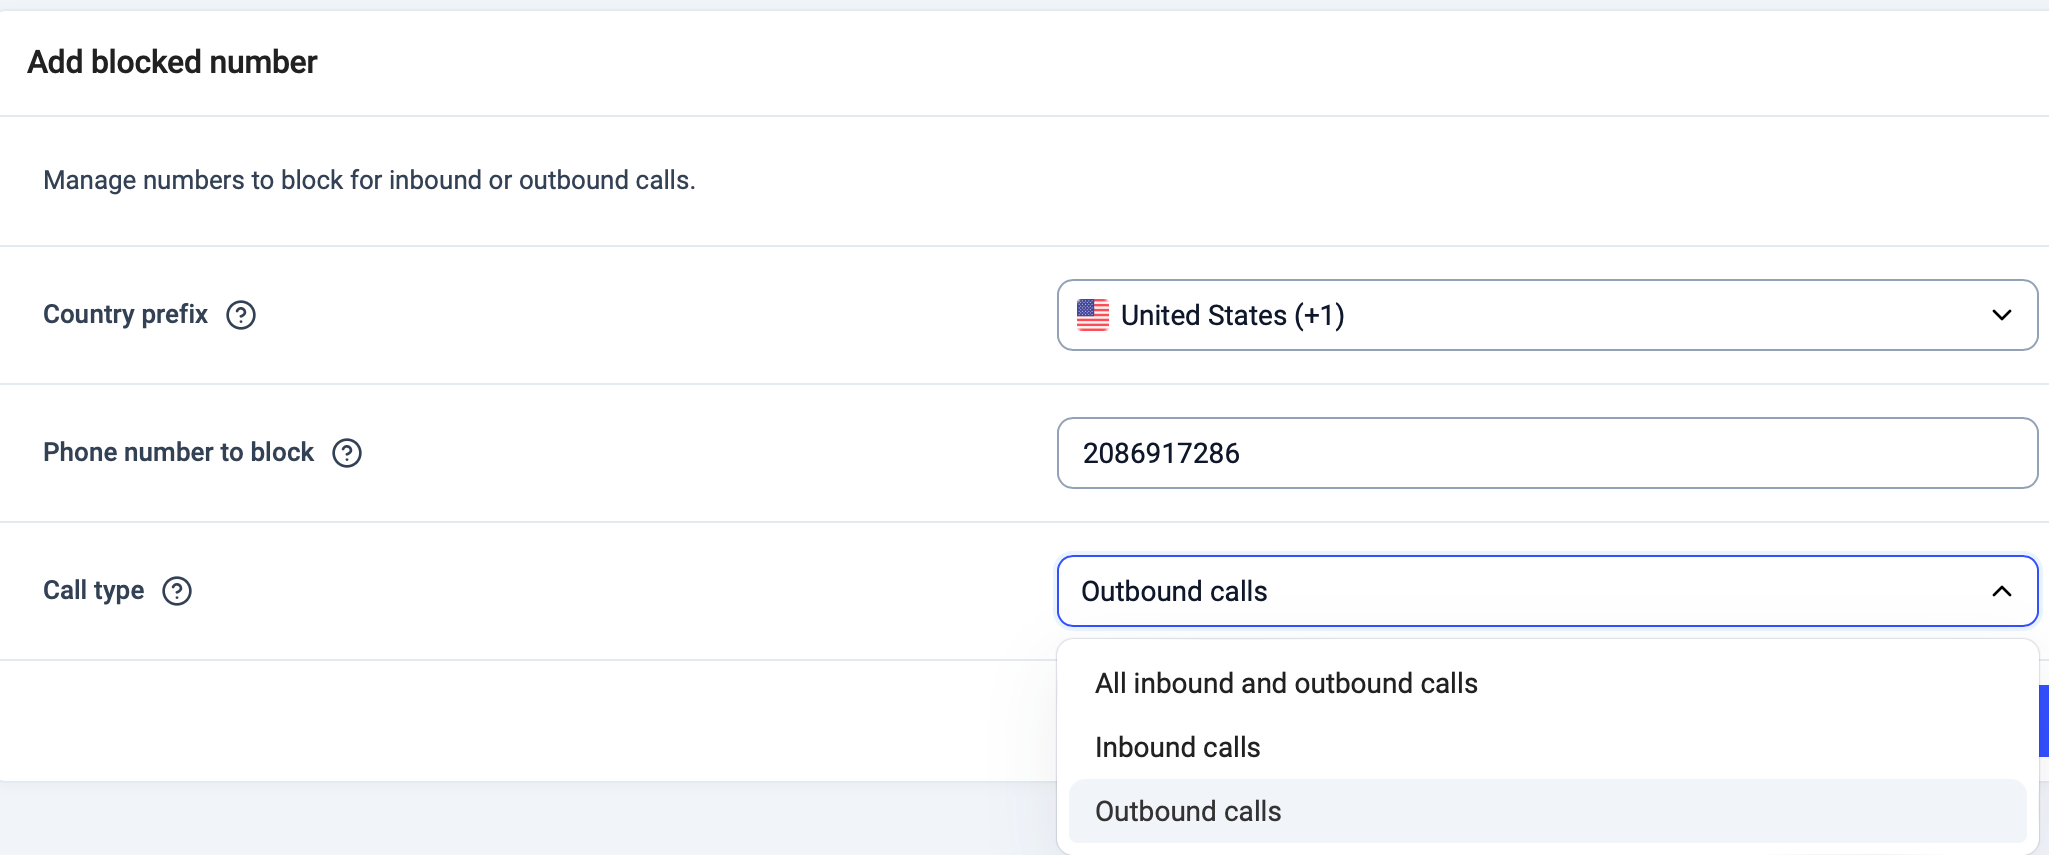
In the Add blocked number panel:
- Select the Country prefix.
- Enter the Phone number to block in its basic format (for example,
949111222). - Choose the Call type:
- Inbound calls
- Outbound calls
- All inbound and outbound calls
-
Click
Block numberand confirm.
Block & add another instead of Block number. The number is blocked straight away without a confirmation, and the panel stays open with the same country prefix and call type, ready for the next number.
The list shows every blocked number in international format, for example +421 2 222 000 70.
There is currently no limit to the number of phone numbers you can add to your blacklist.
You can later edit a blacklisted number by clicking the edit (pencil) icon next to it, updating the country prefix, phone number, or call type, and clicking
Update number.Manage many numbers at once with a CSV file
To add, change or remove many numbers at once, download your blacklist as a CSV file, edit it in a spreadsheet, and import it again.Download your blacklist
In Settings > Blacklist, clickDownload CSV. The file lists every number on your blacklist. If your blacklist is empty, the file has only the header row, which you can use as a template.
The file has three columns:
Import a CSV file
-
In Settings > Blacklist, click
Import CSVand choose your file.- The file must be a CSV file of up to 8 MB.
- Columns can be separated by commas or semicolons.
- The first row must name the columns
country_prefix,phone_numberandcall_type.
- CloudTalk checks the file. Nothing changes on your blacklist yet, and you can leave the page while the check runs.
-
When the check is done, click
Review changes. You see how many numbers will be added, will get a new call type, will be removed, and will stay unchanged. -
Click
Replace blacklistto confirm, or cancel to keep your blacklist as it is. If the import removes more than 1,000 numbers or more than half of your blacklist, type REPLACE to confirm. - CloudTalk replaces your blacklist. You can leave the page while it does. When it’s finished, the page shows Your blacklist is replaced with the number of numbers added, changed and removed.
Only one import can be checked or applied at a time. If you start a new import while an earlier one is waiting for your confirmation, the earlier one is cancelled.
If your file can’t be imported
CloudTalk imports the file only if every row is correct. If any row has an error, nothing changes on your blacklist. ClickDownload error report to get a file with each row that has an error, its values, and the reason. Fix those rows and import the file again.
Common reasons:
If the same number is in the file twice with the same call type, it’s imported once.
CloudTalk also rejects a file that has no numbers, a file whose first row doesn’t name the three columns, and a file larger than 8 MB.
Managing the Blacklist via API (advanced)
For teams that prefer automation, CloudTalk also allows you to maintain blacklisted numbers through the CloudTalk API. To change many numbers once, the CSV import is usually quicker. Using the Blacklist API, you can:- View all blacklisted numbers
- Add new numbers
- Update existing blacklist rules
- Remove numbers from the blacklist
How to remove a number from the Blacklist
In Settings > Blacklist, find the number you want to remove, click the delete (trash) icon on the right, and confirm the action. The number is removed from the blacklist immediately. To remove many numbers at once, delete their rows from the downloaded file and import it.Calls with a hidden caller ID
If a caller hides their number, the blacklist can’t block their calls.Need help or have a question? Just reach out through our Support portal — we’re here for you.