

The Call Flow Designer (CFD) feature allows you to set up different phone trees to route and manage calls efficiently.
Before You Start
To build your first call flow, you’ll need:- An active CloudTalk number.
- Admin permissions.
- Any audio recordings you plan to use (greetings, IVR menus).
- Optional: Groups and agents already created in your account.
Open the Call Flow Designer
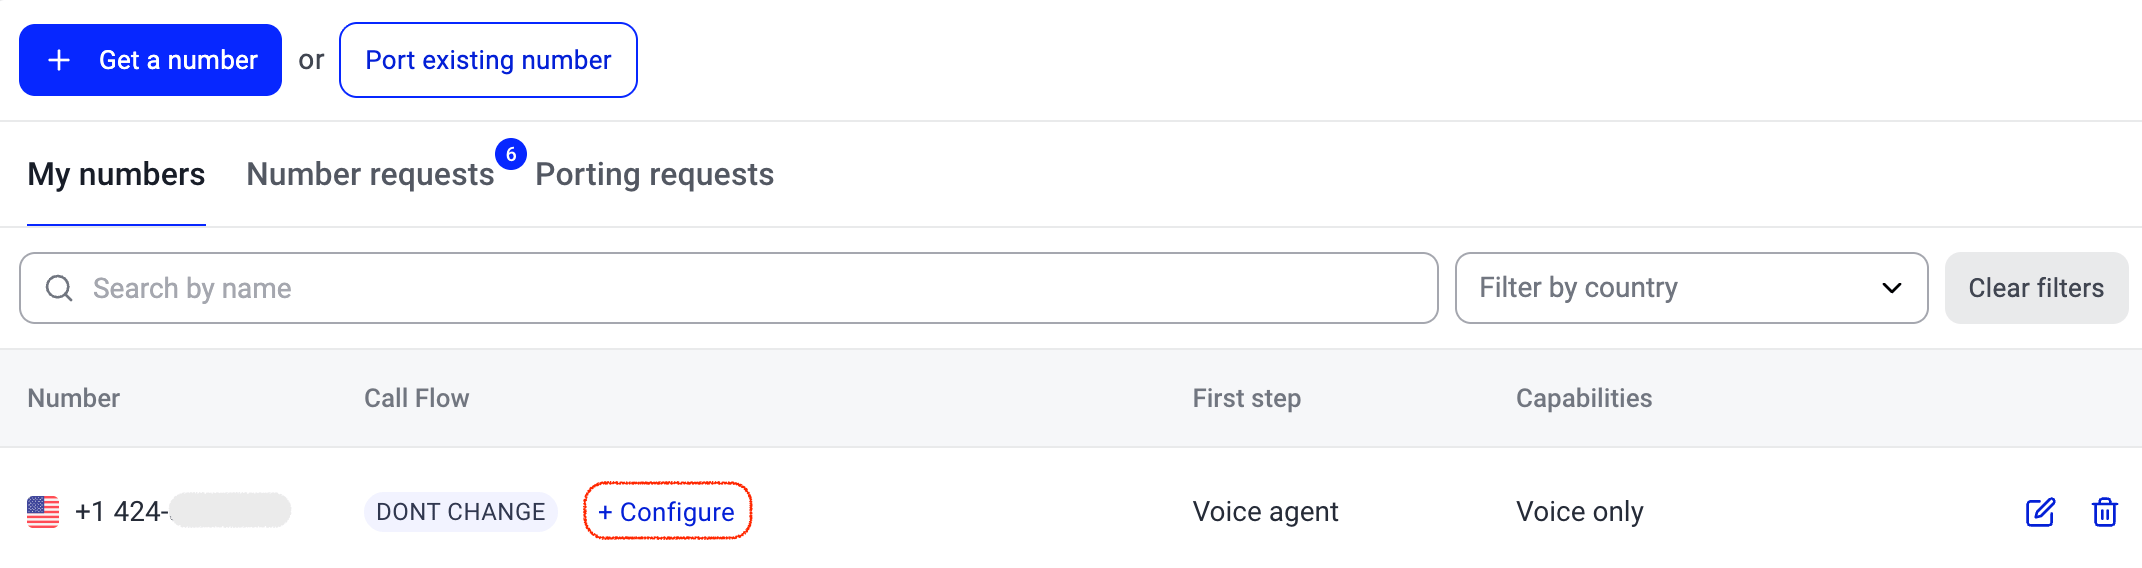
- From the Dashboard, click Numbers.
- In the My numbers tab, find the number you want to configure.
- Click + Configure in the Call Flow column to open the designer.
The Flow Editor
The Call Flow Designer uses a top-to-bottom canvas. Every flow starts with a Call comes in node at the top and ends with a Call ends node at the bottom. You build the flow by adding steps between them. Click the+ button between any two nodes to add a step. The panel on the right lets you browse steps by category or search by name.

- Connect to agents (Ring to, Voice Agent, Redirect, Dial by Extension)
- Routing logic (Day/Time Splitter, Condition Splitter, IVR Menu, Jump to)
- Wrap up (Voicemail, Mark Call as Resolved)
- Automation (Collect Input, HTTP Request)
- Call settings (Change number, Recording)
Steps that need a specific plan
Some steps are only available on certain plans:
You can also use Add saved flow at the top of the library to copy a configured step from another number’s flow.
Saving your flow
The editor uses a Save / Discard model. Changes you make are not live until you click Save in the top-right corner. If you want to undo your changes, click Discard to revert to the last saved version.
Call Flow Actions
The Call Flow Designer uses a top-to-bottom canvas. Every flow starts with a Call comes in node at the top and ends with a Call ends node at the bottom. You build the flow by adding steps between them. Click the+ button between any two nodes to add a step.
Greeting
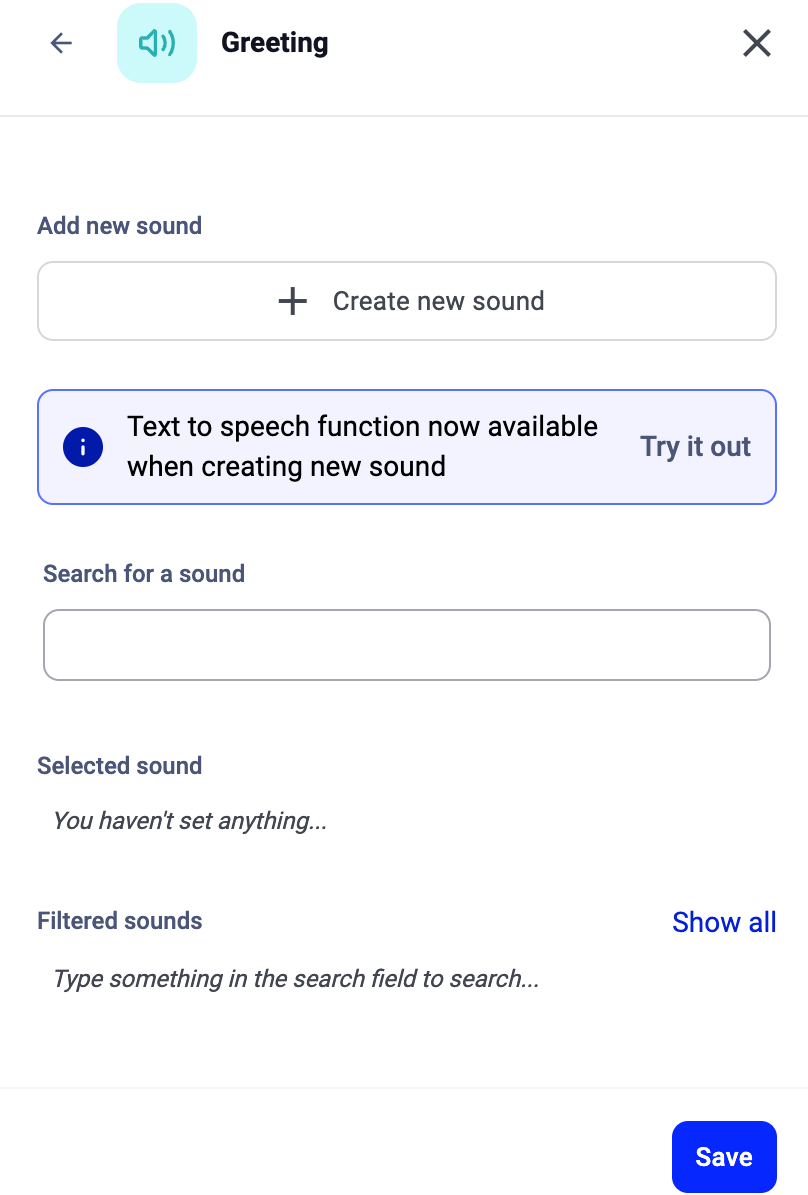
- Click + Create new sound to record, upload (mp3, max 8 MB), or generate one with text-to-speech.
- Search for a sound to pick from your existing sound library.
- Click Show all to browse all available sounds.
Add saved flow

Connect to Agents
Ring to

- Agent: Route the call directly to one specific person.
- Group: Route the call to a ring group. The call follows the group’s ring strategy (round robin, ring all, etc.).
- Favorite agent: Route the call to the agent listed as the caller’s favorite on their contact record. If no favorite agent is set, the step is skipped.
Dynamic routing via variableInstead of picking a target from the dropdown, you can click Route dynamically via variable to switch to a variable input mode. This lets you enter a variable (for example, 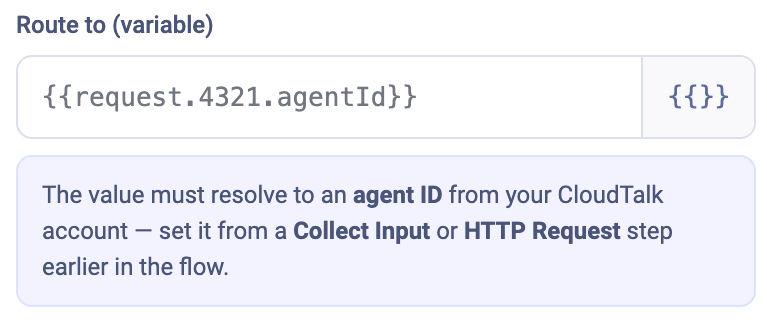
#{{request.4321.agentId}}) that resolves to an agent ID at call time. The value is typically set by a Collect Input or HTTP Request step earlier in the flow. To switch back, click Pick from list instead.Voice Agent
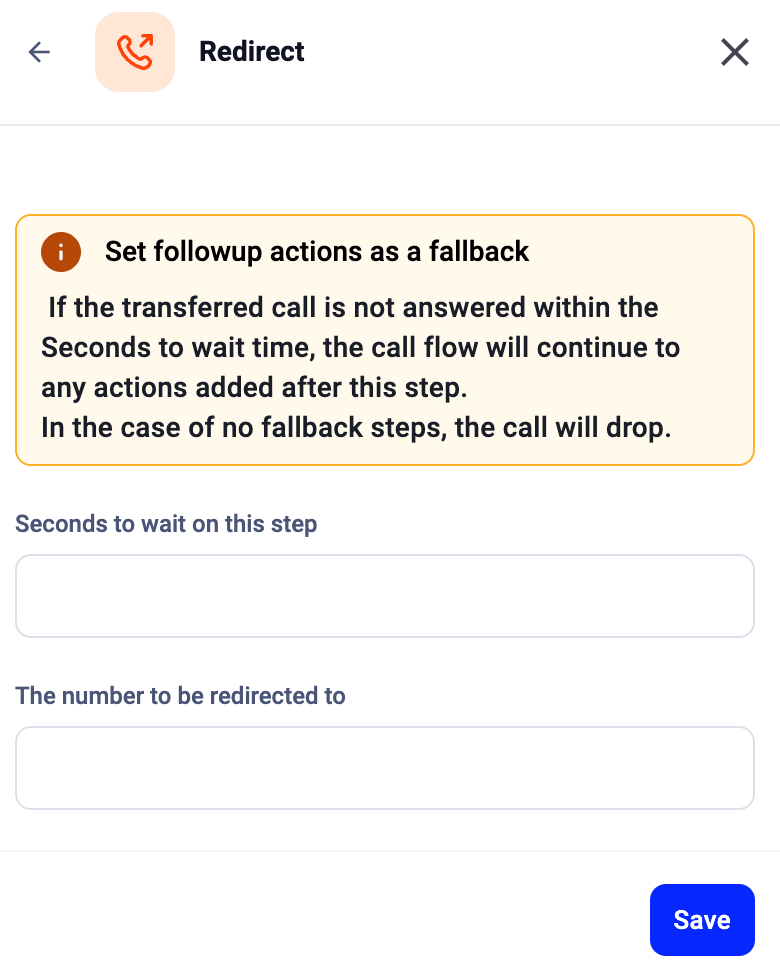
Redirect
Dial by Extension
Routing Logic
Day/Time Splitter

- Set a timezone per number or per branch, with the GMT offset or live time displayed.
- Use the date picker to add holidays and exceptions. Holiday calendars cover national-level holidays for 58 countries. Regional holidays are not included. See Business Hours for the full list and details.
- Branch names are editable so you can label them (e.g., “Weekdays 9-18” or “Holiday hours”).
- The failover branch covers any time not specified by other branches.
Condition Splitter

- Conditions are configured inside the step itself.
- Supports AND and OR operators, plus negation (“does not contain,” “is not”).
- You can reference values collected earlier in the flow (from Collect Input or HTTP Request steps).
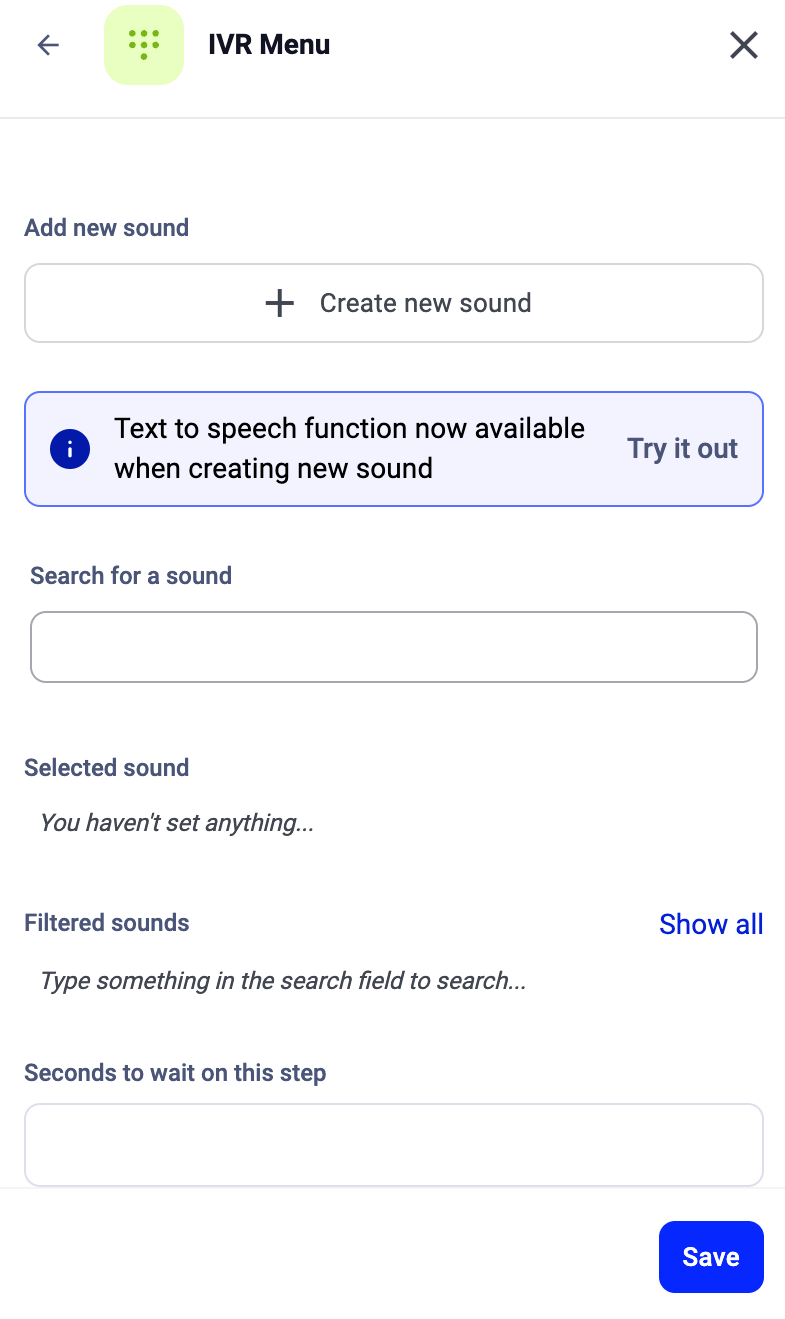
IVR Menu

Jump to

Wrap Up
Voicemail

Mark Call as Resolved

Automation
Collect Input

- Set the expected input length (replaces the old regex pattern).
- Configure a timeout for callers who need more time.
- The entered value can be used in downstream steps (HTTP Request or dynamic routing on a Ring to step).
HTTP Request

- Endpoint: the URL to call.
- Method: choose GET, POST, or another HTTP method.
- Request Headers: add custom headers (collapsible section).
- Request Body: add key-value pairs or click Add contact custom field to insert contact data like caller number, name, or tags.
- Parse response: check this to make the API response available to downstream steps (Condition Splitter, dynamic routing).
- Retain data after call: keep the response data after the call ends.
Call Settings
Change of caller

Call recording
Editing and Deleting Steps
Edit a step
Click the step card on the canvas to open its configuration panel on the right side.Delete a step
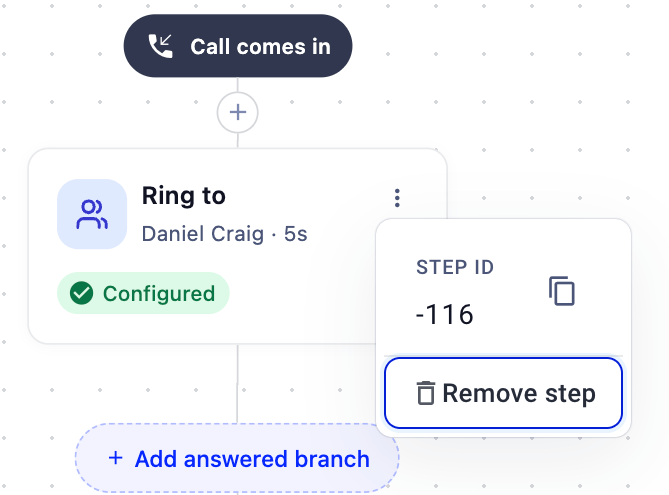
- Click the three-dot menu (⋮) on the step card.
- Select Remove step.
Example Call Flow Designs
Now that you have a basic grasp of how the designer works, let’s look at some traditional routing practices. The main aim of the Call Flow Designer is to avoid missed calls and to ensure your customers efficiently reach the agents who can be most helpful to them. Below are some straightforward examples of how to achieve that.Personal Line with Voicemail Fallback
A simple flow where calls ring one agent. If the agent doesn’t answer, the caller leaves a voicemail. Steps: Greeting > Ring to (Agent) > If unanswered: Voicemail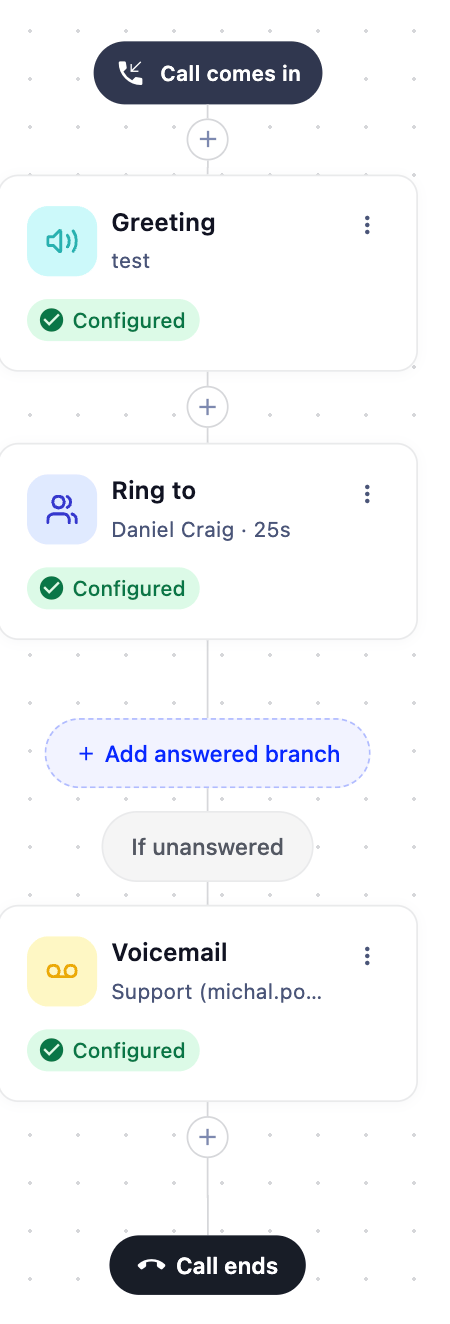
- The caller hears a welcome message (Greeting step).
- The call rings the assigned agent (Ring to step, target: Agent).
- If the agent doesn’t pick up, the caller is routed to Voicemail.
Team Line with Answered Branch
Calls go to a group. Answered calls are marked as resolved. Unanswered calls fall back to voicemail. Steps: Greeting > Ring to (Group) > Answered: Mark Call as Resolved / If unanswered: Voicemail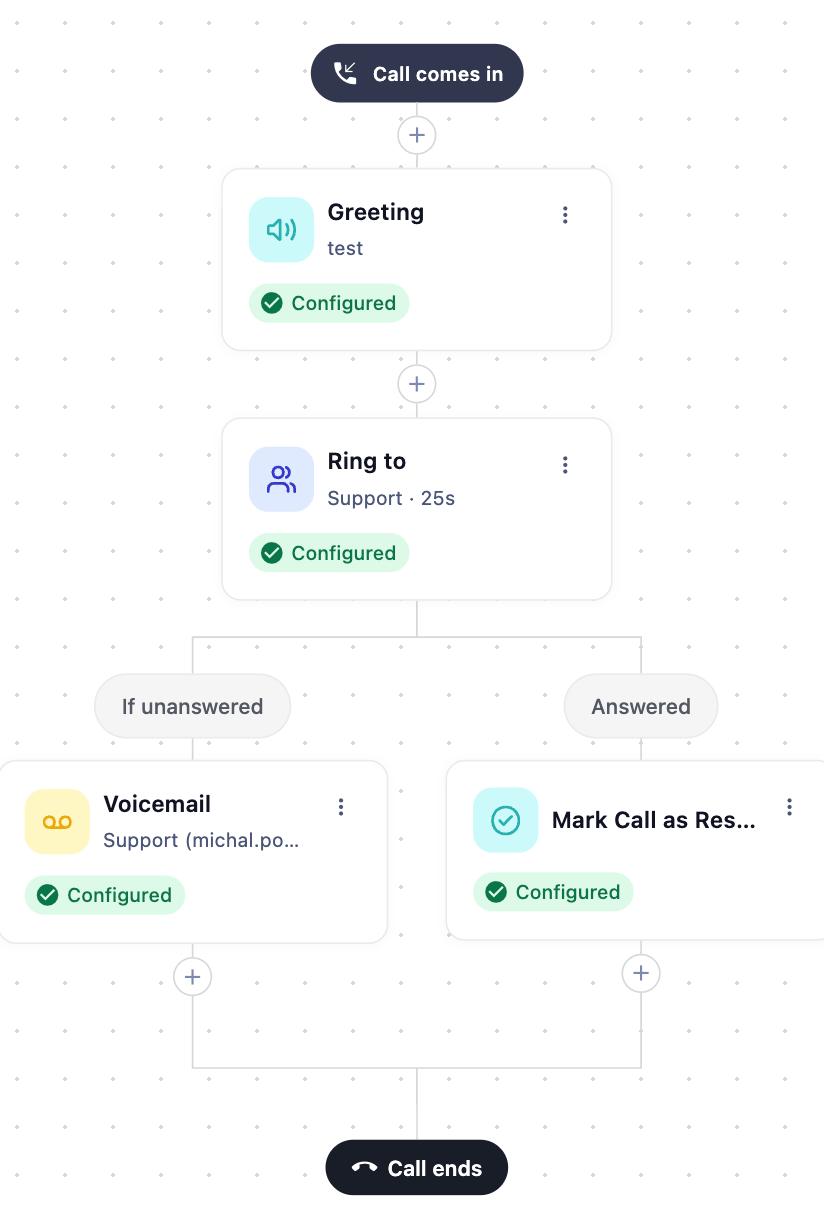
- The caller hears a welcome message (Greeting step).
- The call rings the selected group (Ring to step, target: Group).
- If answered, the call is marked as resolved on the Answered branch.
- If unanswered, the caller is routed to Voicemail.
IVR Menu with Department Routing
Callers hear a welcome message, then choose a department by pressing a number. Each department has its own team and voicemail fallback. Steps: Greeting > IVR Menu > Key 1: Ring to (Sales group) > Voicemail / Key 2: Ring to (Support group) > Voicemail / Key 3: Voicemail (Billing)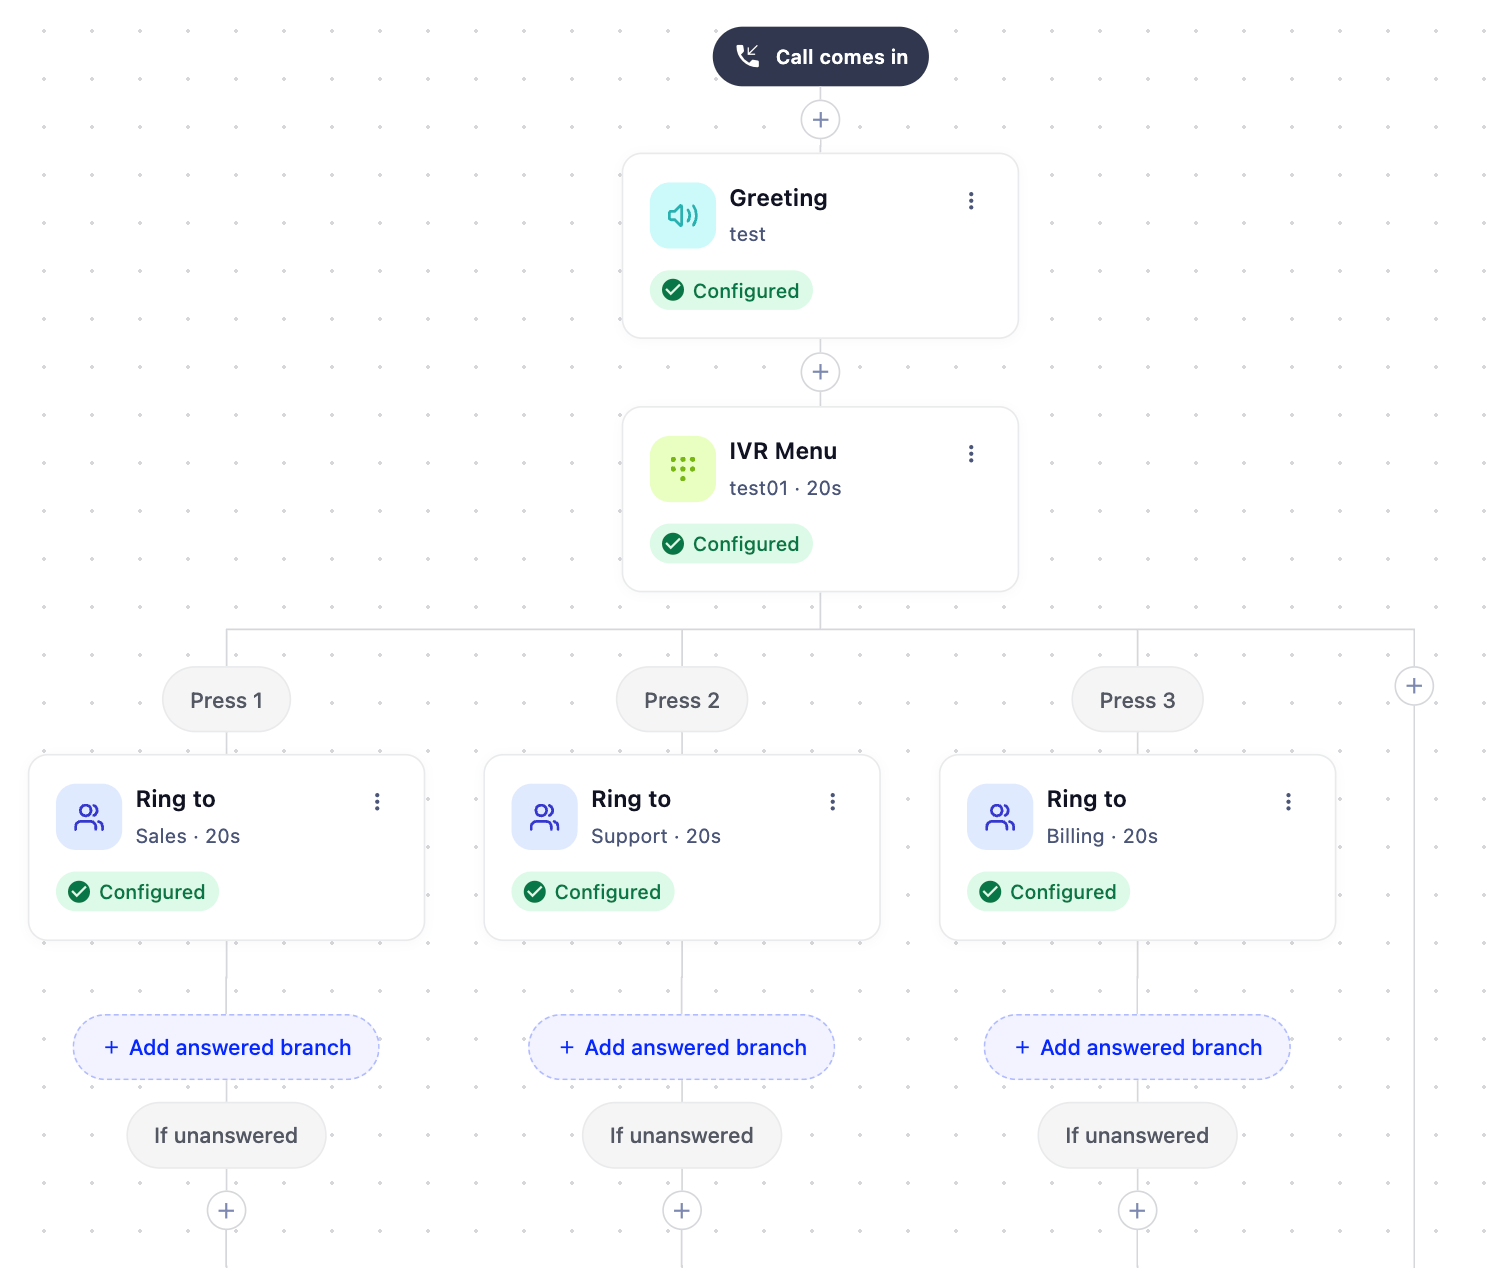
- The caller hears a welcome message listing the options.
- The IVR Menu step prompts the caller to press 1, 2, or 3.
- Each key routes to the appropriate team. If nobody answers, the caller reaches that team’s voicemail.
- Match the key numbers in your recorded prompt to the IVR keyboard numbers you assign to each branch.
- Always configure the Failover for no key pressed branch and connect it to a Hang Up step (or Voicemail, if you prefer). If this branch is not configured, calls where no key is pressed will stay open until the carrier drops them, which can take an extended period. This is especially common with bot and spam calls, which will sit in your IVR silently.
- Give callers at least 20 seconds to listen and respond.
Need help or have a question? Just reach out through our Support portal — we’re here for you.