> ## Documentation Index
> Fetch the complete documentation index at: https://help.cloudtalk.io/llms.txt
> Use this file to discover all available pages before exploring further.
# Salesforce Service Cloud Voice : guide de configuration pour les administrateurs
> Configuration administrateur de CloudTalk dans Salesforce Service Cloud Voice : activer Voice, configurer les ensembles d'autorisations, créer le centre de…
**Pour les administrateurs Salesforce.** Effectuez ces étapes une seule fois pour activer CloudTalk dans Service Cloud Voice. Une fois la configuration terminée, les agents peuvent suivre le [guide Salesforce Service Cloud Voice](/fr/articles/14654473-salesforce-service-cloud-voice) pour passer, recevoir et transférer des appels.
**Niveau d'utilisateur** : Admin
***
Avant de commencer
Il vous faut :
* Une organisation Salesforce où **Service Cloud Voice** est disponible
* Un accès **System Administrator** dans Salesforce
* Le **certificat du centre de contacts** fourni par CloudTalk lors de l'onboarding (ne l'obtenez nulle part ailleurs)
Configuration étape par étape
Étape 1 : activer Service Cloud Voice
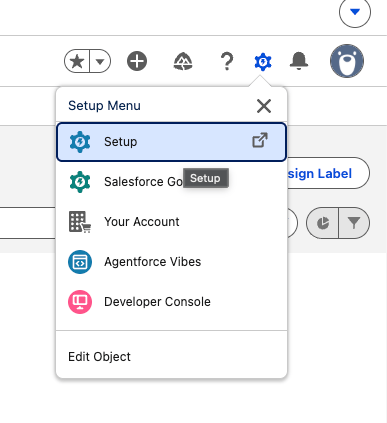
1. Ouvrez **Setup** et recherchez **Voice**.
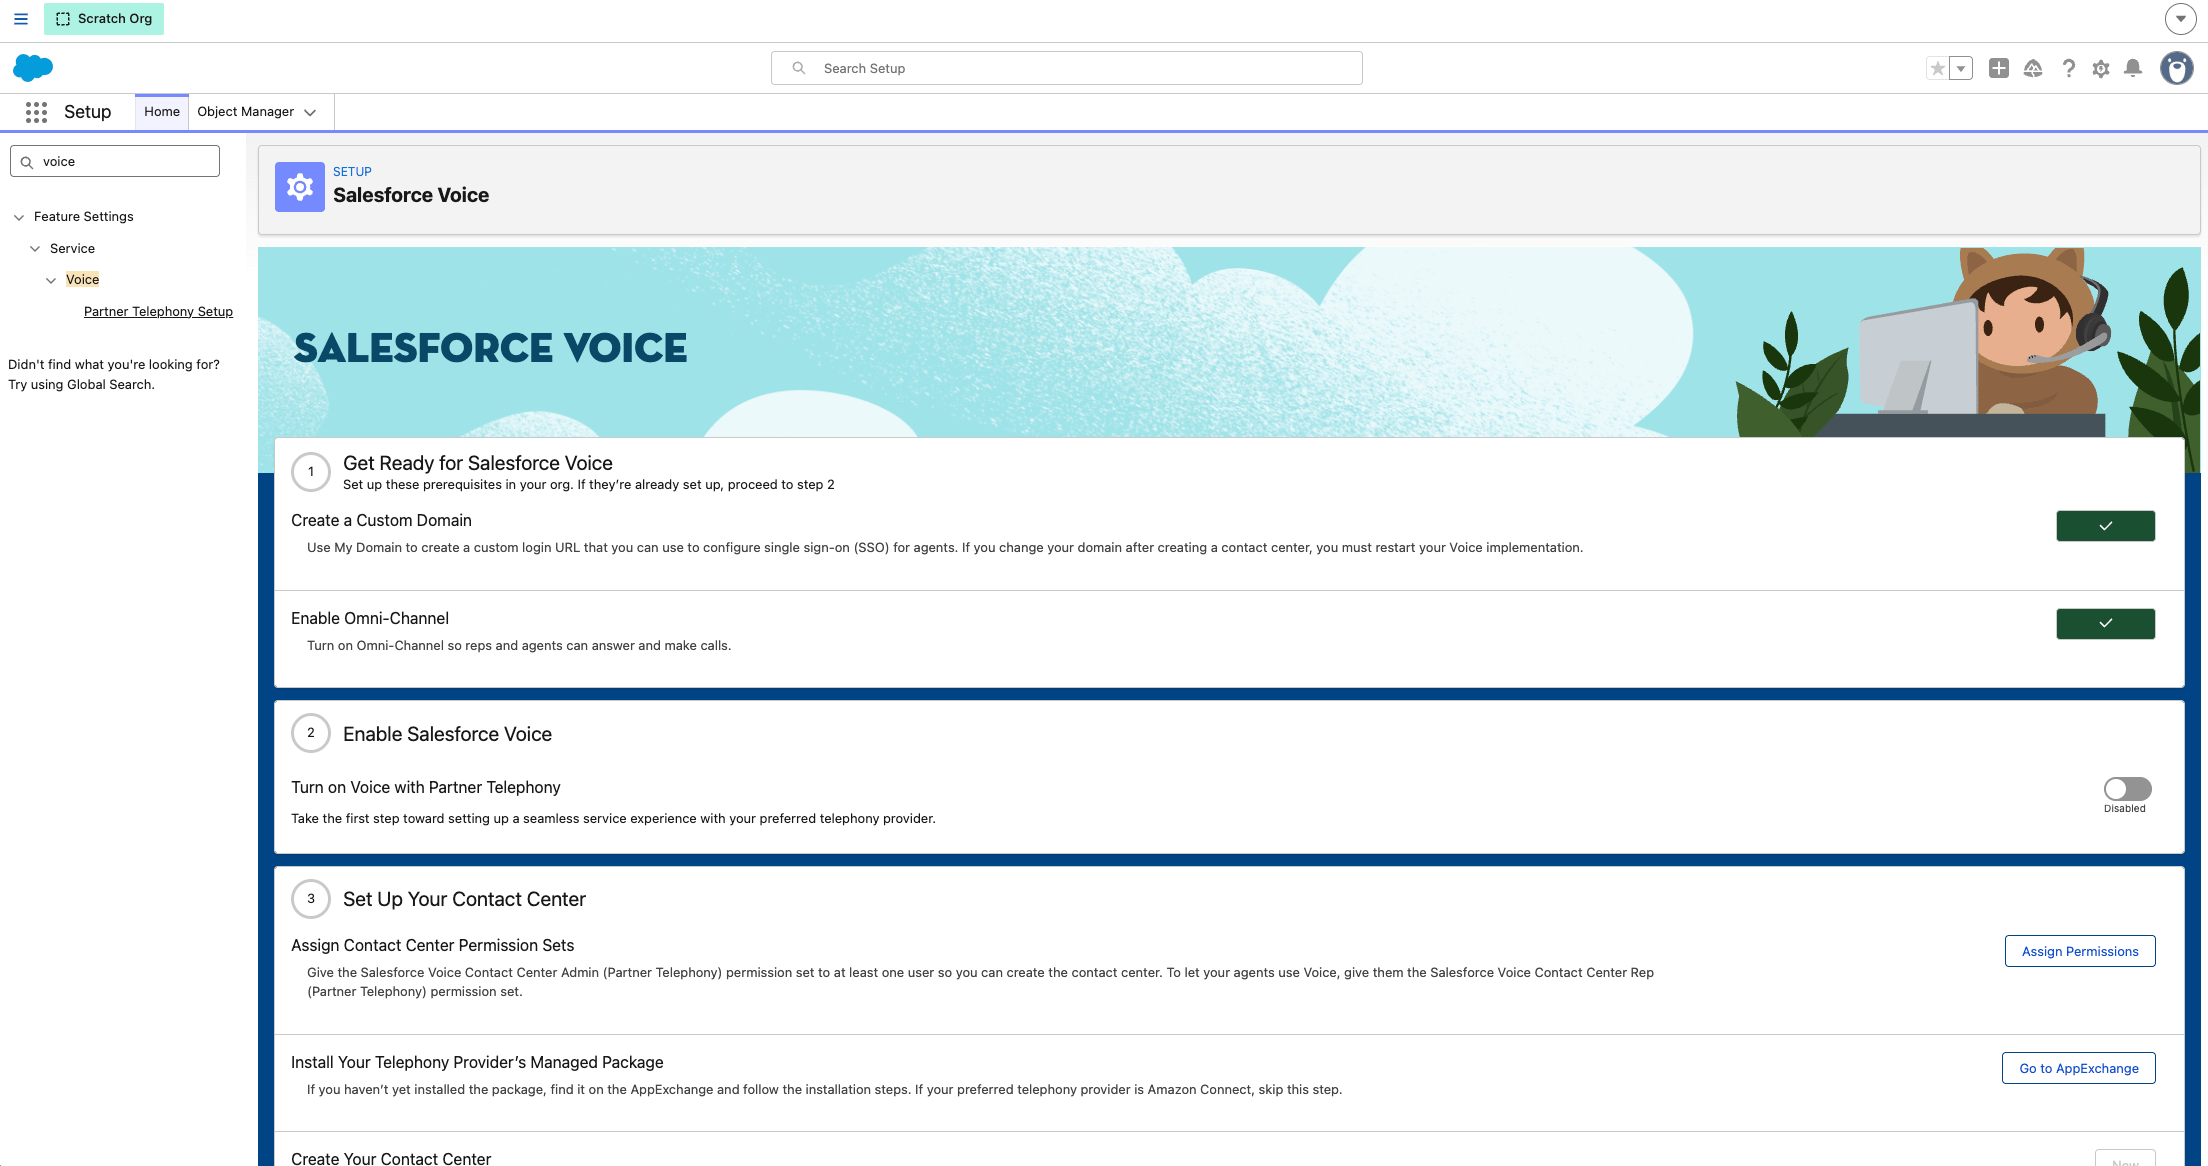 2. Activez la fonctionnalité dans **Feature Settings > Service > Voice**.

Étape 2 : configurer l'ensemble d'autorisations Partner Telephony
1. Dans Setup, accédez à **Permission Sets** et ouvrez **Partner Telephony Permission Set**.
2. Ouvrez **App Permissions > Edit** et activez :
* Control Call Recording
* Salesforce Voice Contact Center Admin (Partner Telephony)
* Salesforce Voice Contact Center Rep (Partner Telephony)
* Salesforce Voice Contact Center Supervisor
3. **Save**.
Étape 3 : attribuer l'ensemble d'autorisations aux utilisateurs
1. Accédez à **Setup > Users > Permission Set Assignments**.
 2. Attribuez **Partner Telephony Permission Set** à chaque agent, ainsi qu'à au moins un administrateur qui gérera le centre de contacts.
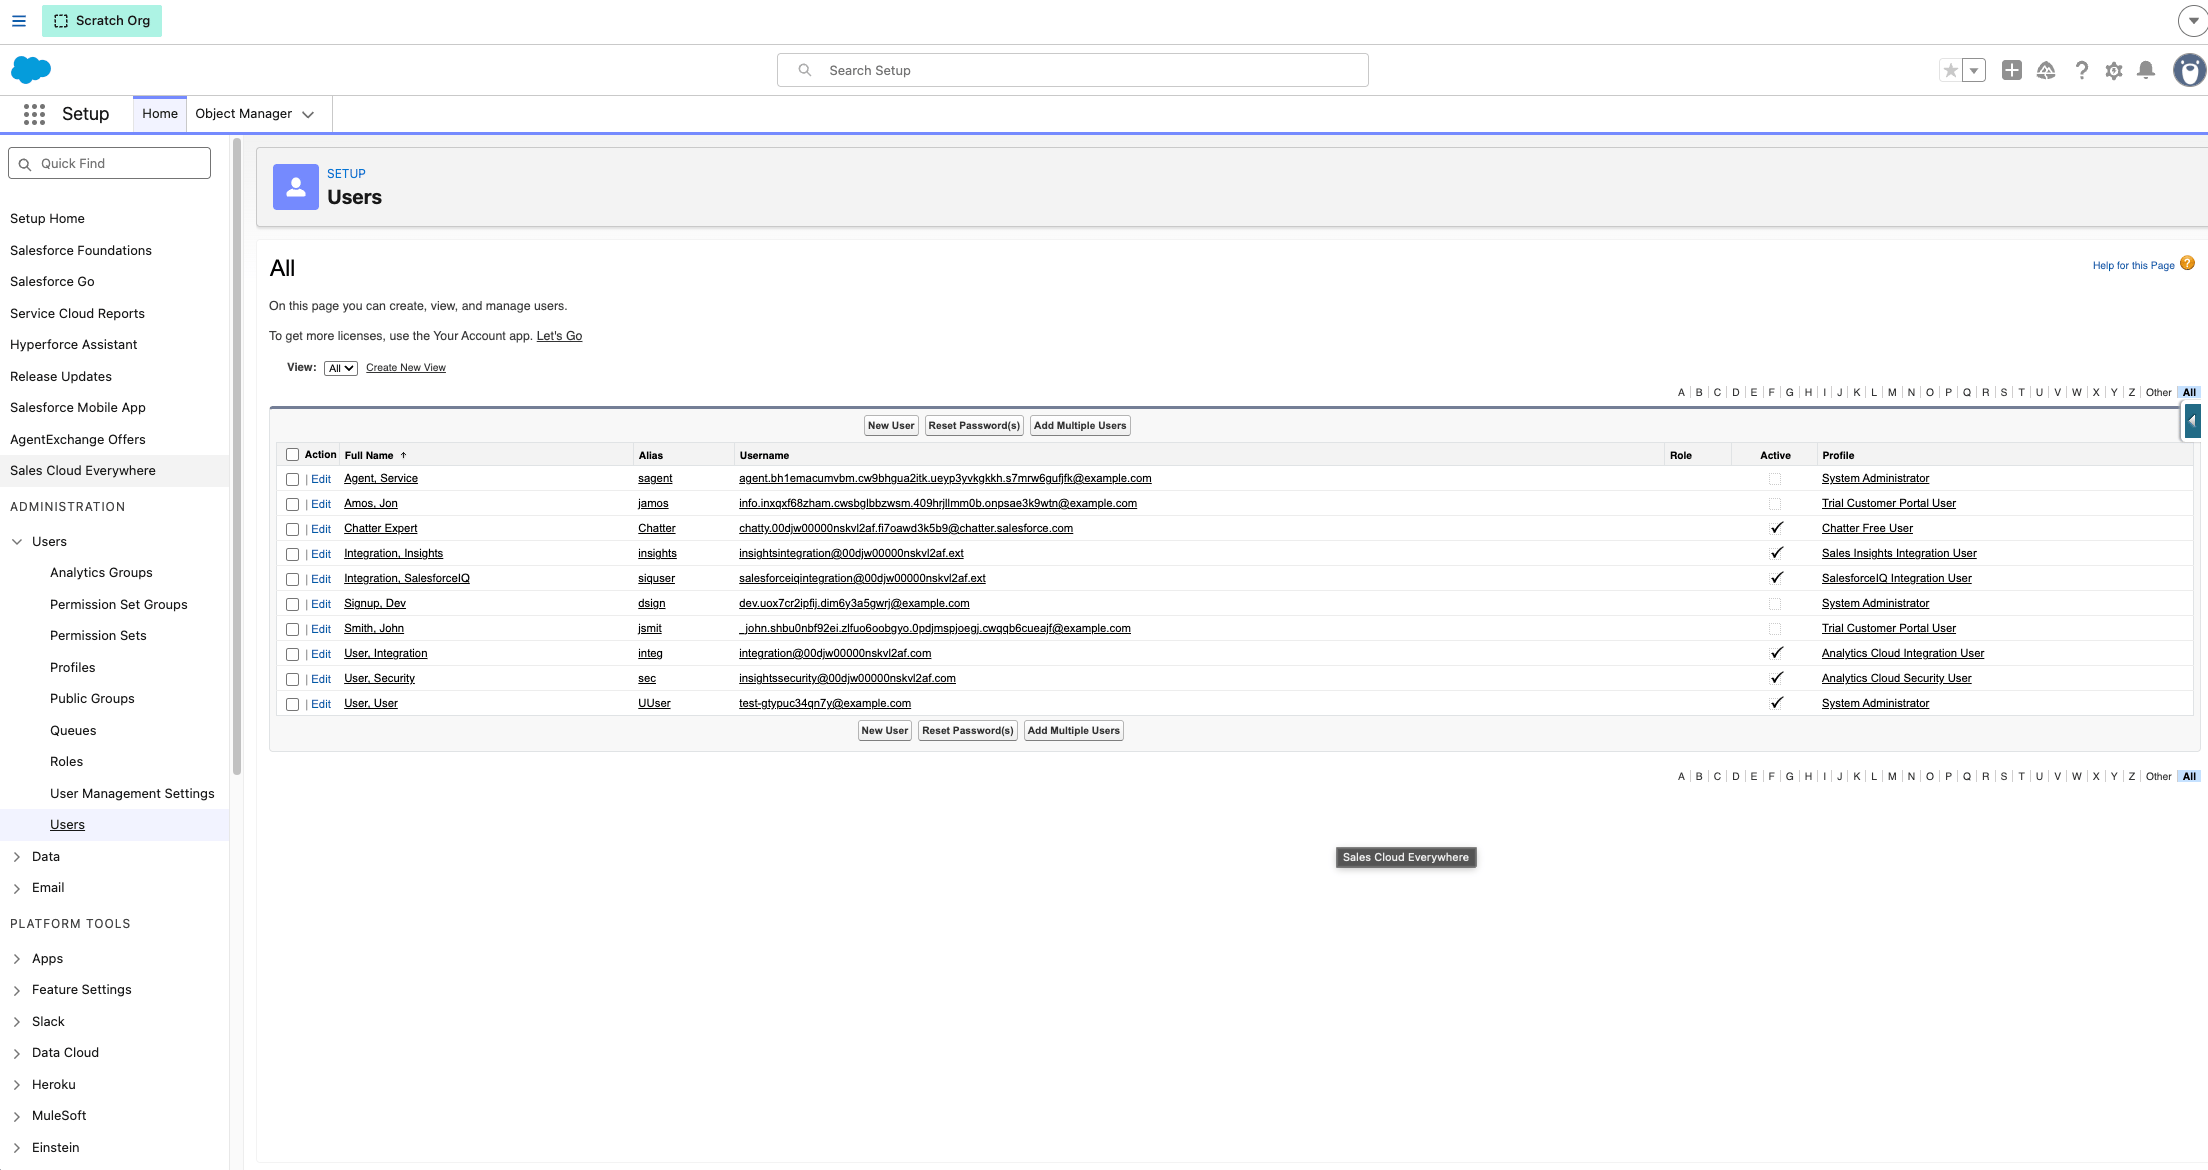 L'autorisation **admin** du centre de contacts est nécessaire pour installer ou mettre à jour le certificat du centre de contacts à l'étape suivante.
Étape 4 : créer le centre de contacts
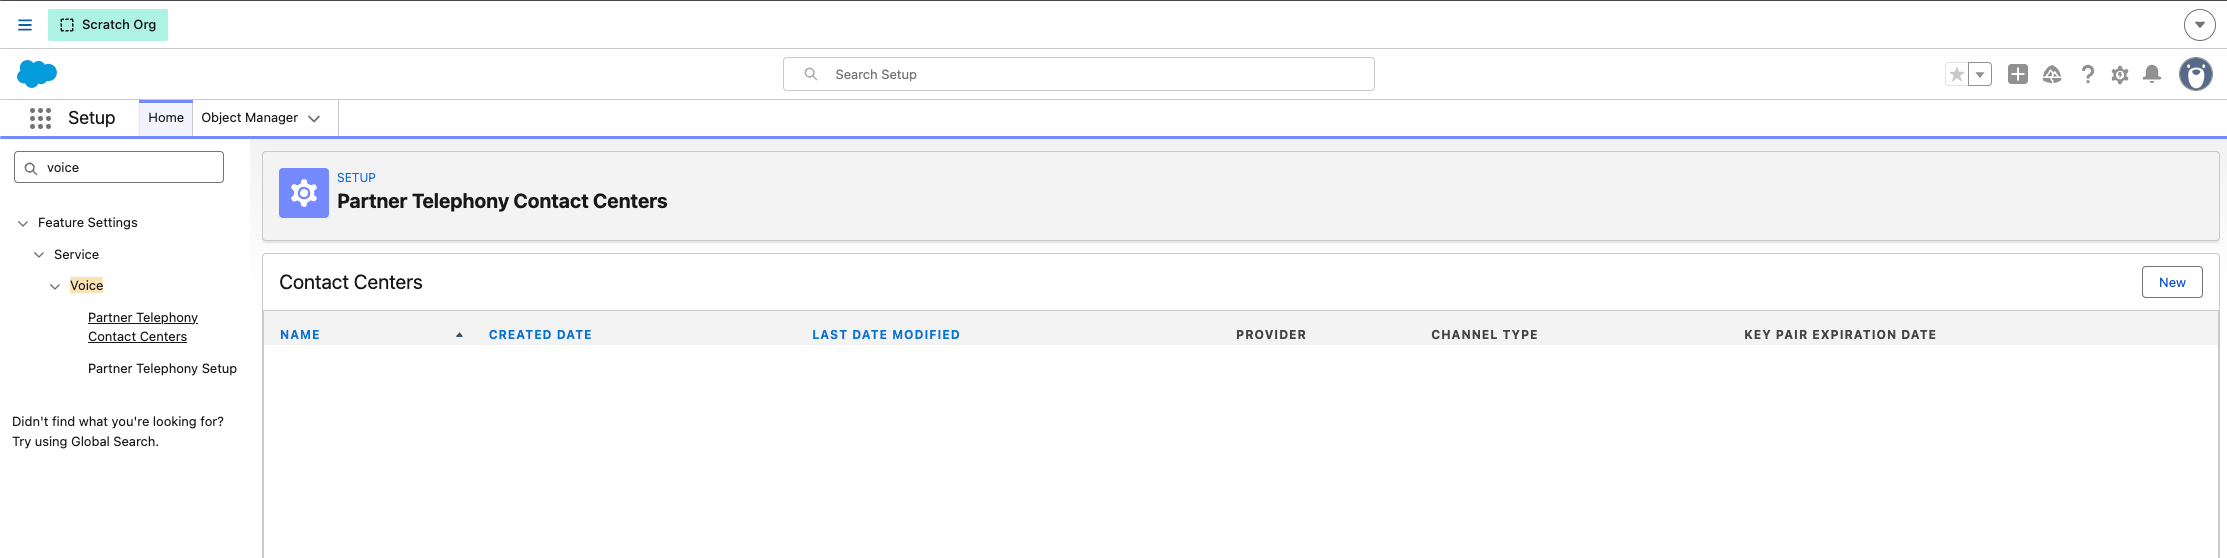
1. Dans Setup, ouvrez **Voice > Partner Telephony Contact Centers** et créez un nouveau centre de contacts.
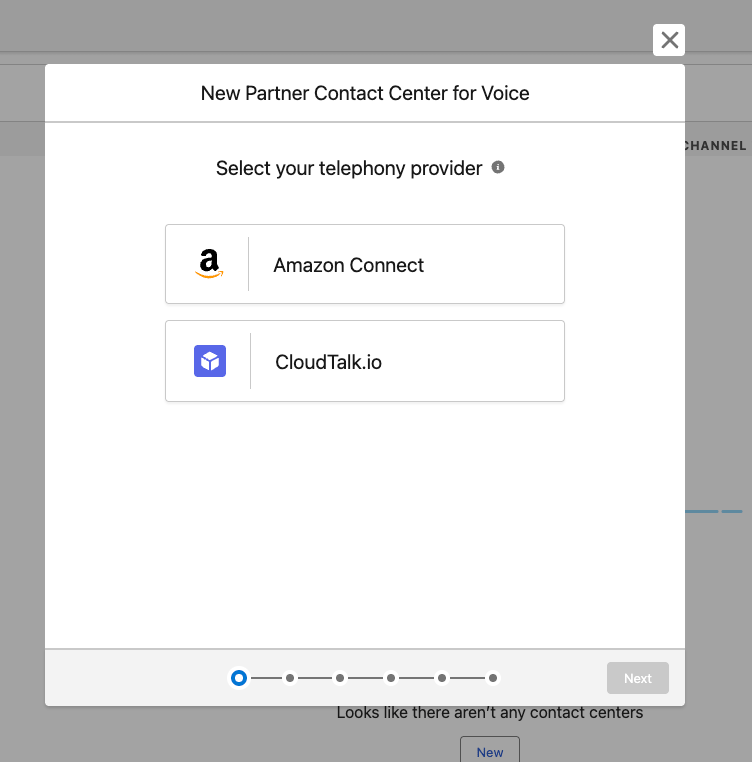 2\. Ajoutez le **certificat à clé publique fourni par CloudTalk**. Collez le bloc de certificat complet, y compris les lignes `BEGIN`/`END`.
```
-----BEGIN CERTIFICATE-----[Paste the certificate CloudTalk provided during onboarding]-----END CERTIFICATE-----
```
2\. Ajoutez le **certificat à clé publique fourni par CloudTalk**. Collez le bloc de certificat complet, y compris les lignes `BEGIN`/`END`.
```
-----BEGIN CERTIFICATE-----[Paste the certificate CloudTalk provided during onboarding]-----END CERTIFICATE-----
```
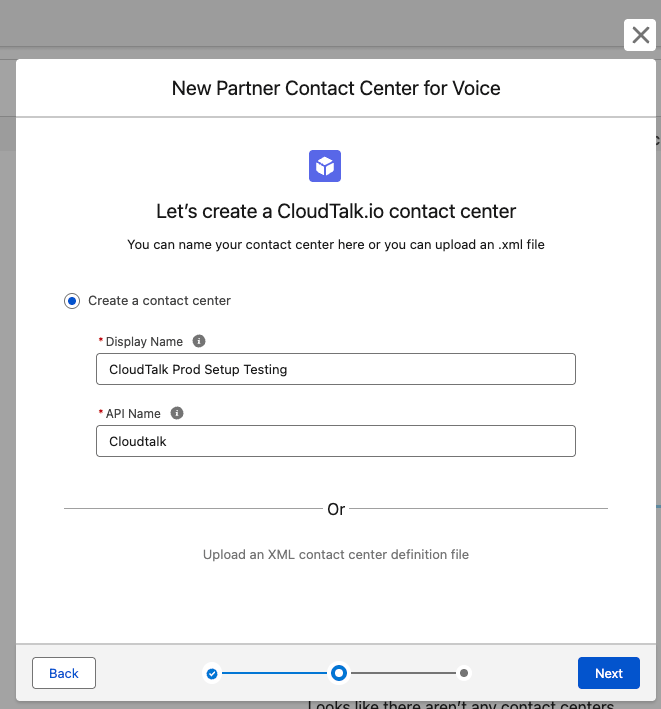 3\. Ajoutez vos agents comme **utilisateurs** du centre de contacts.
Étape 5 : configurer les Trusted URLs (CSP)
1. Dans Setup, ouvrez **Security > Trusted URLs**.
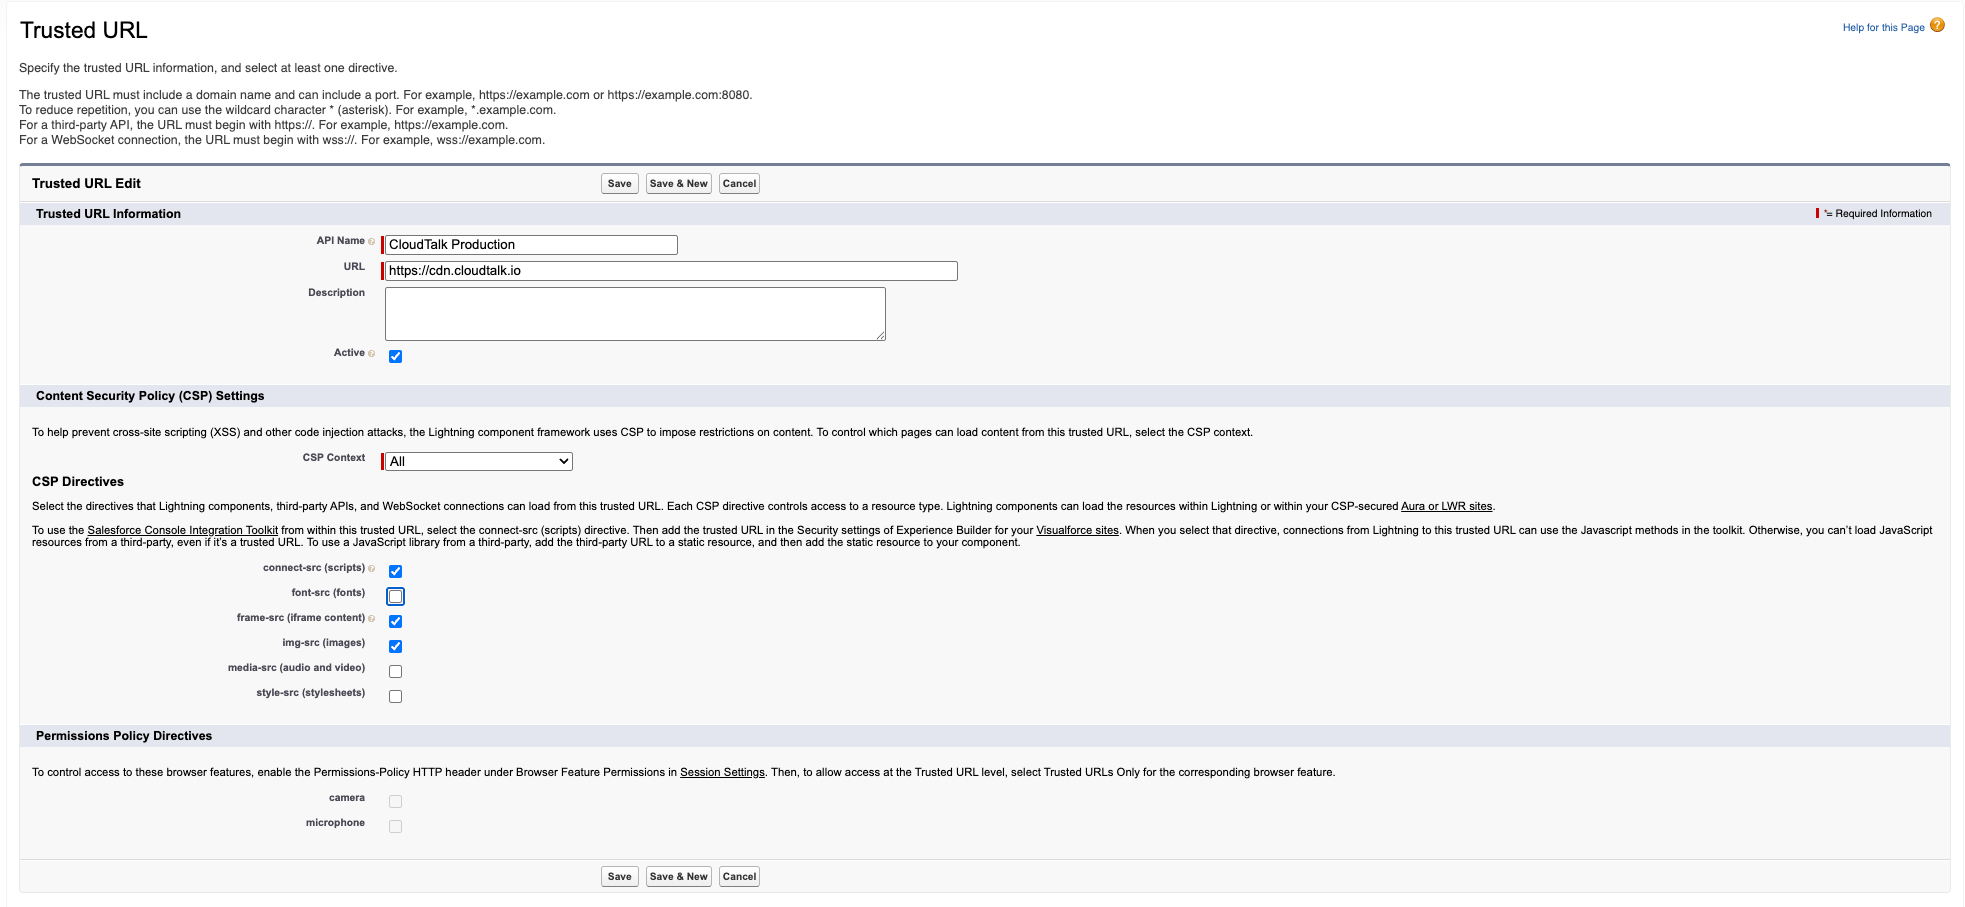
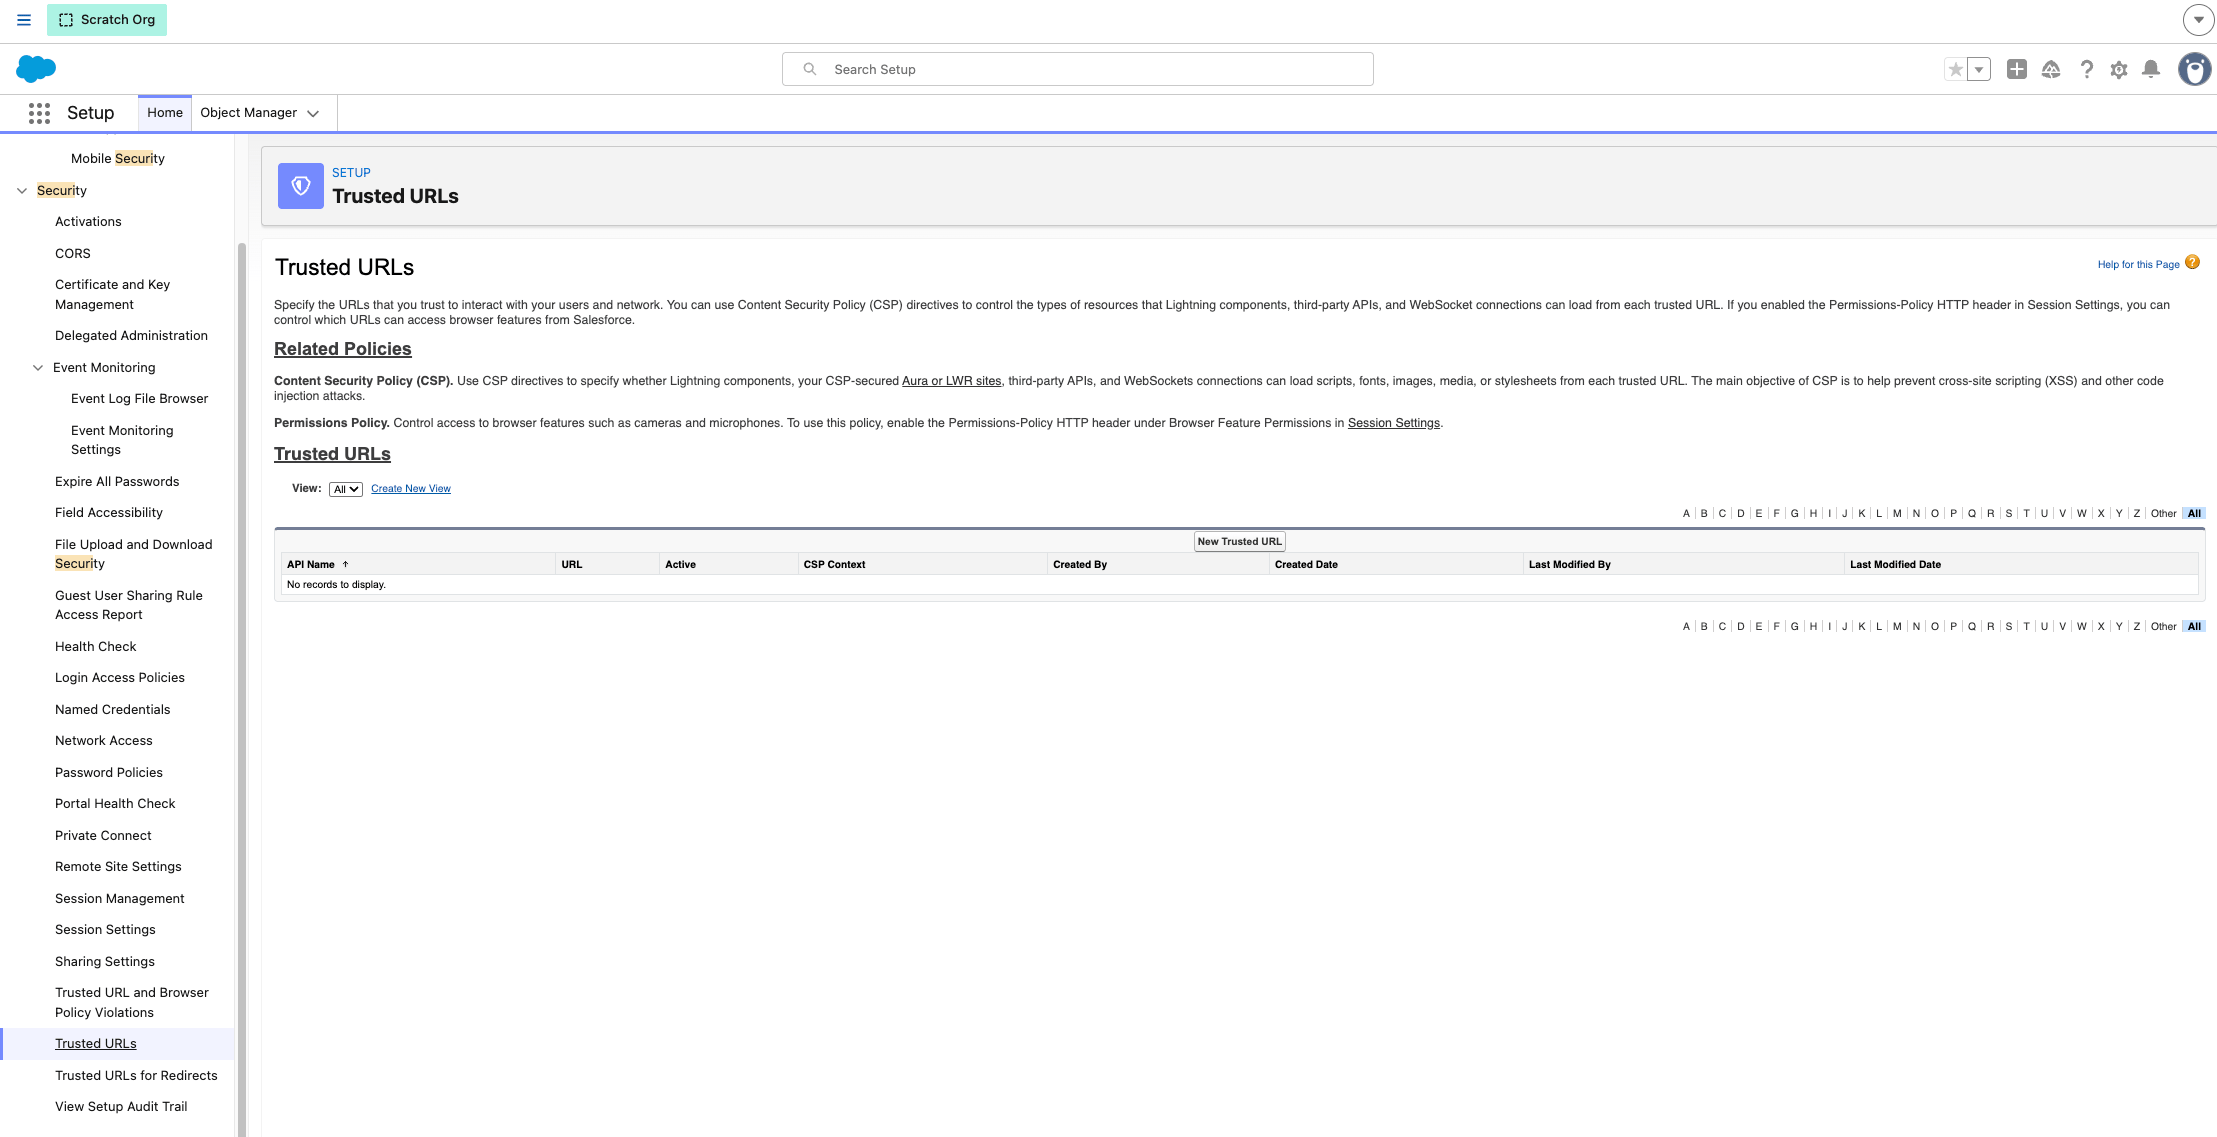 2. Ajoutez l'URL du CDN CloudTalk correspondant à votre environnement :
| **Environnement** | **URL** |
| - | - |
| Production | `https://cdn.cloudtalk.io` |
| Stage | `https://cdn.stage.cloudtalk.io` |
| Dev | `https://cdn.dev.cloudtalk.io` |
3\. Pour cette URL, activez les directives CSP : **connect-src**, **frame-src** et **img-src**.
2. Ajoutez l'URL du CDN CloudTalk correspondant à votre environnement :
| **Environnement** | **URL** |
| - | - |
| Production | `https://cdn.cloudtalk.io` |
| Stage | `https://cdn.stage.cloudtalk.io` |
| Dev | `https://cdn.dev.cloudtalk.io` |
3\. Pour cette URL, activez les directives CSP : **connect-src**, **frame-src** et **img-src**.
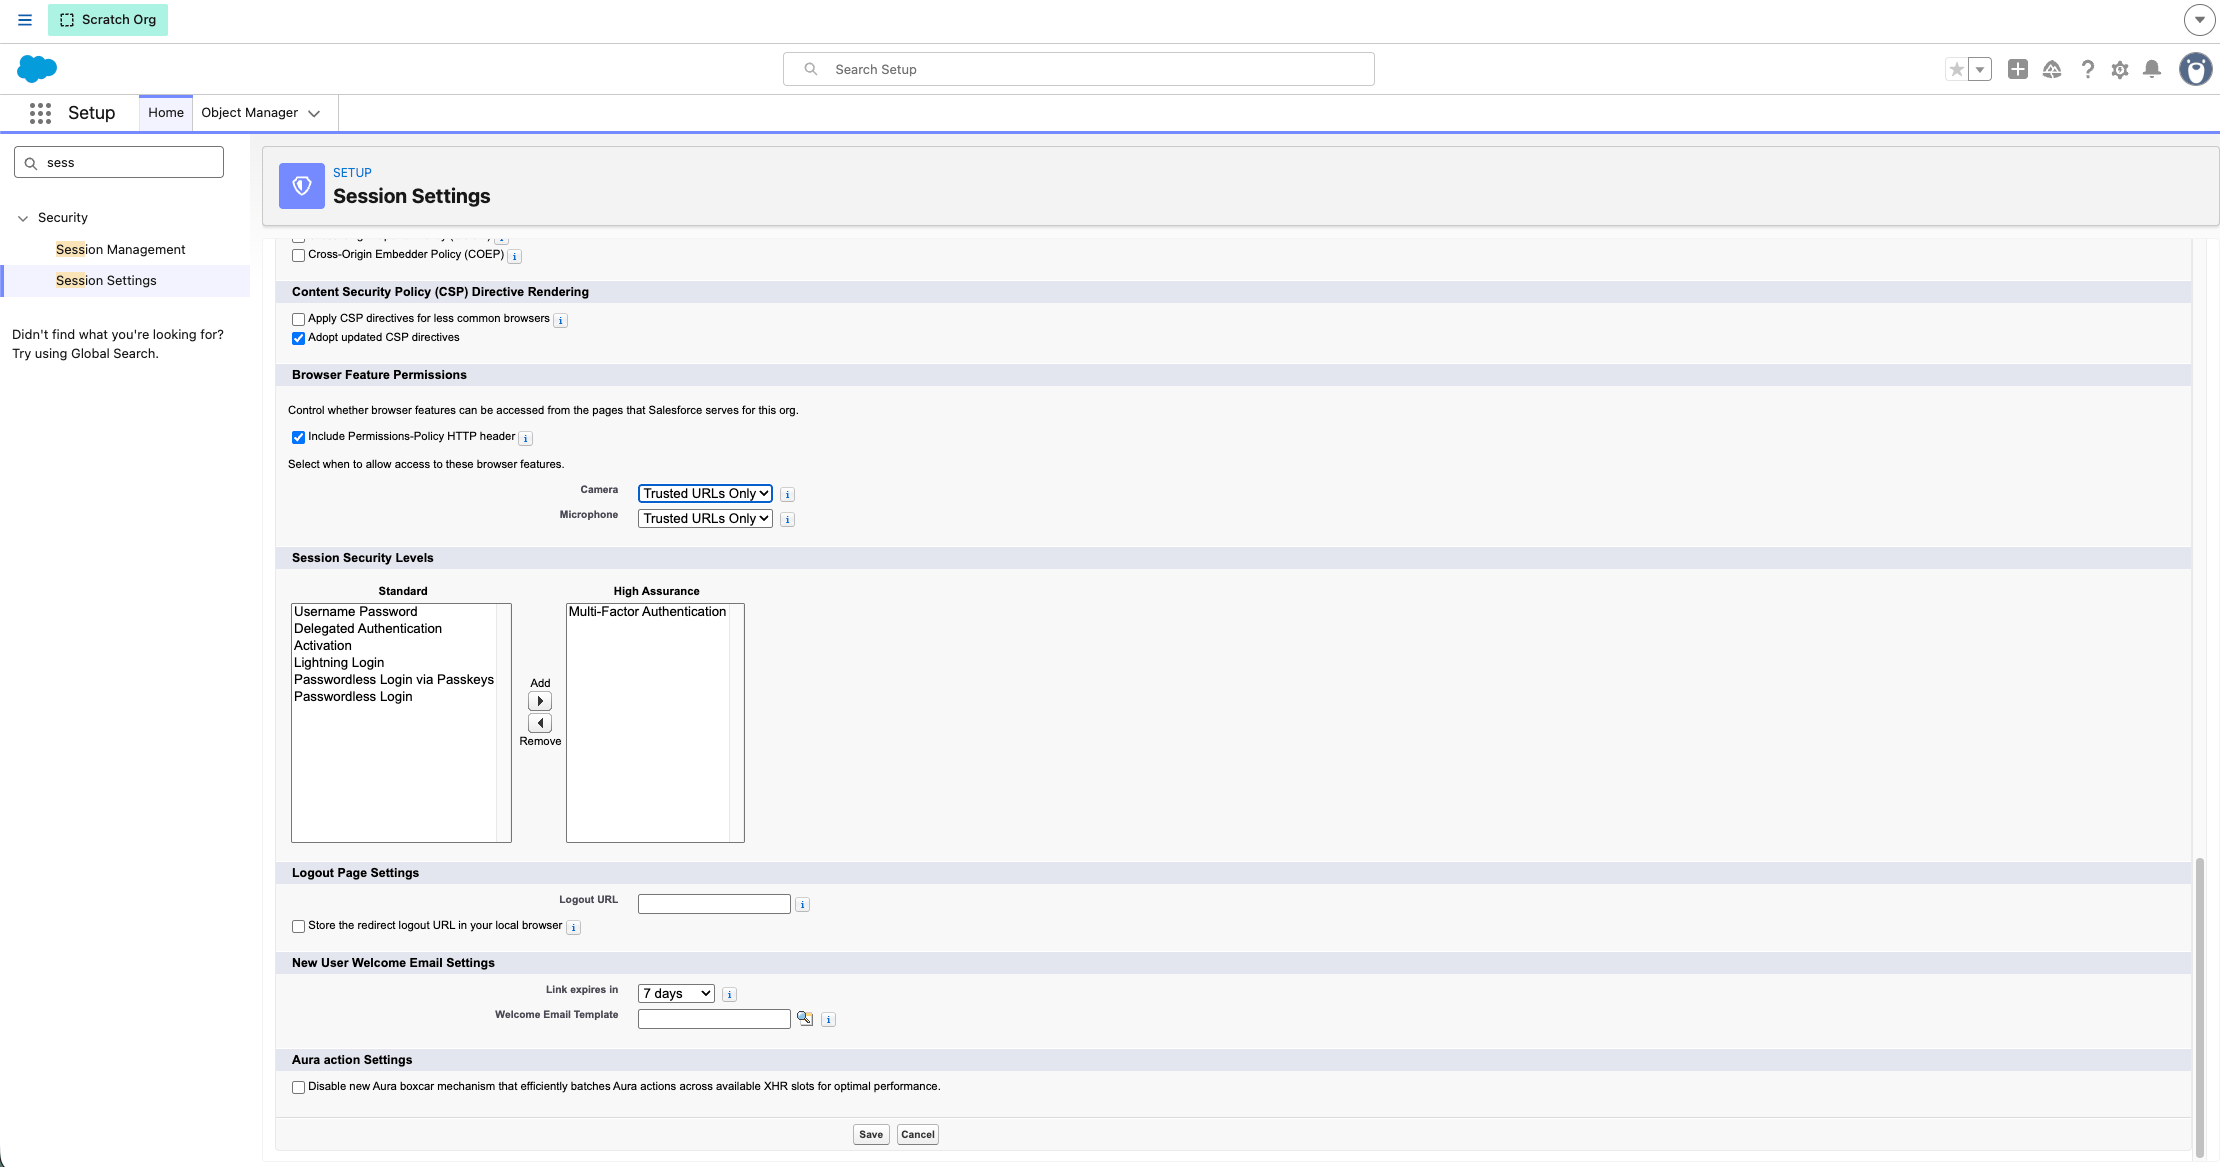
 4\. Accédez à **Setup > Session Settings > Browser Feature Permissions** et activez **Include Permission-Policy HTTP header**.
Étape 6 : configurer la présence des agents et Omni-Channel
Créer un statut de présence
1. Dans Setup, créez un statut de présence **Available**.
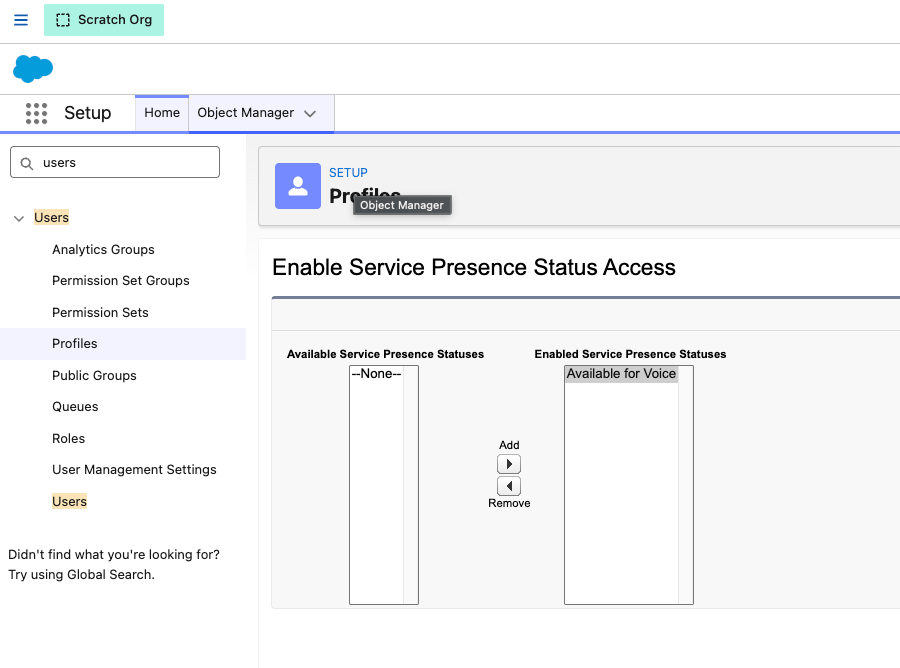
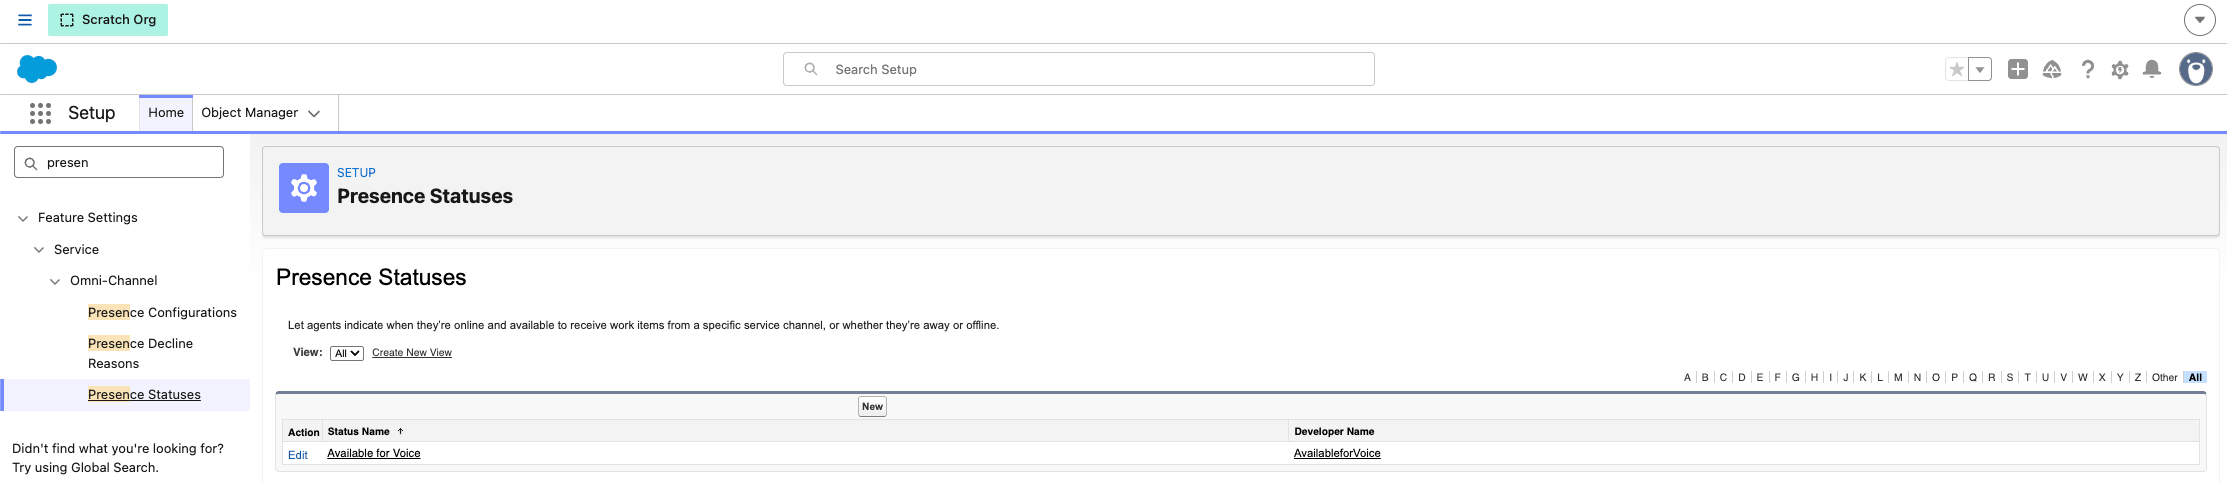 2. Accordez-le via le profil **System Administrator** (Setup > Profiles > enabled presence statuses).

Autoriser les agents à refuser des appels
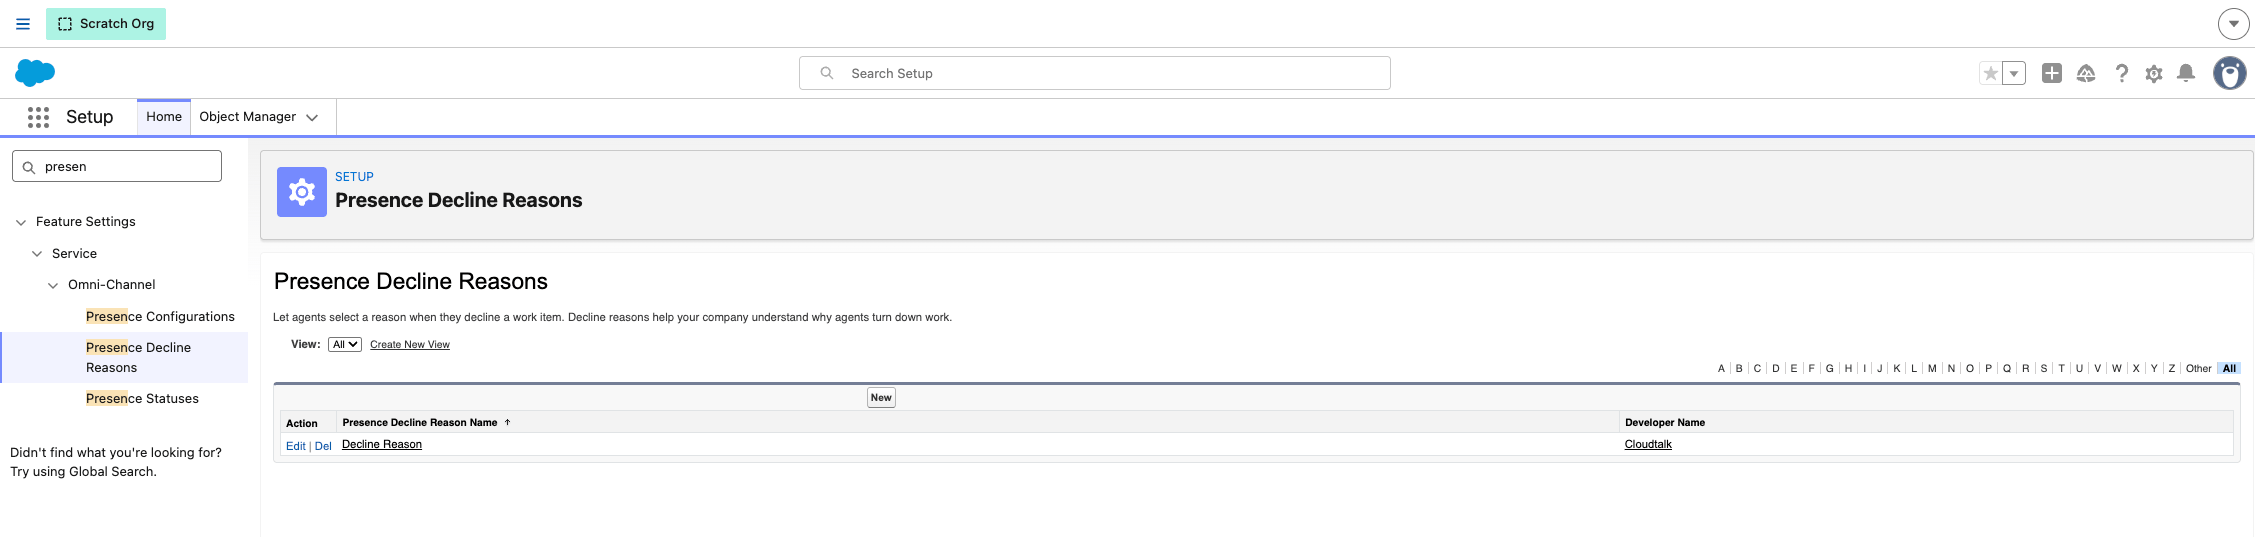
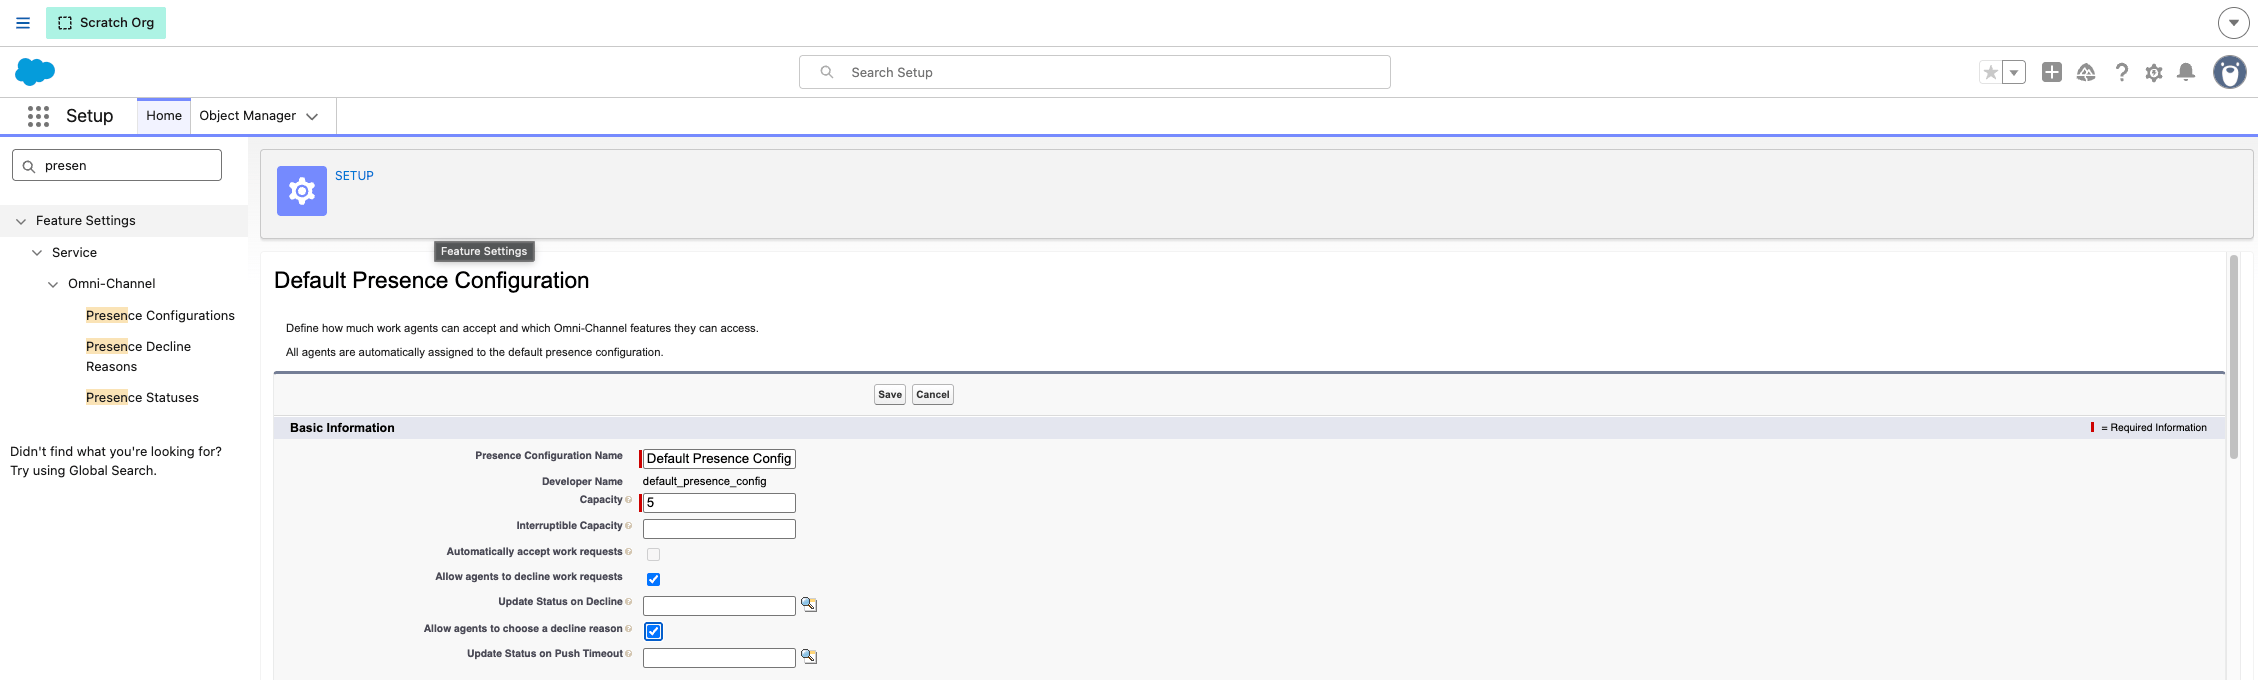
1. Ouvrez **Setup > Presence Decline Reasons** et définissez au moins un motif de refus.
 2. Ouvrez **Setup > Presence Configurations** et activez :
* Allow agents to decline work requests
* Allow agents to choose a decline reason
2. Ouvrez **Setup > Presence Configurations** et activez :
* Allow agents to decline work requests
* Allow agents to choose a decline reason
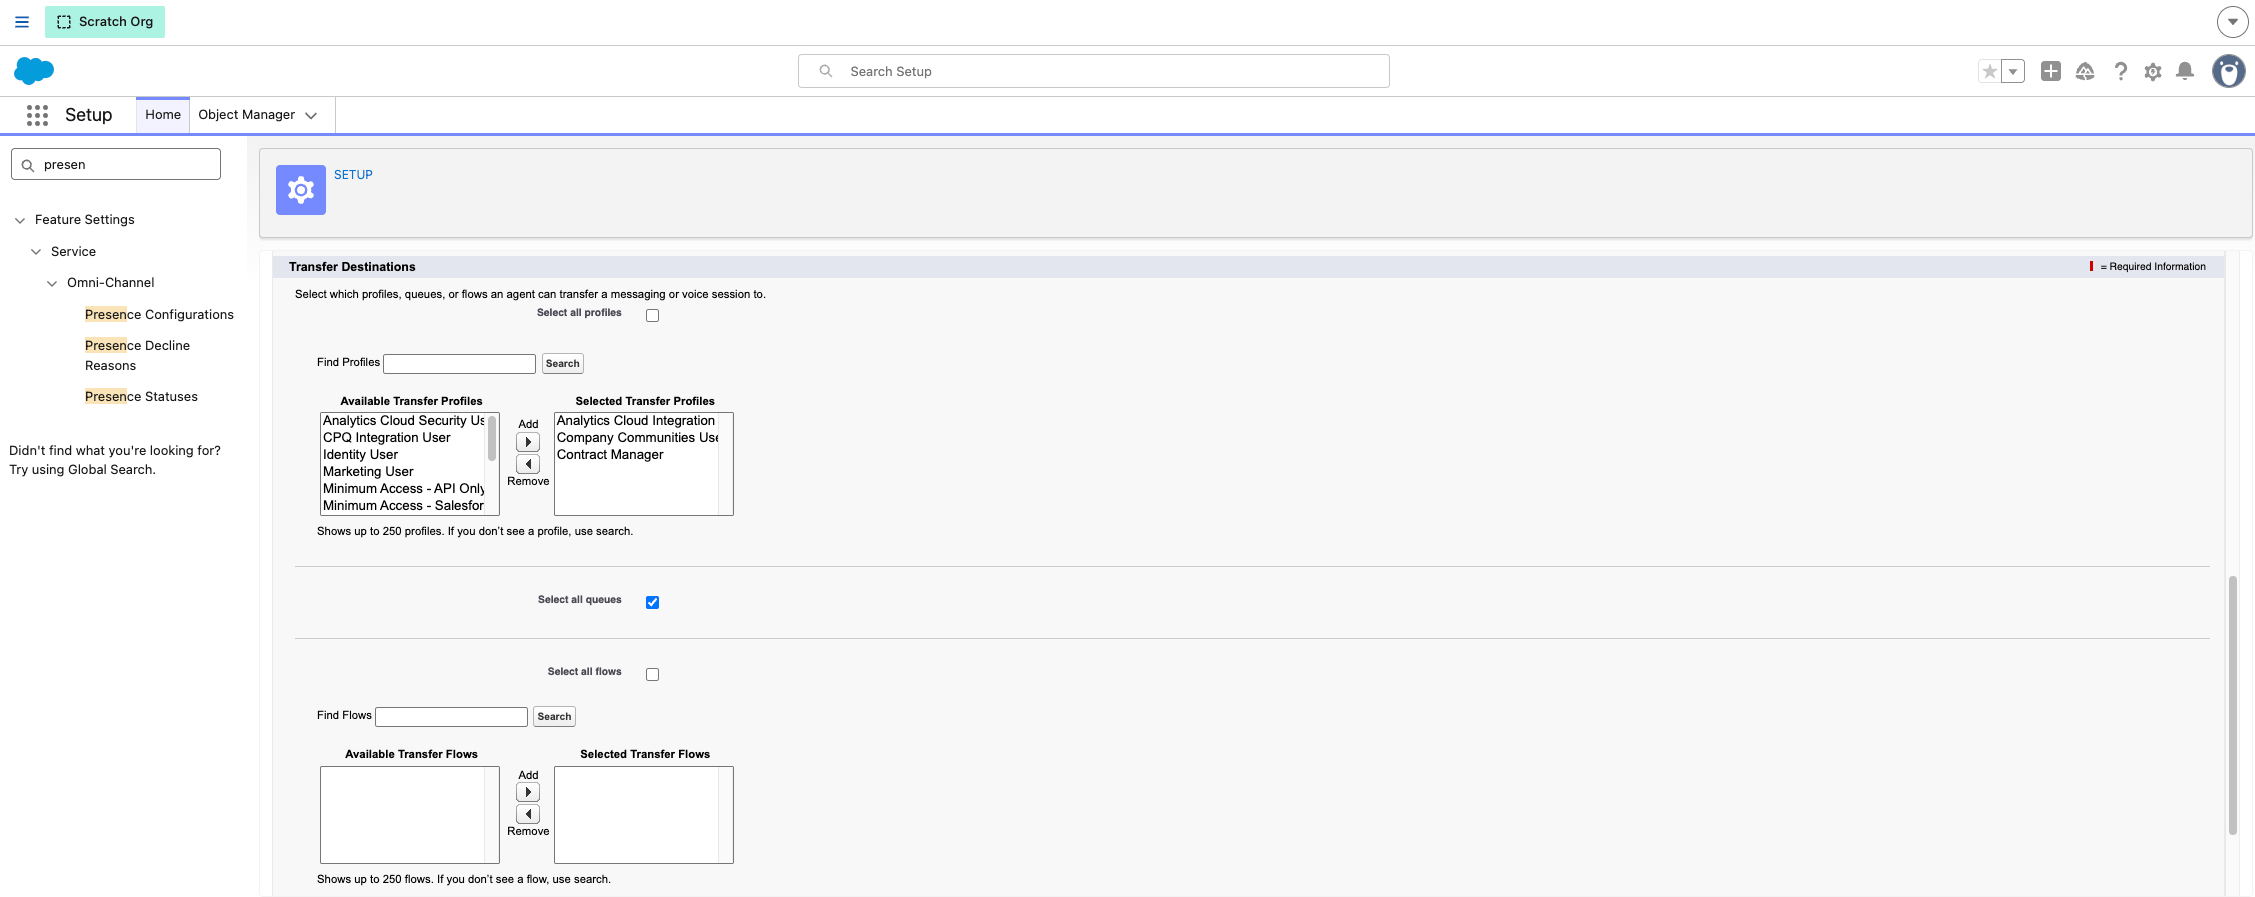
Configurer les cibles de transfert
Dans la configuration de présence/Omni-Channel, définissez les profils et les files d'attente vers lesquels les agents peuvent transférer. Sélectionnez **tous les profils** et **toutes les files d'attente** pour bénéficier de la couverture la plus large.
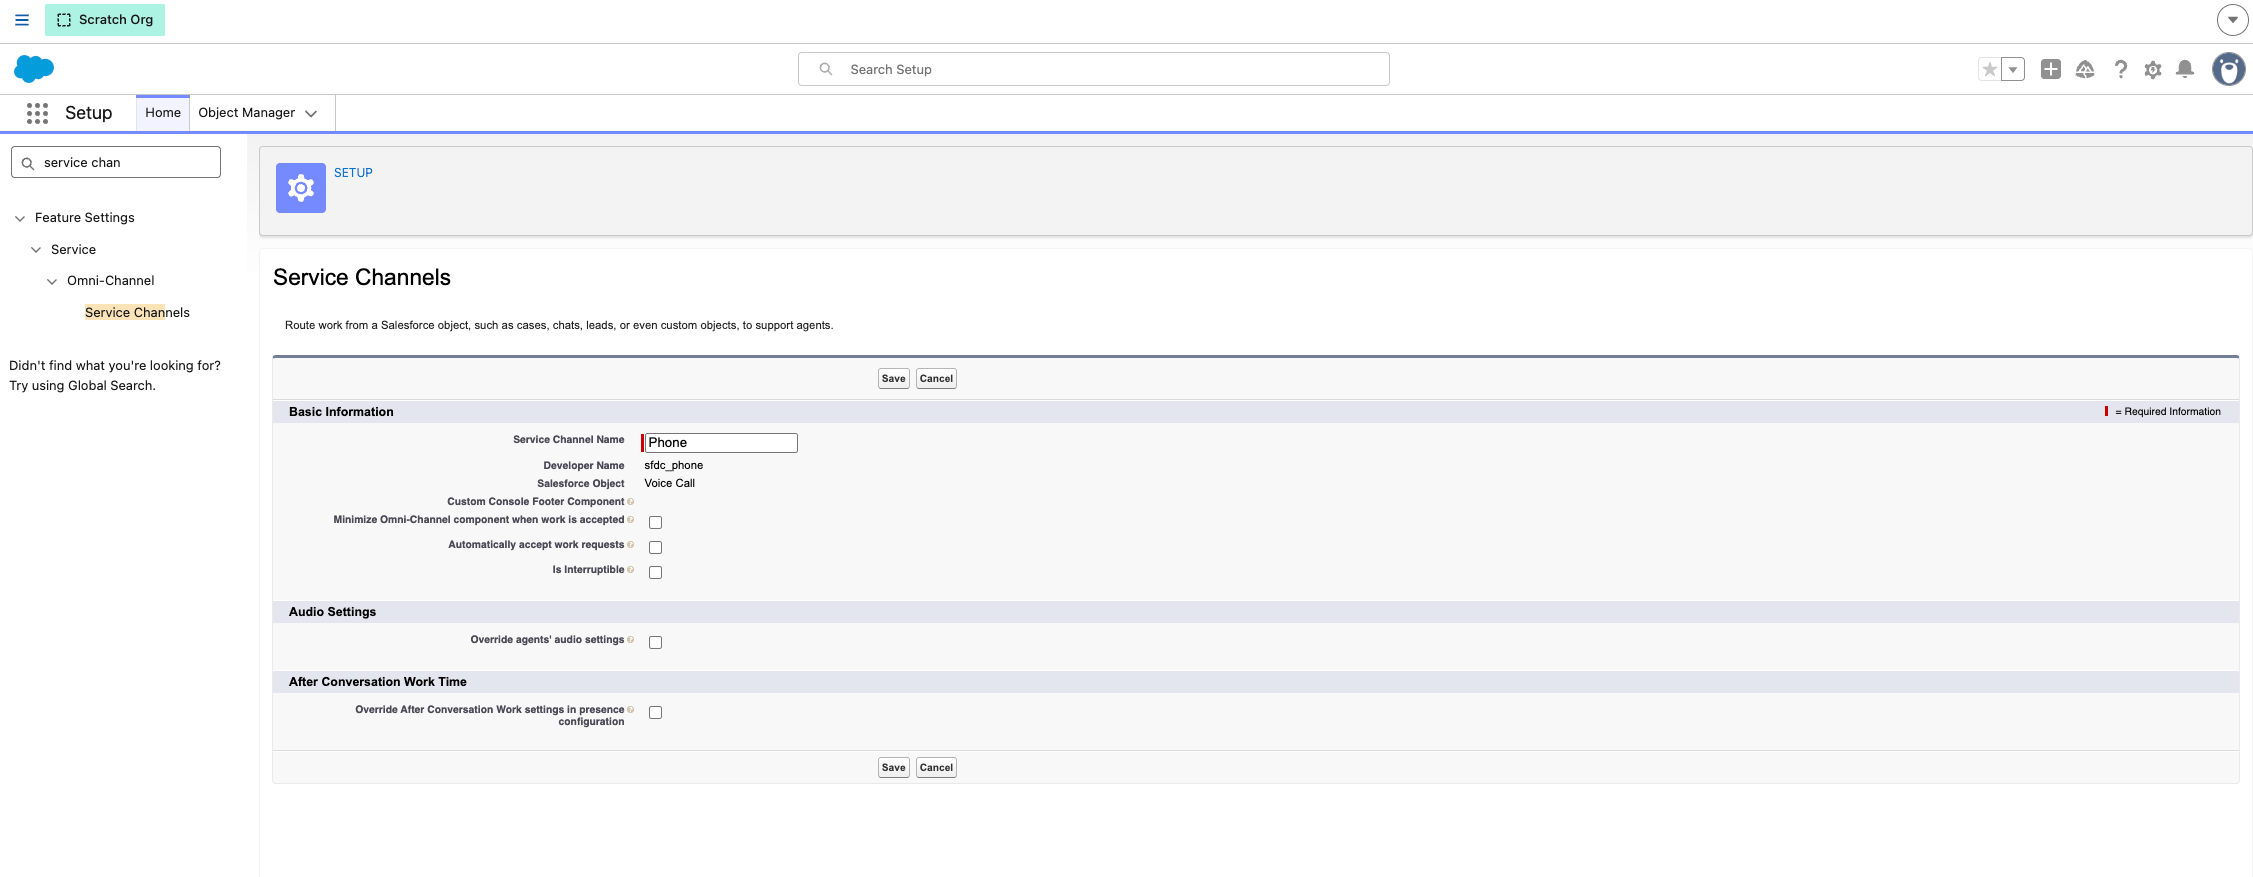
Garder le panneau Omni-Channel ouvert pendant les appels
1. Dans Setup, recherchez **Service Channels** et modifiez le canal de service **Phone**.
2. Décochez **Minimize Omni-Channel component when work is accepted**.
Étape 7 : personnaliser l'affichage des enregistrements
Afficher les coordonnées du contact en en-tête
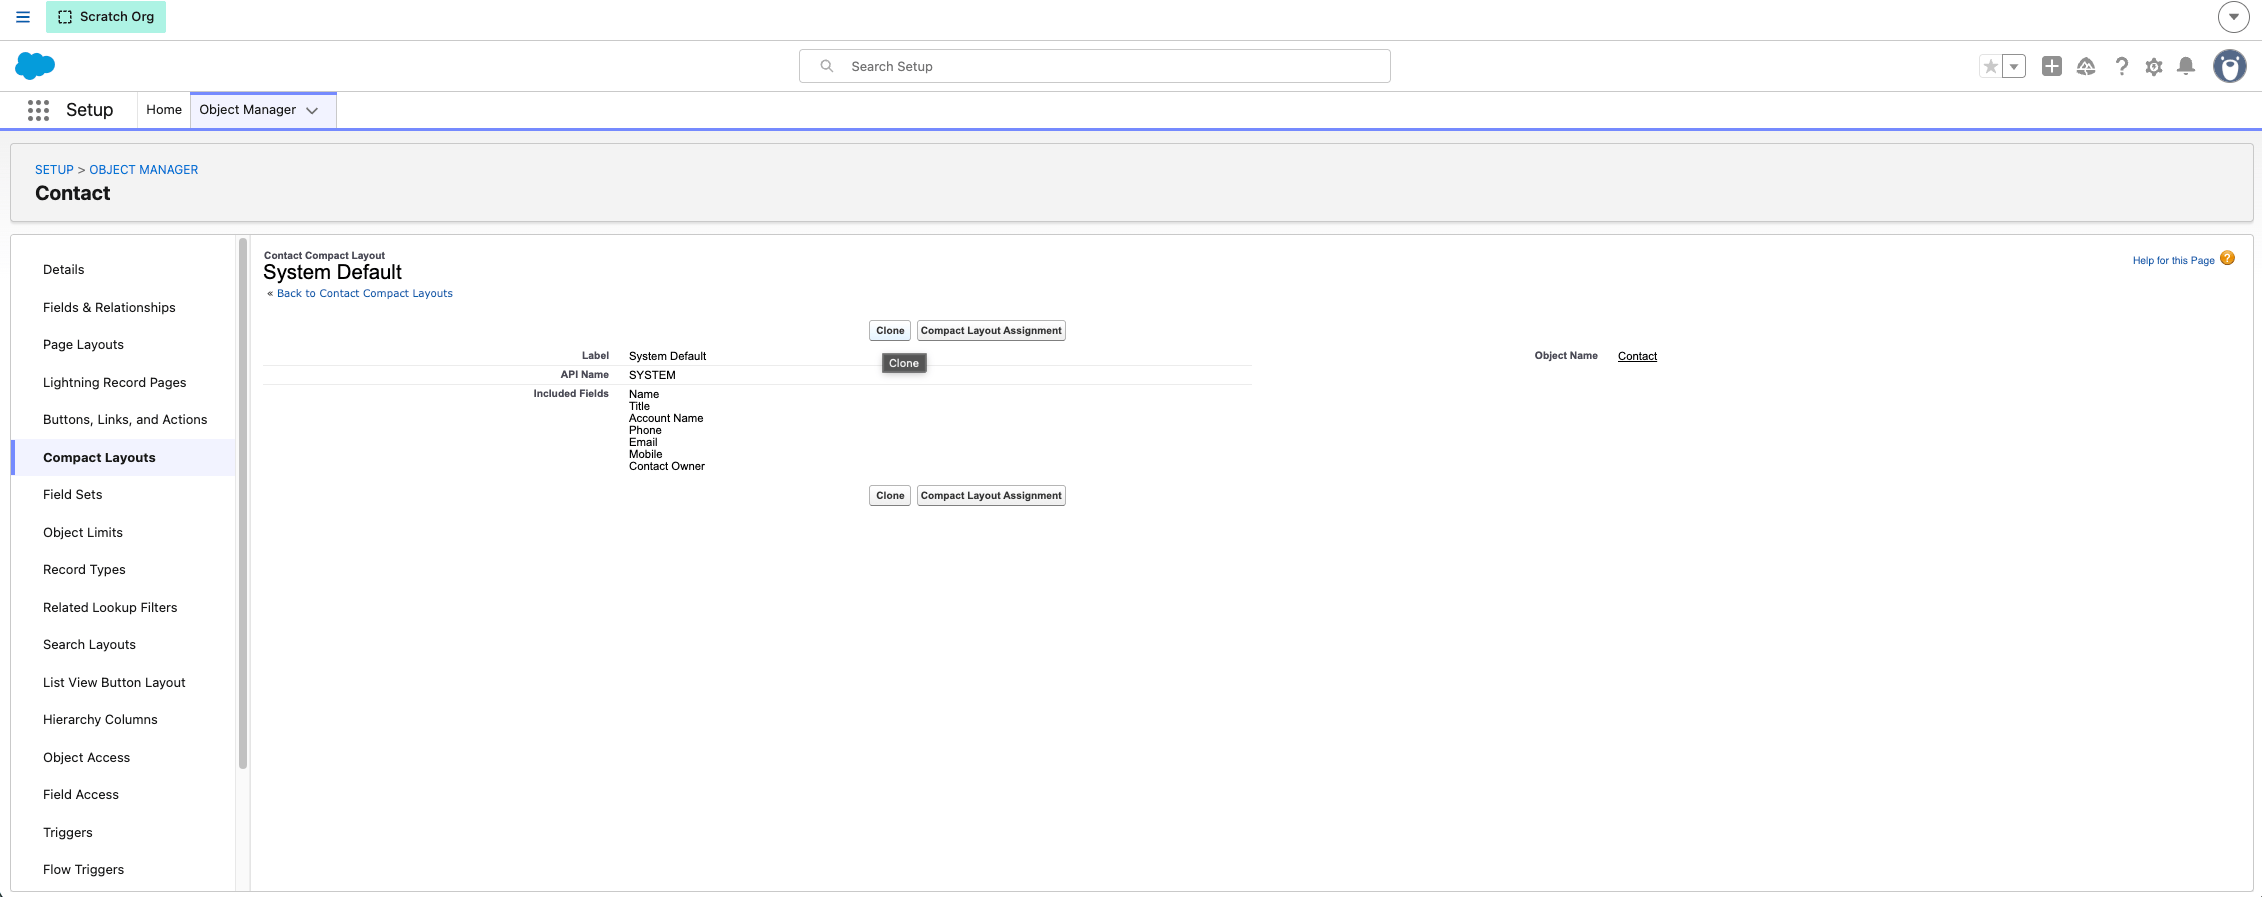
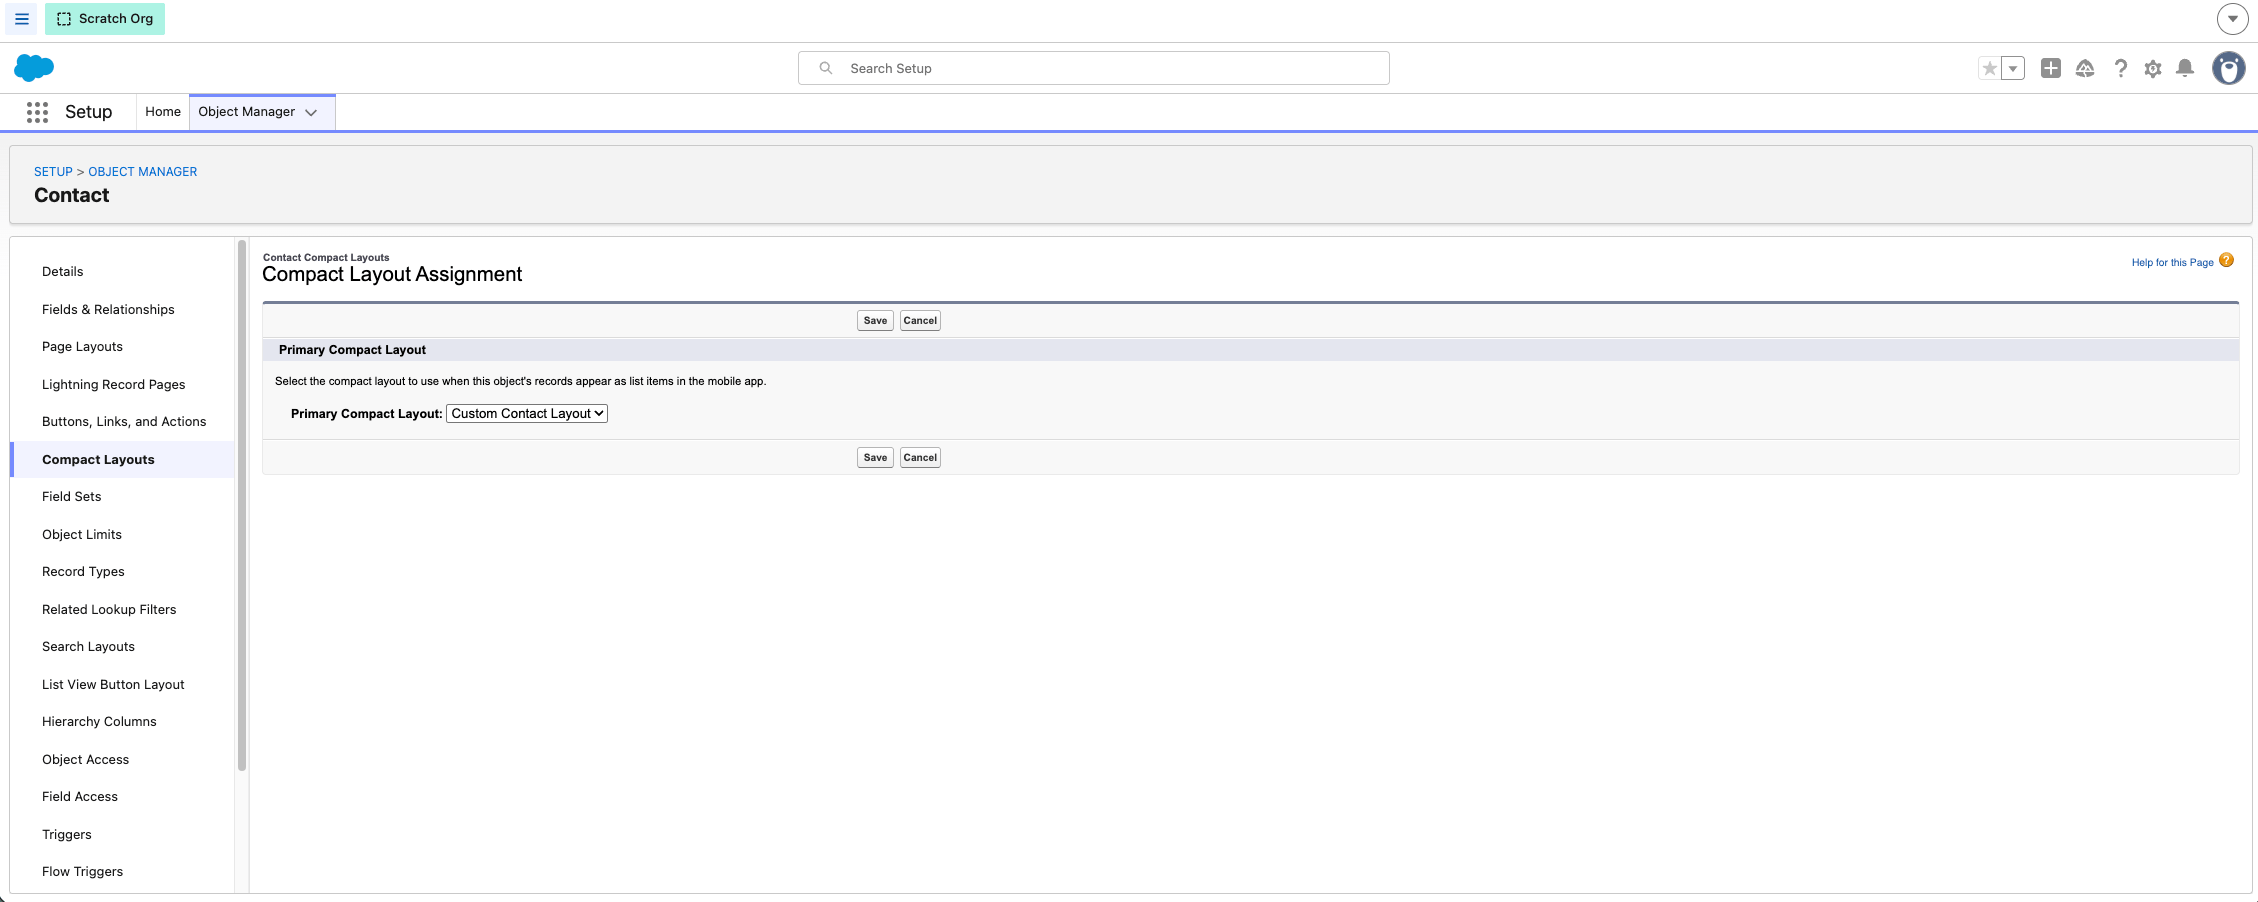
1. Ouvrez **Object Manager > (objet concerné) > Compact Layouts**.
2. Clonez **System Default** et donnez-lui un nom (par exemple « Custom »).
3. Déplacez **Recipient Contact Info** dans les champs sélectionnés et placez-le en premier.
4. Enregistrez, puis ouvrez **Compact Layout Assignment** et attribuez votre nouvelle présentation.
Afficher l'historique des appels sur la fiche de contact
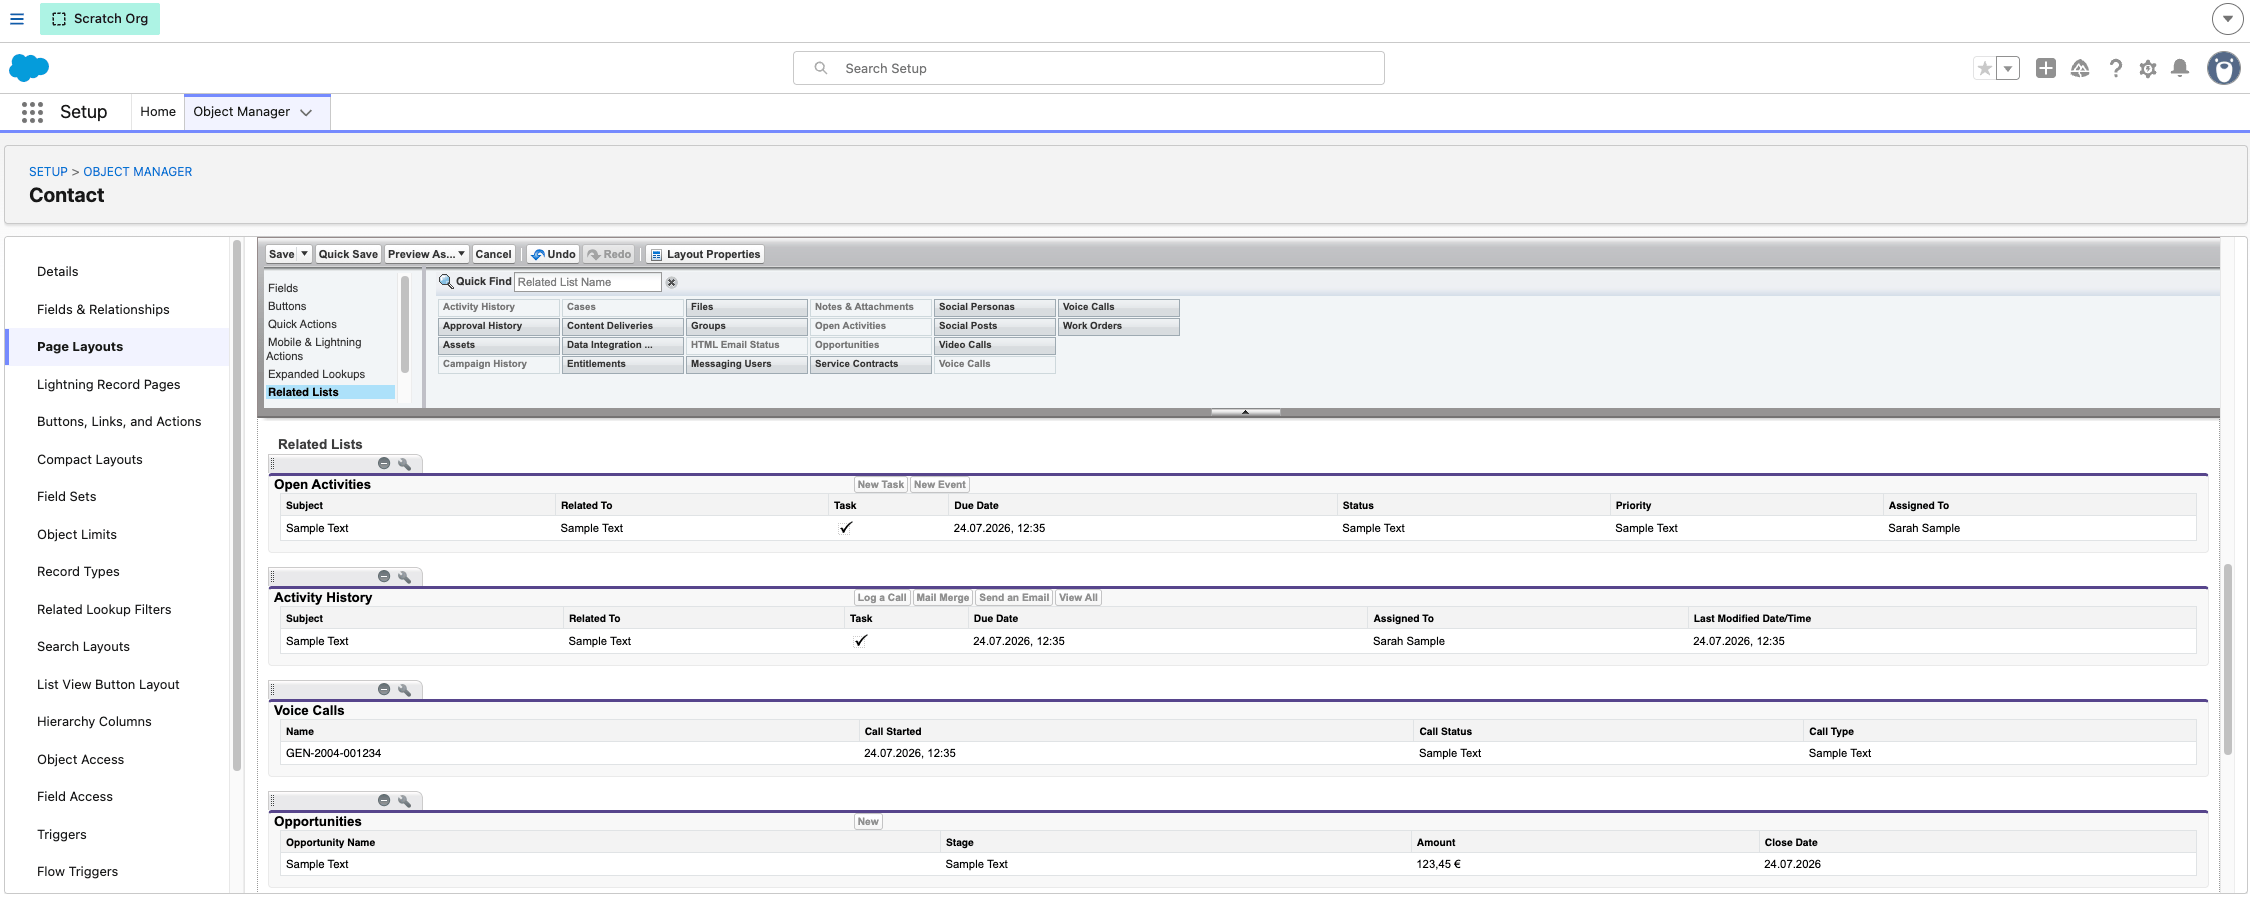
1. Ouvrez **Object Manager > Contact > Page Layouts**.
2. Ajoutez la liste associée **Voice Calls** à la présentation.
 **C'est terminé !**
Les agents à qui l'ensemble d'autorisations a été attribué et qui ont été ajoutés au centre de contacts peuvent désormais se connecter au widget CloudTalk dans le panneau Omni-Channel et commencer à traiter des appels. Renvoyez-les vers le [guide Salesforce Service Cloud Voice](/fr/articles/14654473-salesforce-service-cloud-voice) pour l'utilisation au quotidien.
***
*Besoin d'aide ou une question ?* Contactez-nous simplement via notre [Portail Support](https://support.cloudtalk.io/hc/en-us/requests/new?ticket_form_id=26305535257884) — nous sommes là pour vous.
## Related topics
- [Salesforce Service Cloud Voice](/fr/articles/14654473-salesforce-service-cloud-voice.md)
- [Configurer Salesforce](/fr/articles/3368501-configure-salesforce.md)
- [Listes de contacts Salesforce dans les campagnes](/fr/articles/9170735-salesforce-contact-lists-in-campaigns.md)
This documentation is built and hosted on [Mintlify](https://mintlify.com), a developer documentation platform.
**C'est terminé !**
Les agents à qui l'ensemble d'autorisations a été attribué et qui ont été ajoutés au centre de contacts peuvent désormais se connecter au widget CloudTalk dans le panneau Omni-Channel et commencer à traiter des appels. Renvoyez-les vers le [guide Salesforce Service Cloud Voice](/fr/articles/14654473-salesforce-service-cloud-voice) pour l'utilisation au quotidien.
***
*Besoin d'aide ou une question ?* Contactez-nous simplement via notre [Portail Support](https://support.cloudtalk.io/hc/en-us/requests/new?ticket_form_id=26305535257884) — nous sommes là pour vous.
## Related topics
- [Salesforce Service Cloud Voice](/fr/articles/14654473-salesforce-service-cloud-voice.md)
- [Configurer Salesforce](/fr/articles/3368501-configure-salesforce.md)
- [Listes de contacts Salesforce dans les campagnes](/fr/articles/9170735-salesforce-contact-lists-in-campaigns.md)
This documentation is built and hosted on [Mintlify](https://mintlify.com), a developer documentation platform.