> ## Documentation Index
> Fetch the complete documentation index at: https://help.cloudtalk.io/llms.txt
> Use this file to discover all available pages before exploring further.
# Enviar SMS de CloudTalk desde Pipedrive mediante una automatización
> Activa automáticamente mensajes SMS desde CloudTalk en función de las actualizaciones de tratos en Pipedrive
En esta guía aprenderás a enviar mensajes SMS automáticamente desde CloudTalk cuando se actualiza un trato en Pipedrive, usando automatizaciones y webhooks.
**Nivel de usuario**: Admin
***
Requisitos previos
Antes de empezar, asegúrate de tener:
* Acceso a las **Automatizaciones de Pipedrive**
* Una **cuenta de CloudTalk**
* Una **Clave de API** generada en CloudTalk:
* Ve a **Dashboard > Cuenta > Configuración > Claves de API**
* Copia las dos:
* Clave de API **ID** (se usa como nombre de usuario)
* Clave de API **Clave** (se usa como contraseña)
* Al menos un **número habilitado para SMS** en CloudTalk
Paso 1: Crear un webhook en Pipedrive
1. En Pipedrive, ve a **Más > Automatizaciones > Webhooks**
2. Haz clic en **Añadir un webhook automatizado**
3. Completa los siguientes datos:
* **Nombre**: Elige el nombre que quieras (p. ej., *Enviar SMS*)
* **URL**:
```
https://my.cloudtalk.io/api/sms/send.json?
```
* **HTTP Auth Username**: Tu **ID de Clave de API** de CloudTalk
* **HTTP Auth Password**: Tu **Clave de API** de CloudTalk
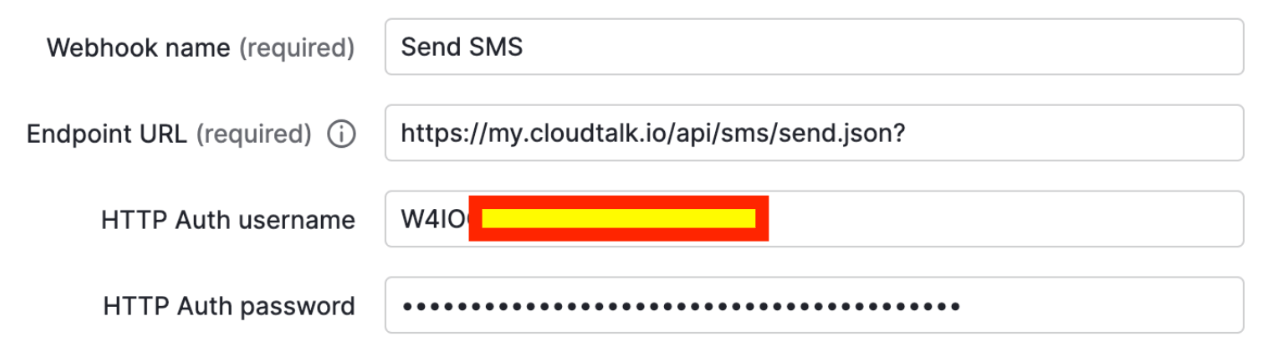 Este webhook se usará para enviar solicitudes de SMS a CloudTalk.
Paso 2: Crear una automatización
1. Ve a:\
**Automatizaciones > Automatizaciones > + Automatización**
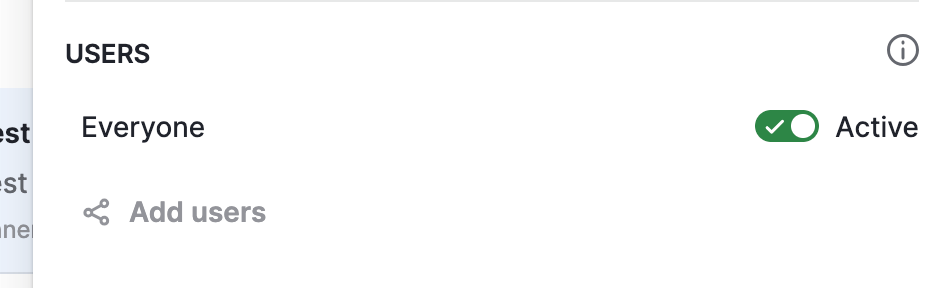
2. Elige qué usuarios pueden activar la automatización
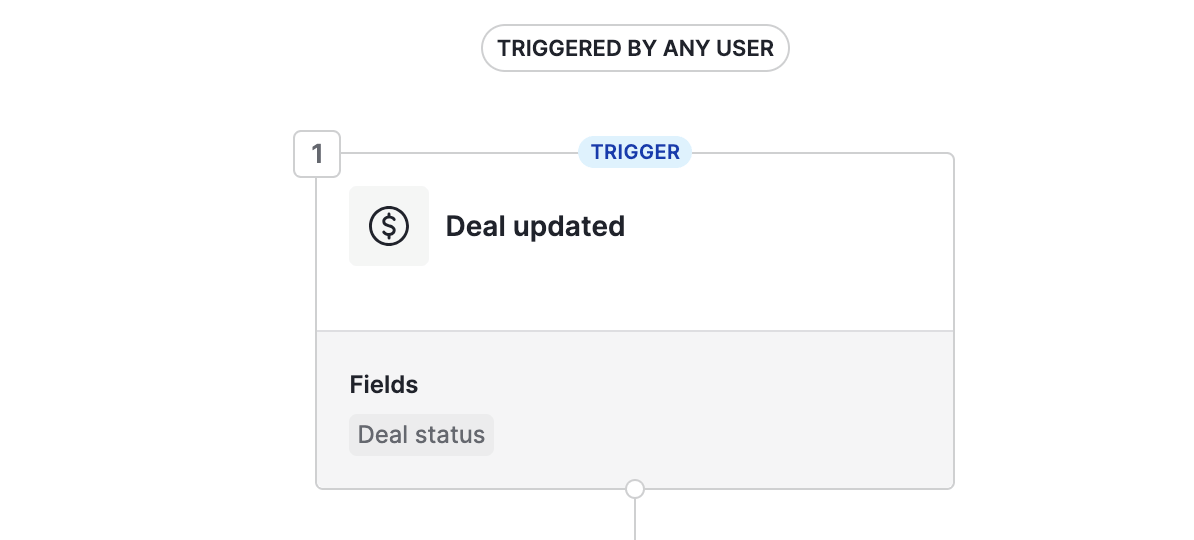
 3. Configura el activador:
* **Activador**: *Deal Updated*
* **Campo**: *Deal Status*
3. Configura el activador:
* **Activador**: *Deal Updated*
* **Campo**: *Deal Status*
Paso 3: Definir la condición
Añade una **condición instantánea** para controlar cuándo se envía el SMS.
*Ejemplo*:
* **El estado del trato es "won"**
 Así te aseguras de que el SMS solo se envía cuando el trato llega a una fase concreta.
Paso 4: Configurar la acción del webhook
1. Añade una **Acción > Enviar solicitud de webhook**
2. Configura la solicitud:
* **Método**: `POST`
* **Webhook**: Selecciona el webhook que creaste antes
Parámetros del cuerpo:
* **recipient**\
Usa el valor dinámico: *Deal contact person phone*
* **sender**\
Introduce tu **número habilitado para SMS** de CloudTalk
* **message**\
Introduce el texto de tu SMS. Puedes incluir valores dinámicos (p. ej., el nombre del contacto o datos del trato)
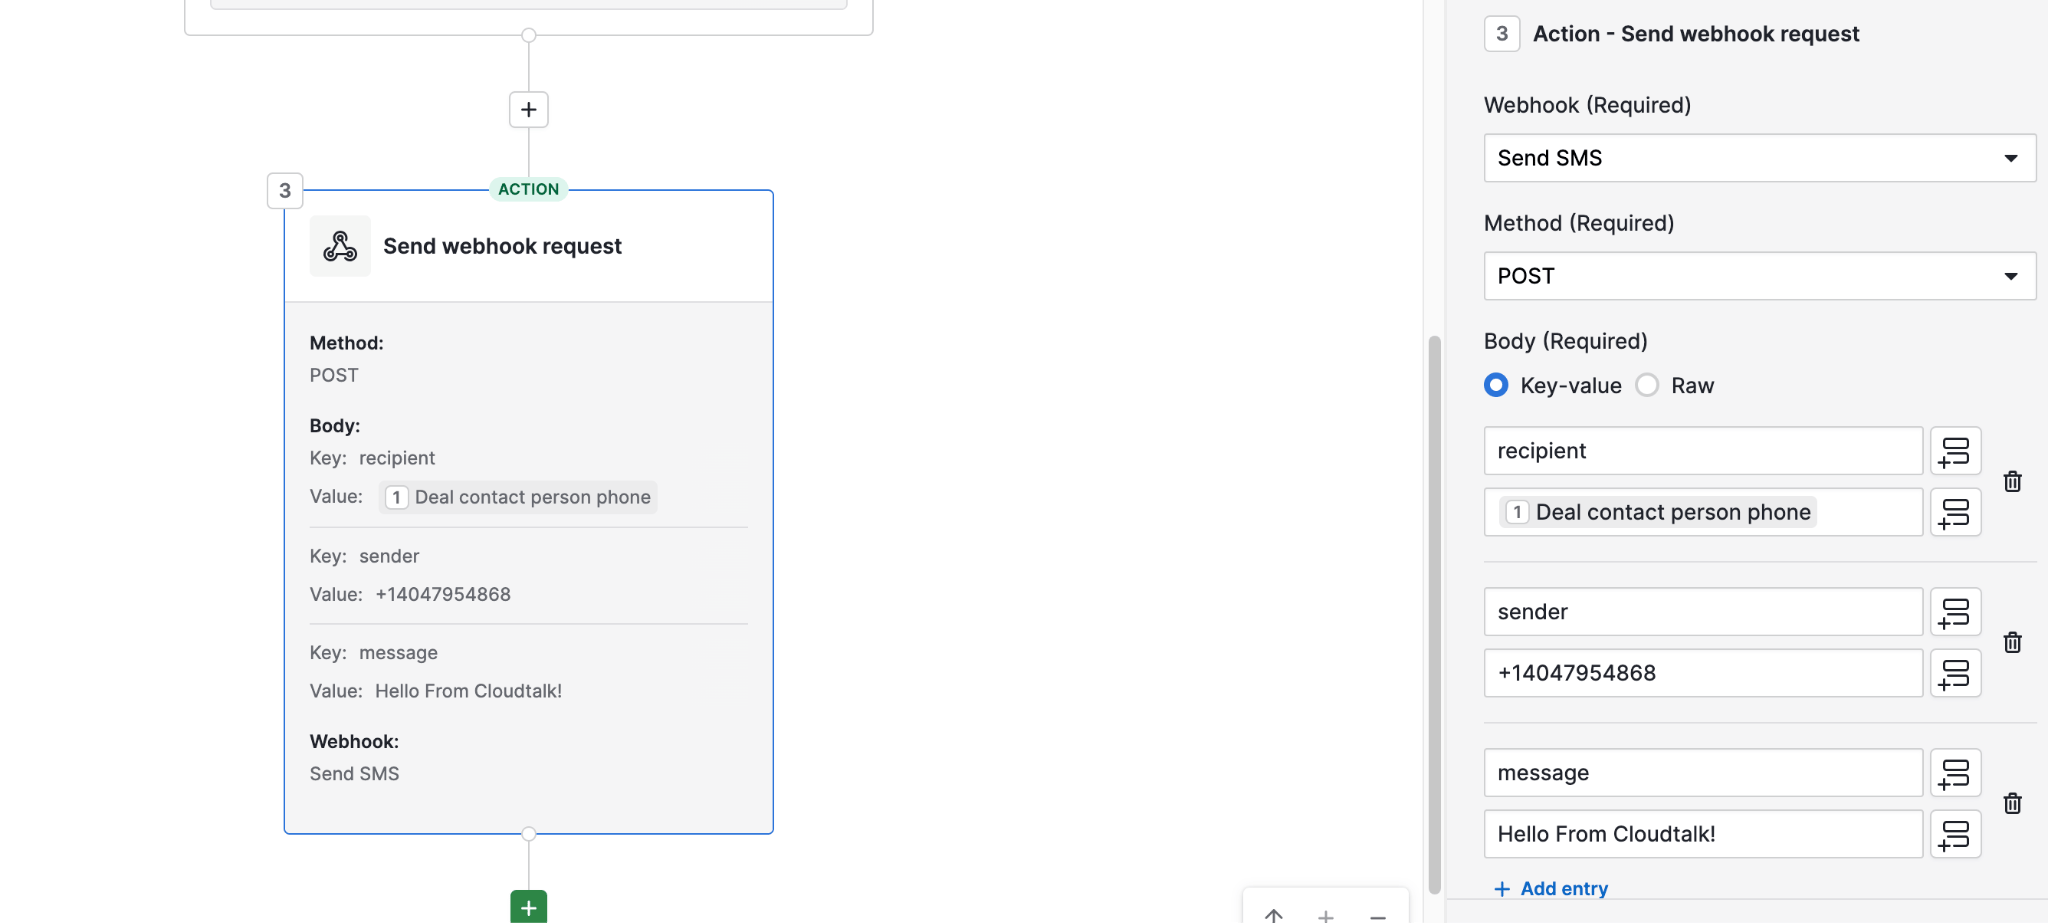
Resultado
Una vez configurado:
* Cuando se actualiza un trato y cumple tu condición (p. ej., marcado como *won*)
* Pipedrive activa el webhook
* CloudTalk envía automáticamente un SMS al contacto
***
*¿Necesitas ayuda o tienes alguna pregunta?* Escríbenos a través de nuestro [Portal de atención al cliente](https://support.cloudtalk.io/hc/en-us/requests/new?ticket_form_id=26305535257884) — estamos aquí para ayudarte.
## Related topics
- [Etapa de negocio de Pipedrive: automatización con Zapier](/es/articles/5724062-pipedrive-deal-stage-zapier-automation.md)
- [Activar una llamada de VoiceAgent desde Pipedrive](/es/articles/15516233-triggering-a-voiceagent-call-from-pipedrive.md)
- [Cómo activar una llamada de VoiceAgent desde Freshdesk](/es/articles/15457387-triggering-a-voiceagent-call-from-freshdesk.md)
This documentation is built and hosted on [Mintlify](https://mintlify.com), a developer documentation platform.