> ## Documentation Index
> Fetch the complete documentation index at: https://help.cloudtalk.io/llms.txt
> Use this file to discover all available pages before exploring further.
# How to Set Up Smart Dialer
> Copy all the numbers on any website straight to CloudTalk, and start dialing them one-by-one with a simple click.
Smart Dialer scans website pages, compiles a list of phone numbers, and lets you automatically call them with a **single click**. It does not automatically trigger calls or start dialing at a scheduled time — the tool simply organizes and displays numbers so you can call them manually, one by one.
**User Level:** Admin
***
Before You Start
Make sure that:
* You have the [CloudTalk Click‑to‑Call extension installed](https://chrome.google.com/webstore/detail/cloudtalk-click-to-call/mbgbeafnenfaffpbpkincpgpepjhekbm?hl=en) in your browser.
* The extension is **switched On**.
* The **CloudTalk desktop app is open**, as it must be running to receive numbers from the extension.
If you need help installing or enabling the extension, see **[How to Use Click‑to‑Call](/en/articles/2964244-the-click-to-call-extension)**[.](/en/articles/2964244-the-click-to-call-extension)
Add Numbers to the Smart Dialer
1. Open your CRM or web page with phone numbers.
For example, in HubSpot or Pipedrive, you can open a contact list or the **Activity** section where multiple phone numbers are visible.
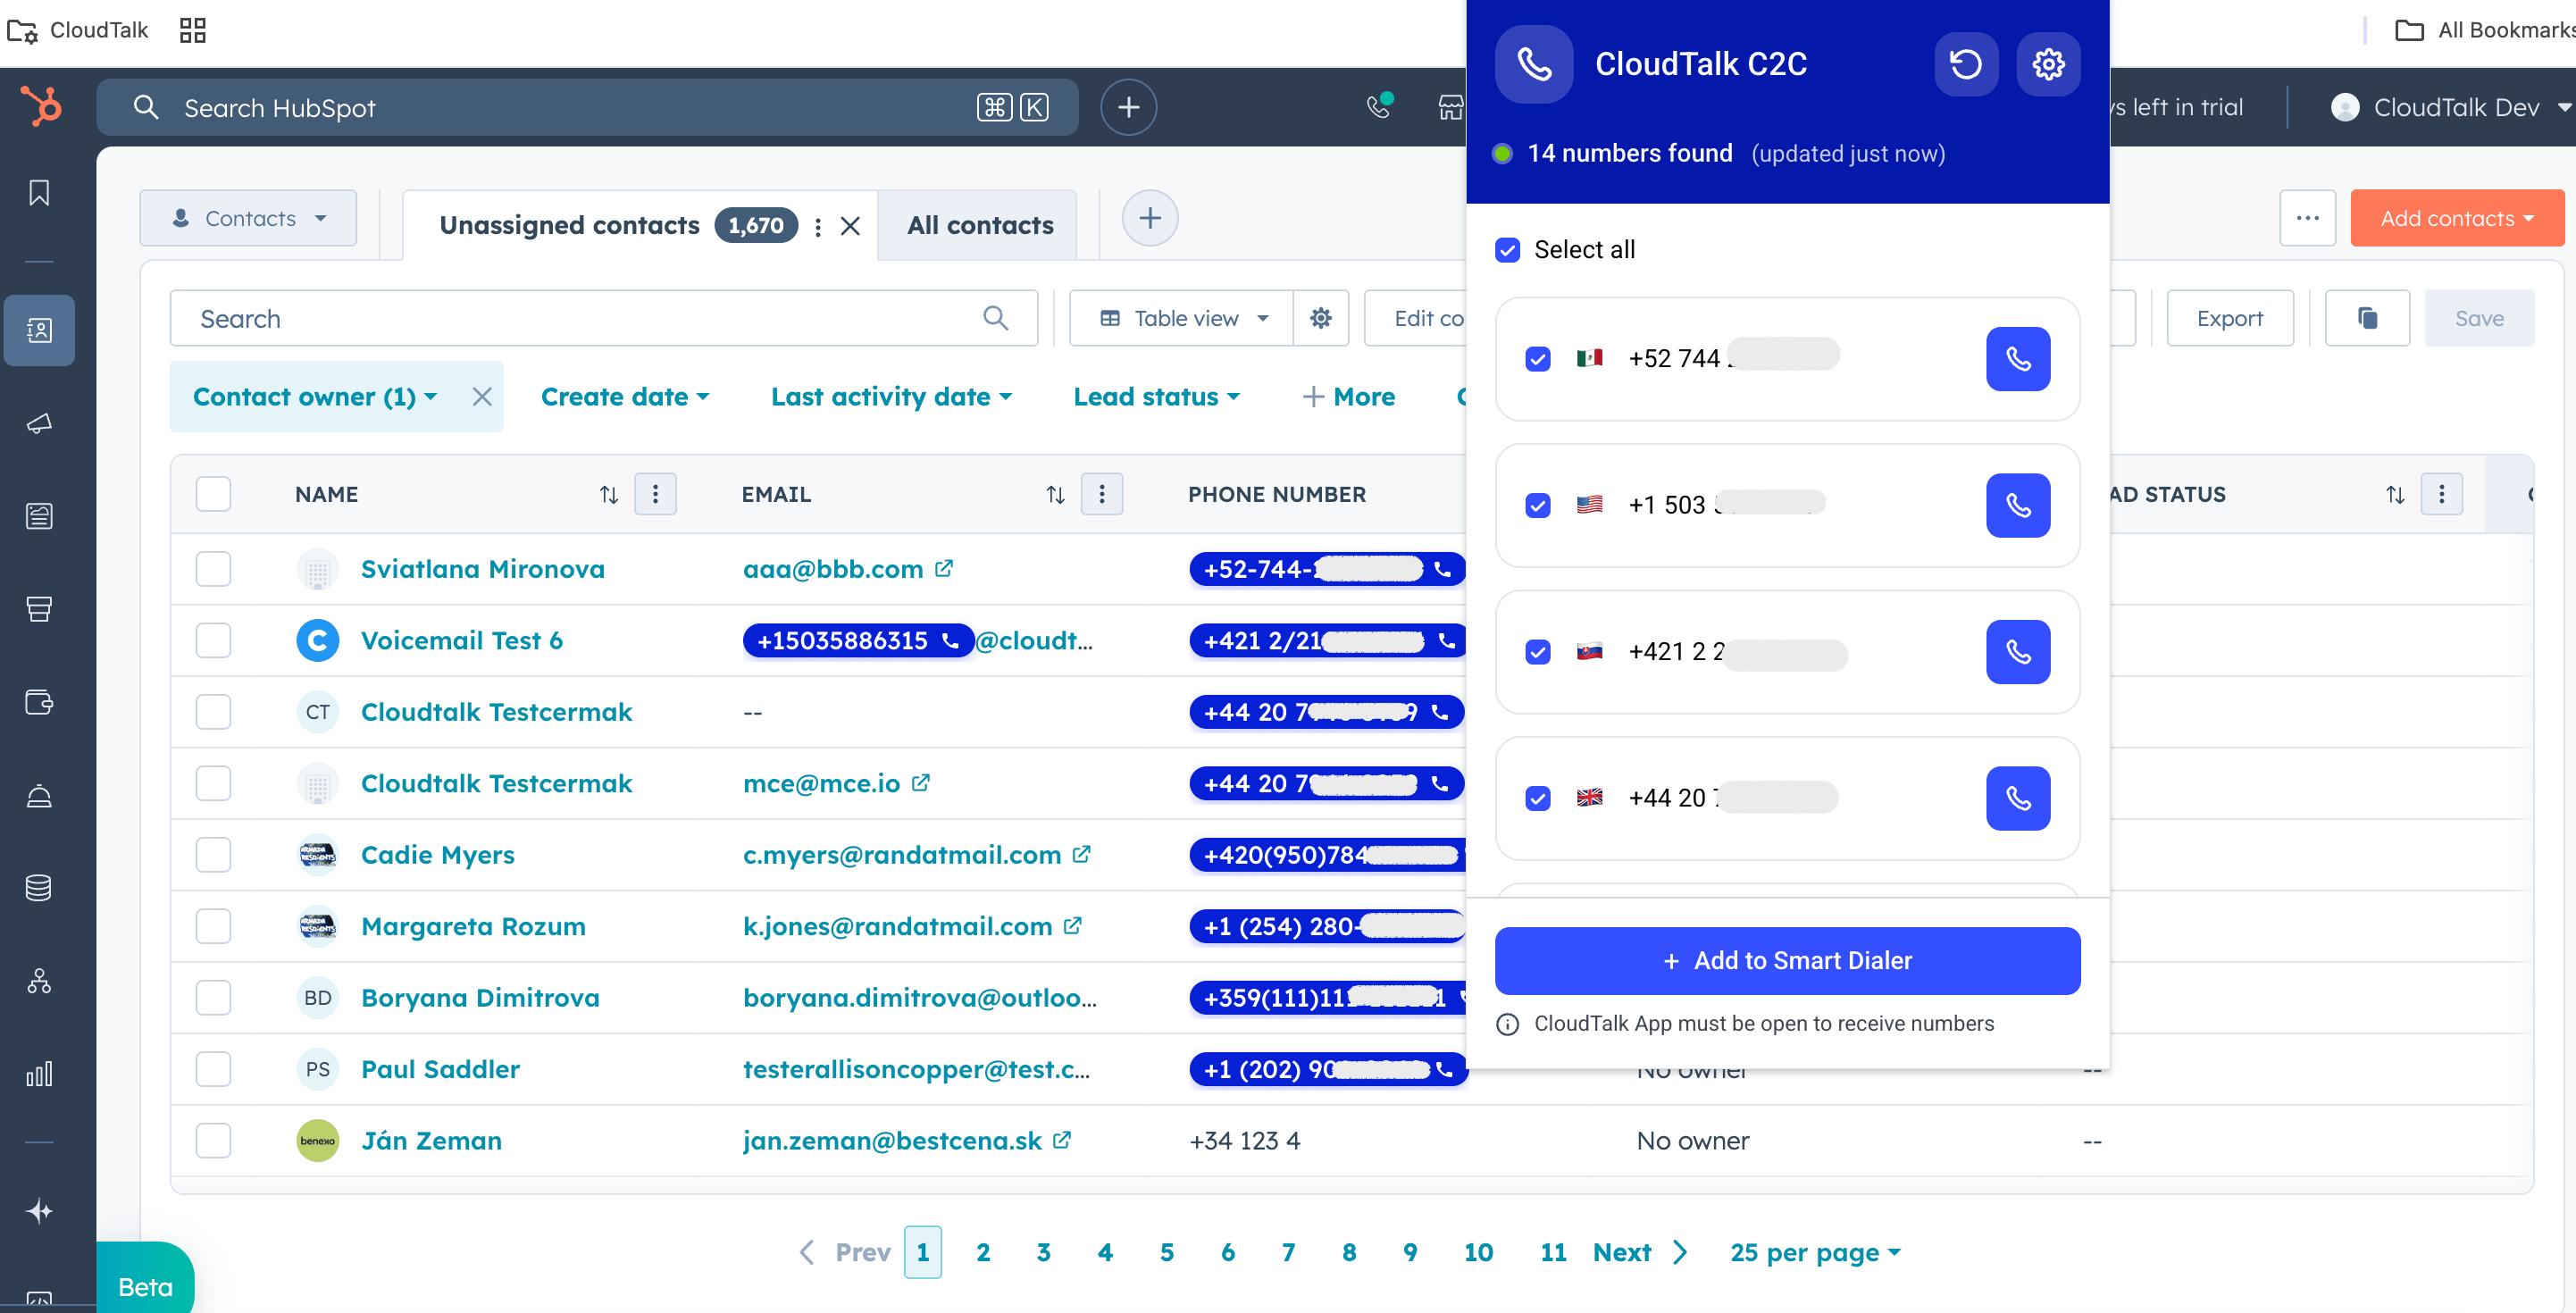
2. Click the **CloudTalk Click‑to‑Call** icon in the top‑right corner of your browser.
3. Review the detected numbers.
The extension automatically scans the page and lists all recognized phone numbers. You can:
* Select individual numbers, or
* Use **Select all** to add every detected number.
4. Click **Add to Smart Dialer**.
What Happens Next
* All selected numbers are sent to the **Smart Dialer queue** in the CloudTalk desktop app.
* Open **Smart Dialer** to review the queue.
* Click **Start session** to begin calling.
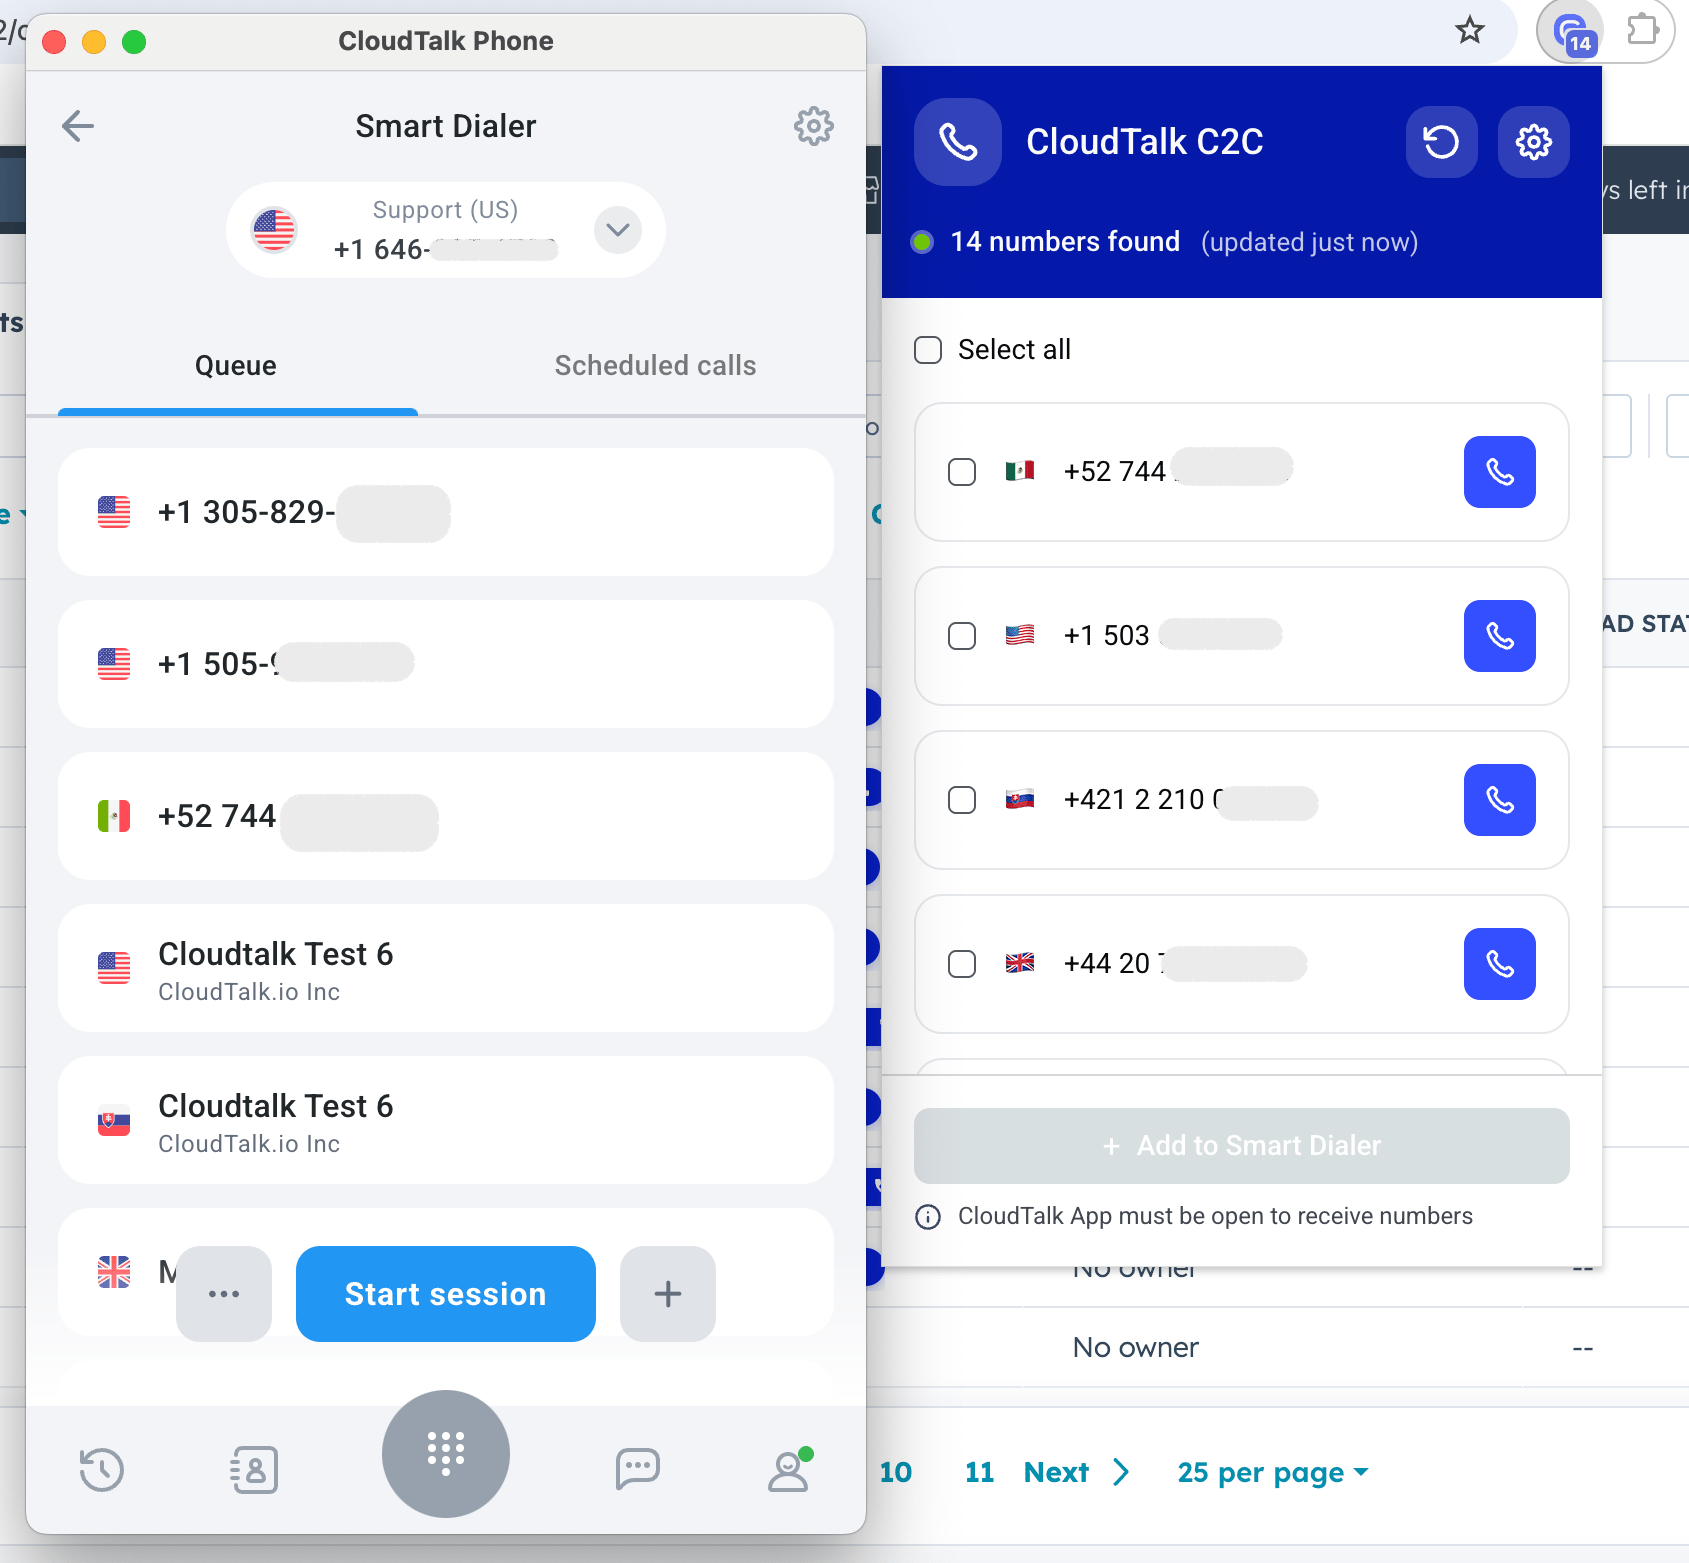 If the **Add to Smart Dialer** button is disabled, check that the CloudTalk app is open and running in the background.
Tips and Best Practices
* Use filters or views in your CRM to control which contacts appear before opening the Click‑to‑Call extension.
* You can repeat this process on multiple pages to continuously build your Smart Dialer queue.
* The extension works across supported integrations and standard web pages where phone numbers are visible.
***
*Need help or have a question?* Just reach out through our [Support portal](https://support.cloudtalk.io/hc/en-us/requests/new?ticket_form_id=26305535257884) — we’re here for you.
## Related topics
- [How to Set Up Zoiper](/en/articles/5361548-how-to-set-up-zoiper.md)
- [How to Set Up MicroSIP](/en/articles/5373619-how-to-set-up-microsip.md)
- [How to Set Up a Cisco IP phone](/en/articles/5408616-how-to-set-up-a-cisco-ip-phone.md)
This documentation is built and hosted on [Mintlify](https://mintlify.com), a developer documentation platform.