> ## Documentation Index
> Fetch the complete documentation index at: https://help.cloudtalk.io/llms.txt
> Use this file to discover all available pages before exploring further.
# Setting up a campaign
> Create and configure an AI Sales Dialer campaign step by step: audience, calling setup, dispositions, agent controls, and activation.
Learn how to create an AI Sales Dialer campaign step by step: audience, calling setup, dispositions, agent controls, and activation.
**User Level**: Admin
***
A campaign is a list of contacts plus the rules for how your team calls them. You create and manage campaigns in the Dashboard under **Dialer (new) > Campaigns**.
Creating a campaign takes five steps: name it, add contacts, configure calling settings, set agent controls, and review.
Step 1: General
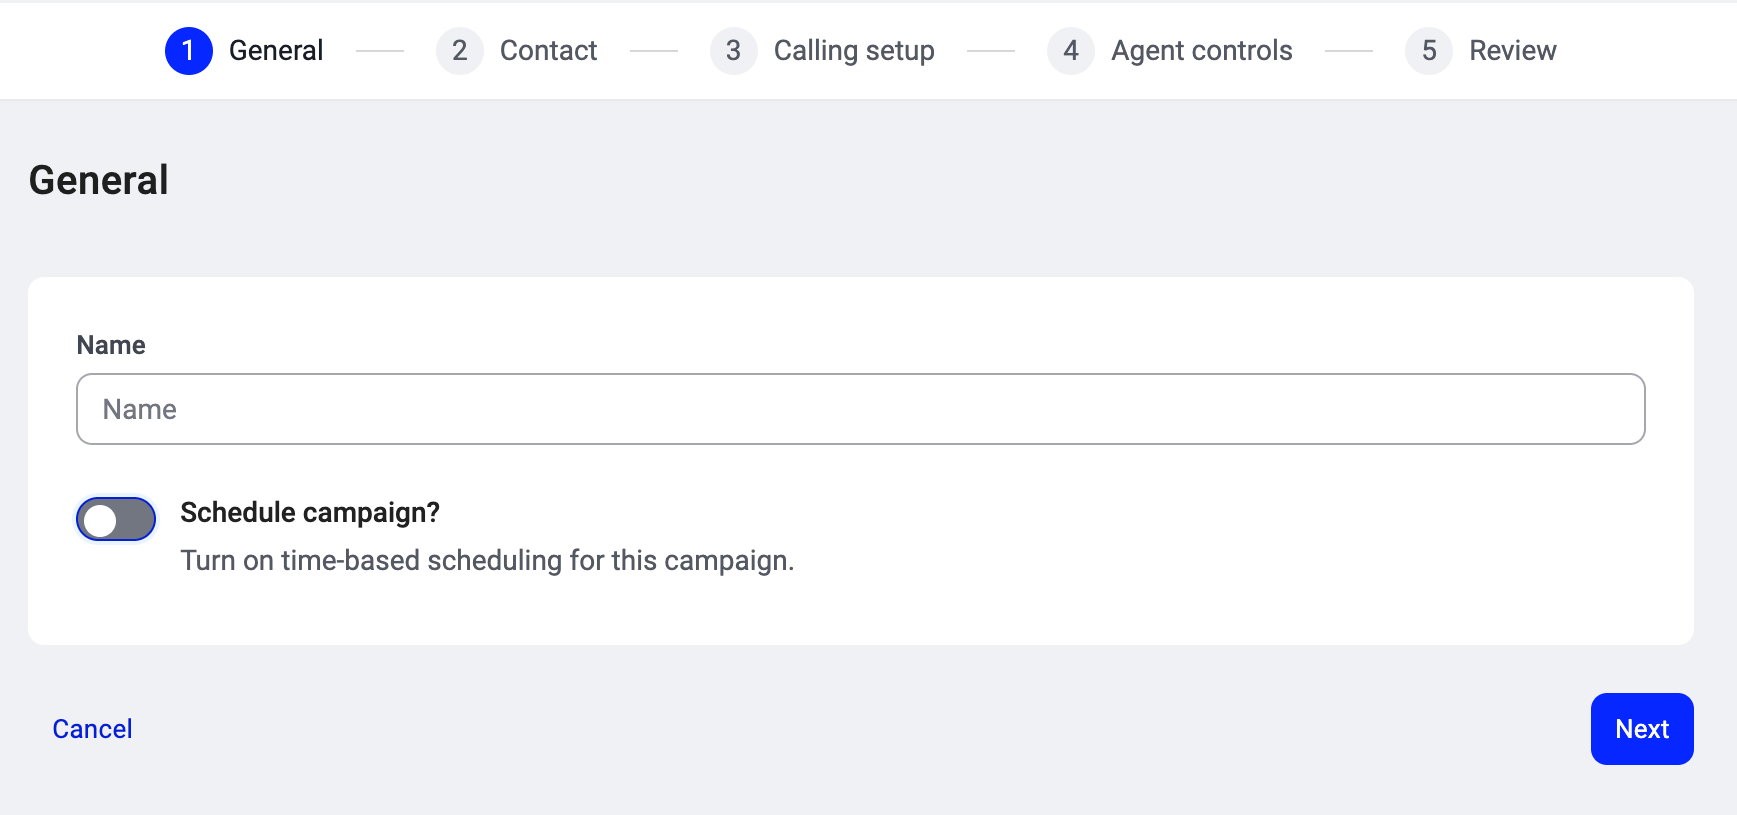
Give your campaign a **name**: something your agents will recognize when they pick it from their list (e.g., "Summer campaign" or "Q3 EMEA re-engagement").
**Schedule campaign?** (toggle). When ON, two fields appear:
* **Date**: the date the campaign should start dialing.
* **Scheduled time**: the time of day dialing begins.
When OFF (the default), the campaign starts as soon as you activate it.
Click **Next** when you're done.
Step 2: Contact
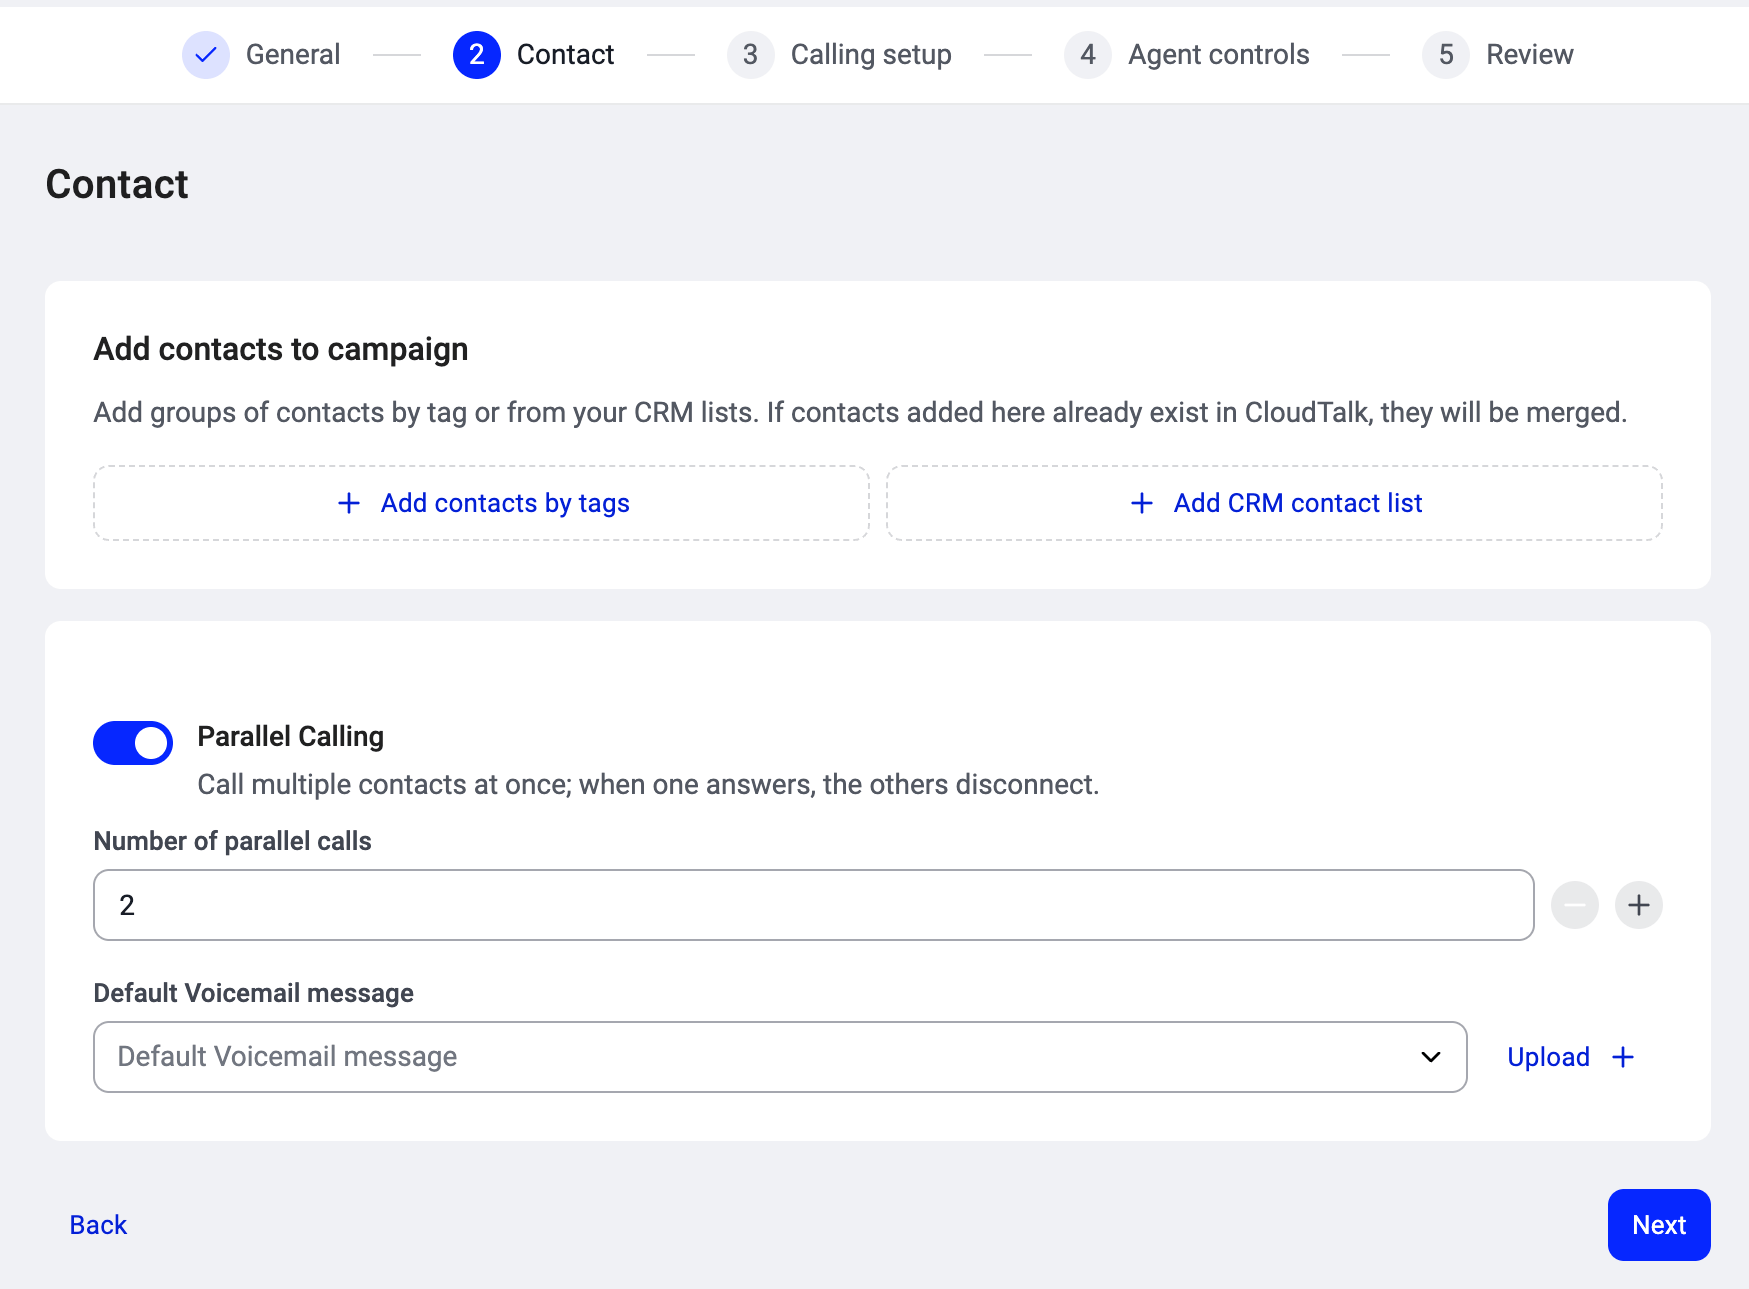
This is where you build your audience. You have two options for adding contacts:
* **Add contacts by tags.** Pick one or more tags from your CloudTalk tag list. Every contact carrying those tags becomes part of the campaign. You can search to find the right tag. This is the most common approach and keeps your audience dynamic: if a contact gains the tag later, they're added automatically.
* **Add CRM contact list.** If you have a connected CRM (HubSpot, Salesforce, Pipedrive, or Zoho), you can select a CRM list directly. The list stays in sync, so contacts added on the CRM side flow into the campaign automatically.
Tags and CRM lists go into one ranked list that you can drag to reorder. The order sets dial priority: contacts from higher-ranked sources are dialed first. See [How contacts are prioritized](/en/articles/17025701-how-contacts-are-prioritized).
If contacts added here already exist in CloudTalk, they are merged, not duplicated.
**Parallel Calling** (toggle). When ON, the dialer calls multiple contacts at the same time. When one answers, the others disconnect automatically. When OFF (the default), the campaign dials one contact at a time (sequential). See [Parallel mode (2+ lines)](/en/articles/17025675-parallel-mode-2-lines). When enabled, two additional fields appear:
* **Number of parallel calls**: how many contacts the dialer rings simultaneously per agent, between 2 and 5. Need more than 5? Up to 10 parallel calls is available on request. Contact your account manager or [Support](https://support.cloudtalk.io/hc/en-us/requests/new?ticket_form_id=26305535257884) to have it enabled.
* **Default Voicemail message**: the voicemail left for contacts who don't answer. Select an existing message from the dropdown or click **Upload +** to add a new one.
⚠️ **Note:** Parallel Calling is a paid add-on and each agent needs a Parallel Calling seat. If you don't see this toggle, your account doesn't have the add-on. See [Plans, add-ons and how to get access](/en/articles/17025709-ai-sales-dialer-plans-add-ons-and-how-to-get-access).
Click **Next** when you're done.
Step 3: Calling setup
This is where you configure how the dialer handles calls for this campaign.
| **Setting** | **What it does** | **Default** |
| - | - | - |
| **Attempts per contact** | How many times the dialer tries to reach each contact before giving up. When set to 2 or more, the *Hours between attempts* field appears. | 1 |
| **Hours between attempts** | How long to wait before retrying a contact. This cooldown applies across all agents on the campaign, not per agent. Only visible when Attempts is 2 or more. | 1 hour |
| **Answer wait time (in seconds)** | How long the dialer lets a call ring before giving up. | 30 seconds |
| **Contact hold time (hours)** | How long a contact stays assigned to a specific agent before being released back to the shared queue. Prevents contacts from being stranded if an agent leaves mid-session. | 24 hours |
| **Automatically dial next contact after a call ends** | When ON, the dialer places the next call automatically after the agent sets a disposition. When OFF, the agent clicks to dial manually. | OFF |
| **Session lock size** | How many contacts a dialing session reserves to one agent at a time, from 1 to 100. Reserved contacts stay with that agent until they're worked or the Contact hold time runs out, so no other agent can call them. Lower it on small campaigns so contacts are shared between agents. Keep it higher on large lists where agents work long runs. See *Choosing a session lock size* below. | 15 |
| **Calls recording** | Record calls on this campaign. | ON |
| **Rotate through a contact's phone numbers** | Dials a contact's numbers in order instead of only the primary number. In parallel mode, numbers are tried one at a time until one is answered or the list runs out, and retries resume from the next untried number. When OFF, the dialer always dials the primary number only. | OFF |
| **Prioritize fresh contacts** | Dial new contacts before retrying earlier no-answers. Favorite and rescheduled contacts keep their priority. When OFF, retries are served before fresh contacts. | OFF |
| **Outbound caller ID** | The number shown to contacts. **Automatic** picks a local number by area code. **Smart Rotation** rotates through your available numbers. Or choose a **specific number** from your list. | Automatic |
**Choosing a session lock size**
Each agent who starts a session gets up to this many contacts reserved for them. Picture a campaign with 20 contacts, three agents, and the default of 15: the first agent reserves 15, the second gets 5, and the third opens the campaign to an empty queue. With the lock size at 5, all three agents have contacts to call.
A simple way to pick a number: take the contacts you usually have ready to dial, divide by the number of agents working the campaign at the same time, and stay at or below that.
**Parallel campaigns need enough contacts to fill every line.** If you set a value lower than your number of parallel calls plus one, the dialer uses that number instead. For example, with 3 parallel calls, the lowest effective lock size is 4.
* **Assign agents directly or select groups.** Select the agents or groups who will work this campaign. Click **+ Add group** to assign an agent group, or **+ Add user** to assign individual agents.
When Parallel Calling is enabled, each agent in the picker shows a **Has seat** or **No seat** badge. Only agents with a seat can be added to the campaign. Agents marked "No seat" cannot be added until your CSM or support team assigns them a Parallel Calling seat. See [Parallel Calling seats](/en/articles/17025691-parallel-calling-seats) for details.
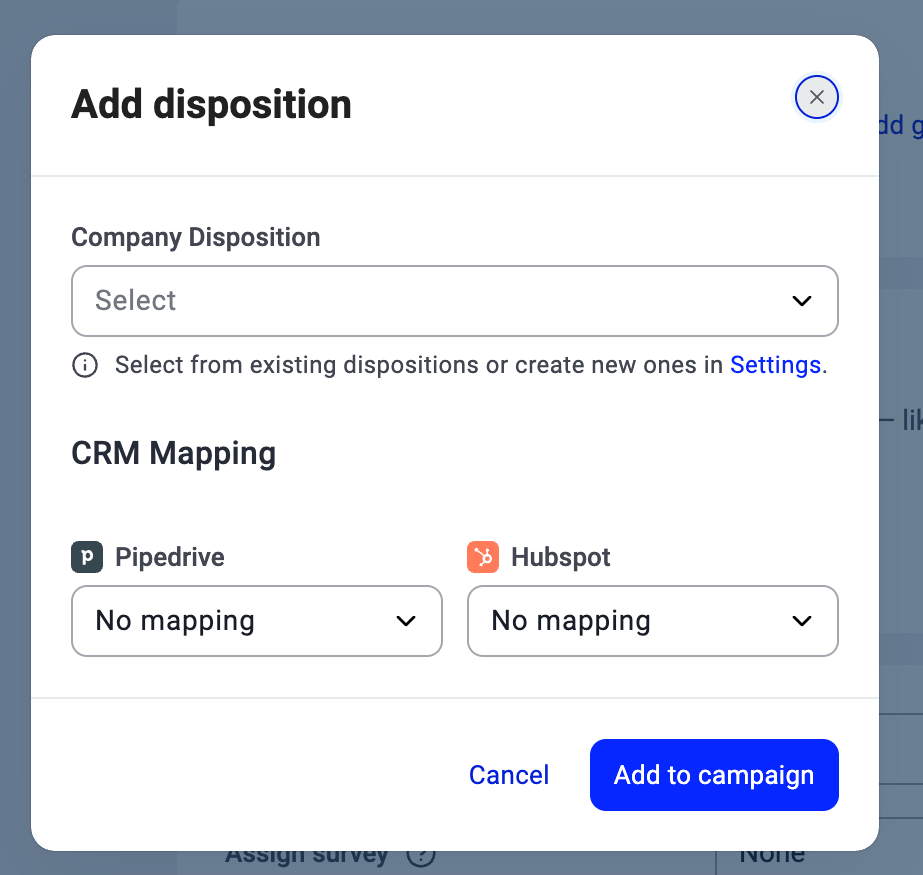
 * **Add dispositions.** When creating a campaign, all your company's dispositions are added automatically. Remove any you don't want agents to see by clicking the **X** on the chip. To re-add one later (or when editing an existing campaign), click **Add**, choose it from the **Company Disposition** dropdown, optionally set a **CRM Mapping** (Pipedrive, HubSpot) so the outcome syncs to your CRM, and click **Add to campaign**. See [Dispositions and outcomes](/en/articles/17025689-dispositions-and-outcomes).
 * **Assign call script.** Attach a script agents see on-screen during calls.
- **Assign survey.** Attach a survey agents complete during or after the call.
* **Assign call script.** Attach a script agents see on-screen during calls.
- **Assign survey.** Attach a survey agents complete during or after the call.
 Click **Next** when you're done.
Step 4: Agent controls
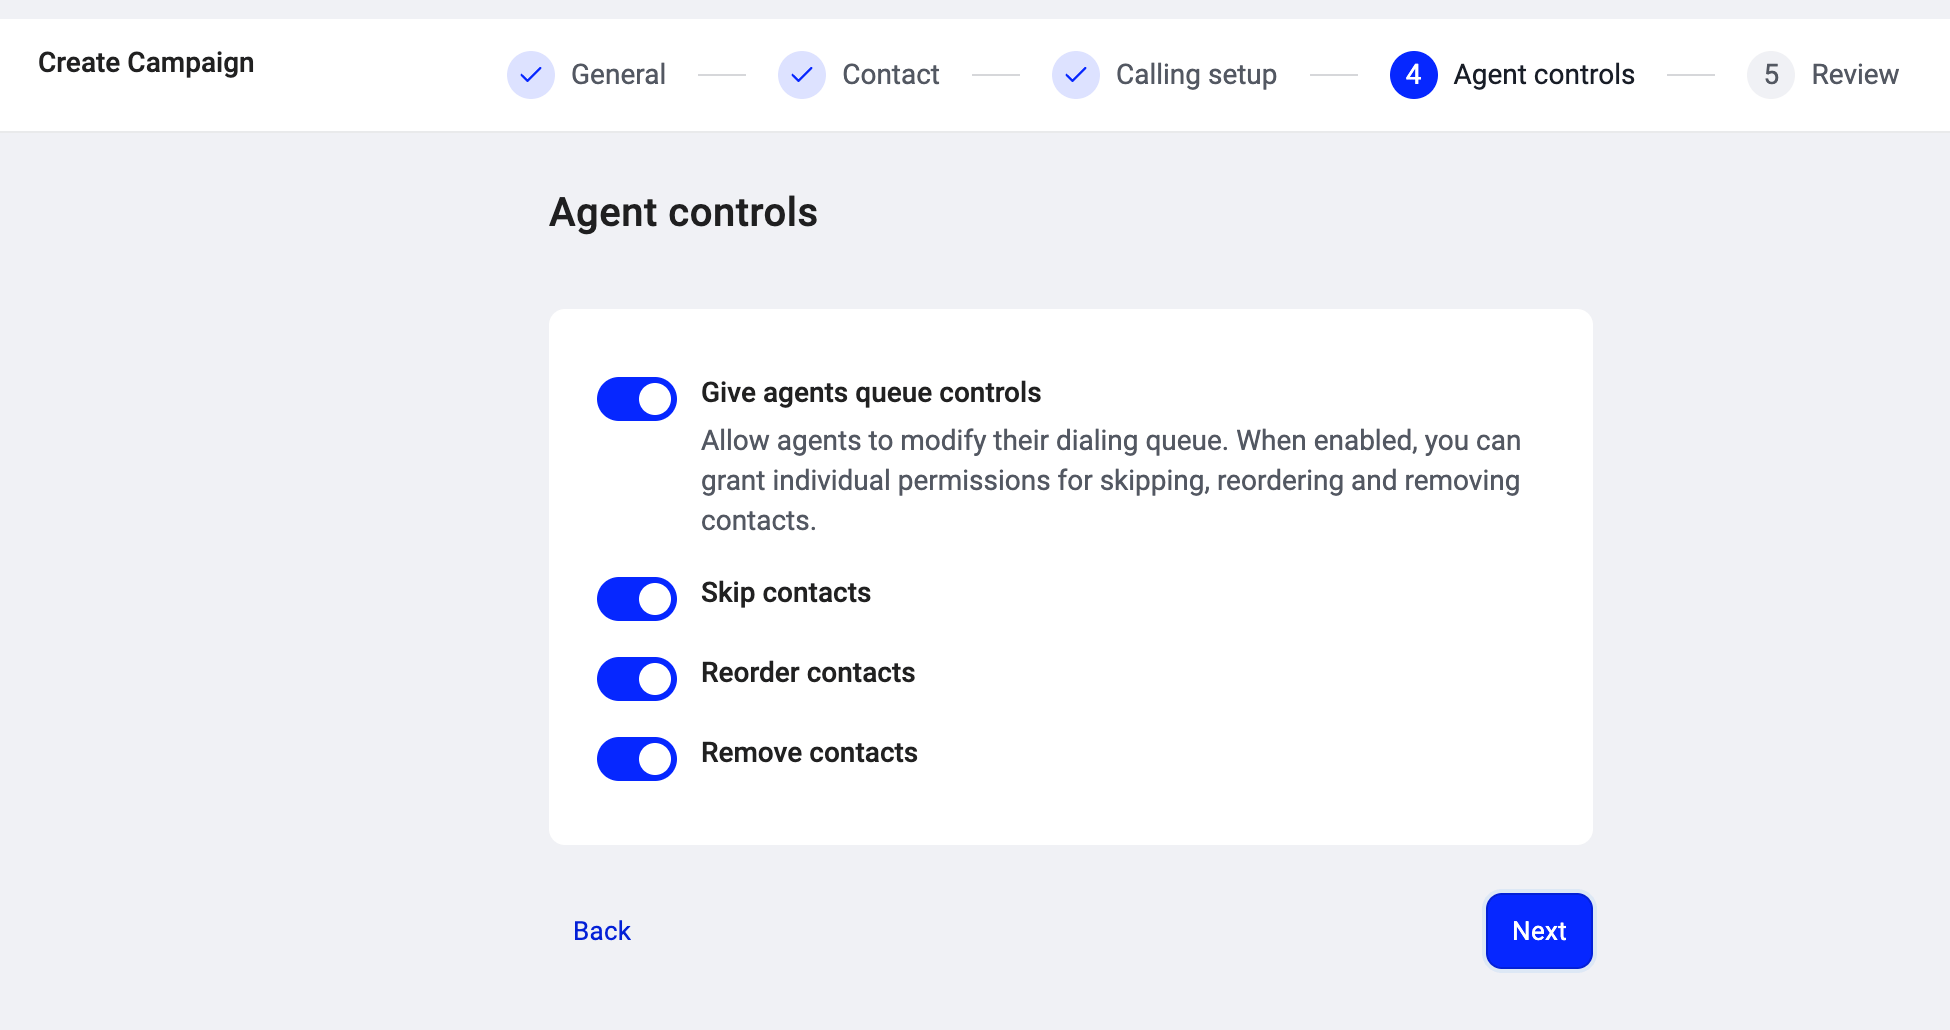
Decide whether agents can modify their dialing queue.
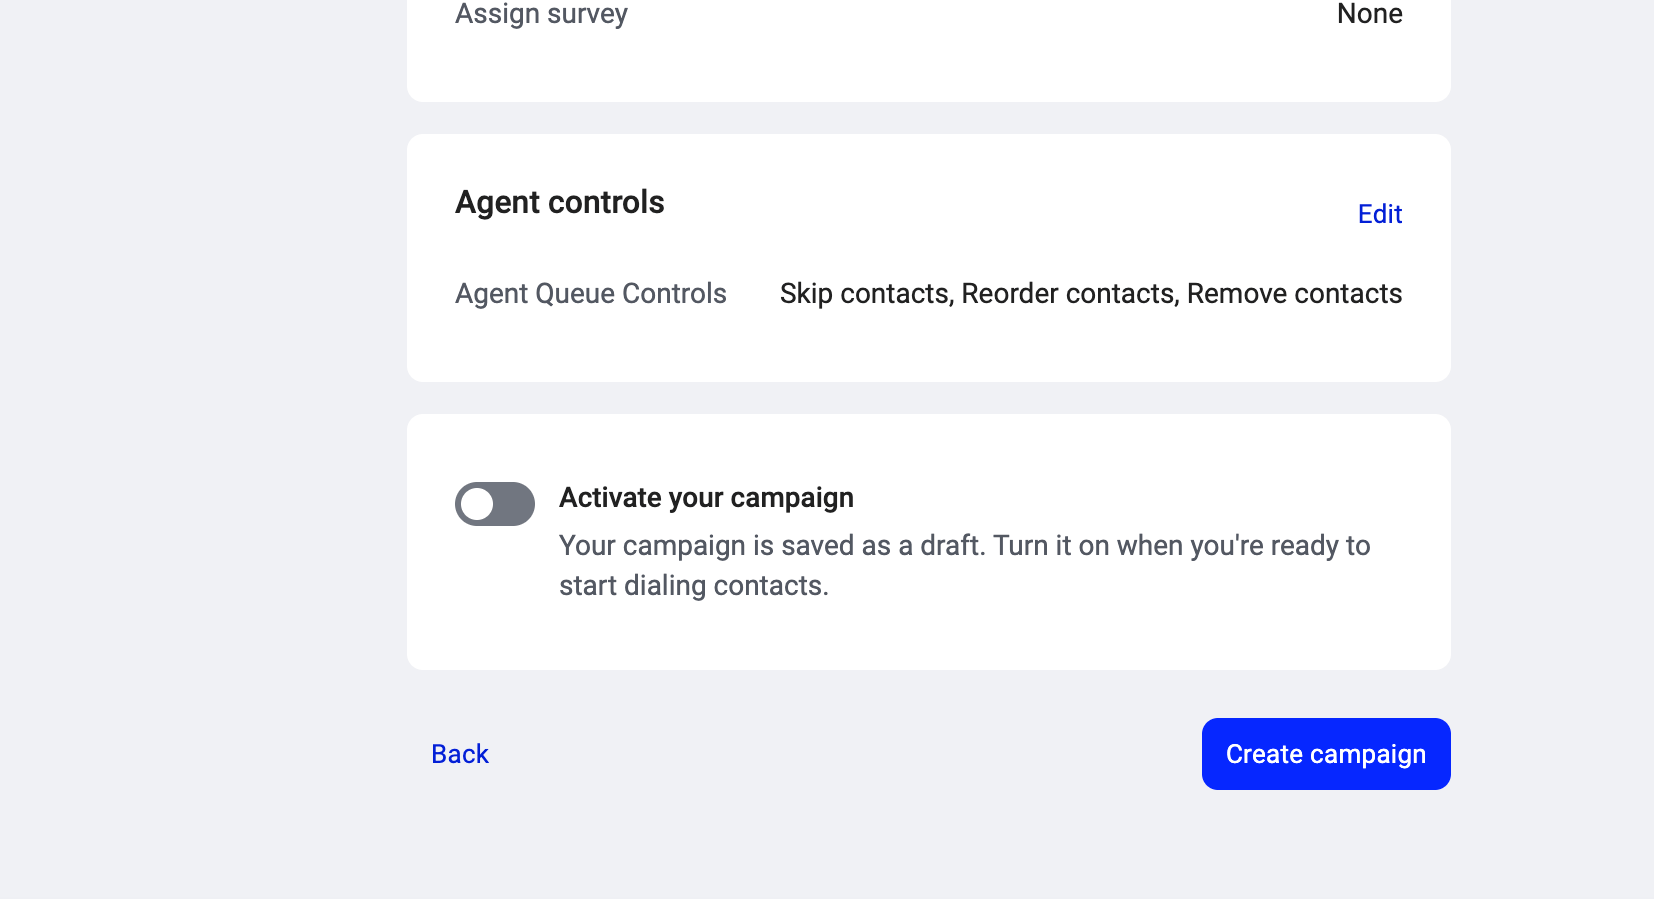
* **Give agents queue controls** (toggle). When OFF, agents work the queue in the order the dialer serves it, with no ability to change it. When ON, three sub-permissions appear:
- **Skip contacts**: agents can skip a contact and move to the next. The skipped contact returns to the queue for later.
- **Reorder contacts**: agents can drag contacts to change the order in their personal queue.
- **Remove contacts**: agents can permanently remove a contact from the campaign queue.
All three are ON by default when the master toggle is enabled.
Click **Next**.
Step 5: Review
Review your settings across all four sections. Each section has an **Edit** link that takes you back to that step if anything needs changing.
At the bottom you'll see **Activate your campaign** (toggle). Your campaign is saved as a draft (Inactive) by default. Turn this ON when you're ready to start dialing contacts. You can also activate it later from the campaign list.
⚠️ You can't activate a campaign until it has at least one contact source, at least one assigned agent or group, and at least one disposition. If any of these is missing, activation is blocked and you're sent back to the step that needs fixing.
Click **Create campaign** to finish.
Campaign states
| State | What it means |
| - | - |
| **Inactive** | Saved as a draft or paused by an admin. Not dialing. You can activate it any time. |
| **Active** | Live. Agents can start sessions and dial. |
| **Archived** | Set aside for review and reporting. Not dialing, but its history is kept. |
Editing a campaign
You can edit any setting on an existing campaign by opening it and clicking **Edit** on the relevant section. Changes apply to future calls. Contacts already dispositioned keep their existing outcomes; new rules (like updated retry settings) apply only going forward.
***
*Need help or have a question?* Just reach out through our [Support portal](https://support.cloudtalk.io/hc/en-us/requests/new?ticket_form_id=26305535257884) — we’re here for you.
## Related topics
- [Setting up Campaigns (Legacy Dialer)](/en/articles/8428838-setting-up-campaigns-legacy-dialer.md)
- [Sequential mode (1 line)](/en/articles/17025671-sequential-mode-1-line.md)
- [Parallel mode (2+ lines)](/en/articles/17025675-parallel-mode-2-lines.md)
This documentation is built and hosted on [Mintlify](https://mintlify.com), a developer documentation platform.